How to… take good shots without a Big Girls Camera (Guest Post)
 Hello! On this glorious Friday, I bring you anoher lovely Guest Poster – Spud from Spudballoo. Spud has wowed us all with her fabulous photography on her blog Chez Spud– if you haven’t seen it yet, you must take a peak. As many of us communicate and market ourselves through the internet, it is important that we have the best possible photos to go with it, one glance and people will decide whether or not they want to read on. So ahem, after your “one glance”, I do hope you will read on… and pick up some fabulous no nonsense tips of how to take great shots without investing in a big expensive camera! Over to Spud!
UPDATE: If you like this post… here is How to Take Great Shots Part 2!
Greetings! Tis Spud of Chez Spud – the home of Spudballoo – taking the controls at RedTedArt for a few quick hints & tips to improve your photography without shelling out for a DSLR (aka: a Big Girl’s Camera). Confession: I’m not a professional photographer and thus am not, to be honest, enormously well qualified to be handing out advice!
I took up photography 2 years ago and, in that time, I’ve learnt a lesson or five (mostly through trial and error and a few tears) and I’m happy to share a few thoughts on what I’ve picked up along the way. I started out with a beaten up old Sony P&S (point & shoot) before a ruinously expensive kit addiction started…first of all lenses…then a new camera body…I sold a few organs and bought a few more lenses. My name is Spud and I’m a kitaholic ; send help!
As much as I am wedded to my Nikon, I absolutely LOVE shooting with my iPhone and run a series called ‘What I saw on my bike today’ on my blog, featuring shots taken with my phone. It’s nice to have a fancy camera but photography is all about the end result – the image – and not the piece of kit you took it with. Not having a DSLR is not a barrier to taking well composed, well exposed and eye catching photos! Some of my favourite shots were snapped with my either my P&S or my iPhone:
Enough rambling, on with the hints & tips. I’ve tackled the ‘biggies’ by category, starting with ‘the rule’ followed by ‘what that really means’ for us mortals:
Lighting
First rule: consider the ambient lighting when taking a shot and manipulate what’s available to your best advantage.
What that really means: don’t take photos outside in bright sunshine (bleaches the colour out of everything and makes people screw up their eyes, and casts deep and unflattering shadows).
I could lecture you about the attractions of the “Golden Hour” but I’m assuming you’re a normal person with a busy a life, and that you snap photos when you have a minute rather than galloping around the countryside waiting for, dramatic pause, “the light”. In short, the best time for outside photos is early to mid morning and a few hours before sunset. The light is kinder. If you must take snaps in brilliant sunshine, move your subject in to the shade.
If you’re inside, try to use the available light in the room without using artificial light. If you must, use lamps. Overhead lights generally produce unflattering light. Avoid using flash if you can, as it creates very harsh light and does away with shadows altogether making your subject seem very ‘flat’. Like this:
With and without flash:
Yuck.
Let’s talk about lighting for ‘products’ ie stuff that doesn’t move, perhaps your latest crafty masterpiece. If you’re shooting inside, set it up your ‘shoot’ near a window with your subject lit from the side. Take a moment and look at how the light is casting a shadow. Ideally you’ll want the shadow cast BEHIND your subject, which is much less distracting to the viewer. So move the subject, or yourself, around until the shadow doesn’t trouble you. After a bit of practice you’ll find your favourite place for set up shots like these. Mine is in the main bedroom of our house, where the light is plentiful and lasts late in to the afternoon. Bit of a chore carrying the stuff up there, but then we must suffer for art must we not?
If the light is very bright coming through the window either move further away, or diffuse the light with net curtains if you have them. Tracing paper stuck at the window also works well. Try not to have bright light straight on to a subject as it can cause ‘uneven’ exposure (ie. some bits of your photo will be bleached out).
Lighting is, I think, the most difficult part of photography. For shooting at home, I think it’s worth spending some time finding where your ‘well lit’ spots are and watching how the light changes through the day.
Composition
First rule: fill the frame.
What that really means: make the subject of your shot fill the whole picture. Sometimes it helps to have a little ‘context’ but generally a photo is much more appealing when the viewer knows what they are supposed to be looking at and aren’t distracted by random passers by, the ironing pile, a shoe etc etc. If I could give you one tip that will immediately improve your photography it would be this: get close to your subject. Get in really, really close. Closer…yup, that’s about it. Filling the frame by getting in close immediately gives your shots impact.
Mostly you’ll want to position your subject in the middle of the frame. Watch for chopped off bits such as heads/limbs etc and take a second to see what else has drifted in to shot which isn’t helping you. Remember: YOU can move to recompose your shot or YOU can get your subject to move! I think many of us forget that we can move around to get a good shot. And you don’t always have to be standing up. You could squat down, or even lie down. Or stand on a chair. Or move in, or move back etc etc. Quick tip: try not to shoot ‘down’ on things, especially children or flowers. With children, get down to their level to get a much more flattering shot. Same with flowers. Bit tough on the knees I will admit….
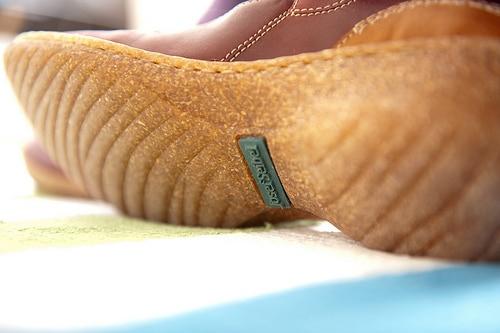
For a totally different perspective, put your camera on the floor and shoot…try it, it’s fun!
I’m going to cover ‘product’ shot set up in more detail in my next post but, for now, let me say that it really pays dividends to think about backgrounds. You want to show off what you’ve done, so its background needs to enhance it rather than drown it. Forget about that perfect, clean white background you see in catalogues…that’s all down to seemless backgrounds, professional lighting rigs, lightboxes, Photoshop and all that jazz. That’s too complicated for what we’re trying to do here, although a lightly coloured background is always flattering. It lets your subject stand out and, of course, acts as a light reflector.
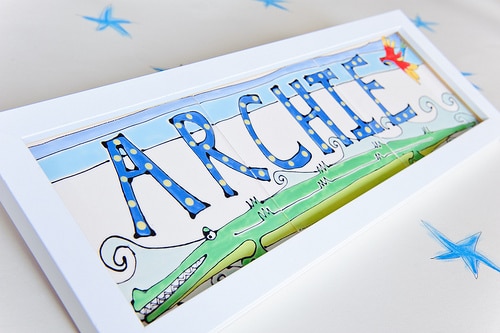
Simple coloured backgrounds can also work well. This was taken with an A4 piece of card as a backdrop.
And this was taken on my boys’ playtable.
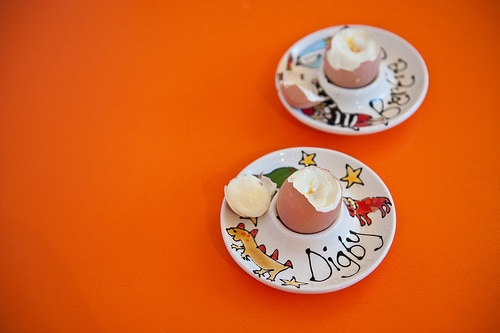
White is nice, but colour is cool too.
Focus
First rule: if it’s not in focus, it can never be a good shot.
In plain speak: you can break ALL the other ‘rules’ but you can’t get away with a blurry, out of focus shot! If your shots are routinely out of focus it will be because (a) you are shooting in low light conditions and the camera can’t cope with it (thus you need to increase the amount of available light) and/or (b) you are wobbling when you push the shutter. Or you are making the camera wobble. Or both.
Assuming you’ve sorted the lighting issue let’s talk about keeping nice and steady. I wrote a huge, long blog post about this issue so if you’re fascinated by the subject nip over to my blog for the long version. The short version is this: YOU need to keep steady and you need to keep your CAMERA steady. Keep your arms tucked in to your sides. Stand with your legs slightly apart, and stand tall and square. If you can, lean on something or someone to get support. Or crouch down, or squat or kneel. Rest the camera on something if you can, or use a tripod if you’re really fancy. Anything you can do to keep yourself and the camera still while you take a shot will make an enormous difference to the quality of your photos, just by virtue of them being in focus!
Read your camera’s manual. It’s boring, I know. But if you only read one thing, read about its autofocus feature. Most cameras require you to push the shutter down half way to allow the camera to auto focus. Then it will show you, often with a dot, whether it has focussed on the subject. Don’t push the shutter all the way down until the camera has focused. It’s as simple as that! If you take it before, you’ll get a blurred shot. Fact.
I hope you’ve enjoyed this whistlestop tour through the basics of taking good shots without a fancy camera. I’ll be back with Part 2 soon (Case studies of ‘real shoots’, how to set up ‘product shots’ and some simple editing tips using free software to really make your shots zing).
Love from Spud x
—————-
Hope you found this as helpful as me! It has definitely given me some ideas for how to take better photographs (including setting up a small space in our bedroom, where the light is great..).
Here is the follow up to this post with some handy tips on craft or product shots!:
Enjoy!


