
How to… make Organza flowers

 Welcome back to the How To section. Today we are looking at how to make Organza Flowers… As you know I often have Guest Posters share their wonderful creative and crafty ideas. This is a fabulous way to keep me on my toes and help bring new and varied crafts. I have often learnt a thing or two myself! Liz from Me and My Shadow is guest posting for us. I “met” Liz on Twitter (@missielizzieb ) she is kind, funny and above all crafty! Like me, she has a toddler that she regularly crafts with, and like me, she also loves adult craft ideas. She also has a weekly “Magpie Monday” Link up party – which a great inspiration for trawling car boot sales, charity shops or bargain basement departments. Go visit and have a good look around!
In the meantime, I want to thank Liz for all her support and loveliness over the last few month, it is fabulous to have you as a real buddy! Hooray for the internet!
So.. to her “How to make Organza Flowers”:
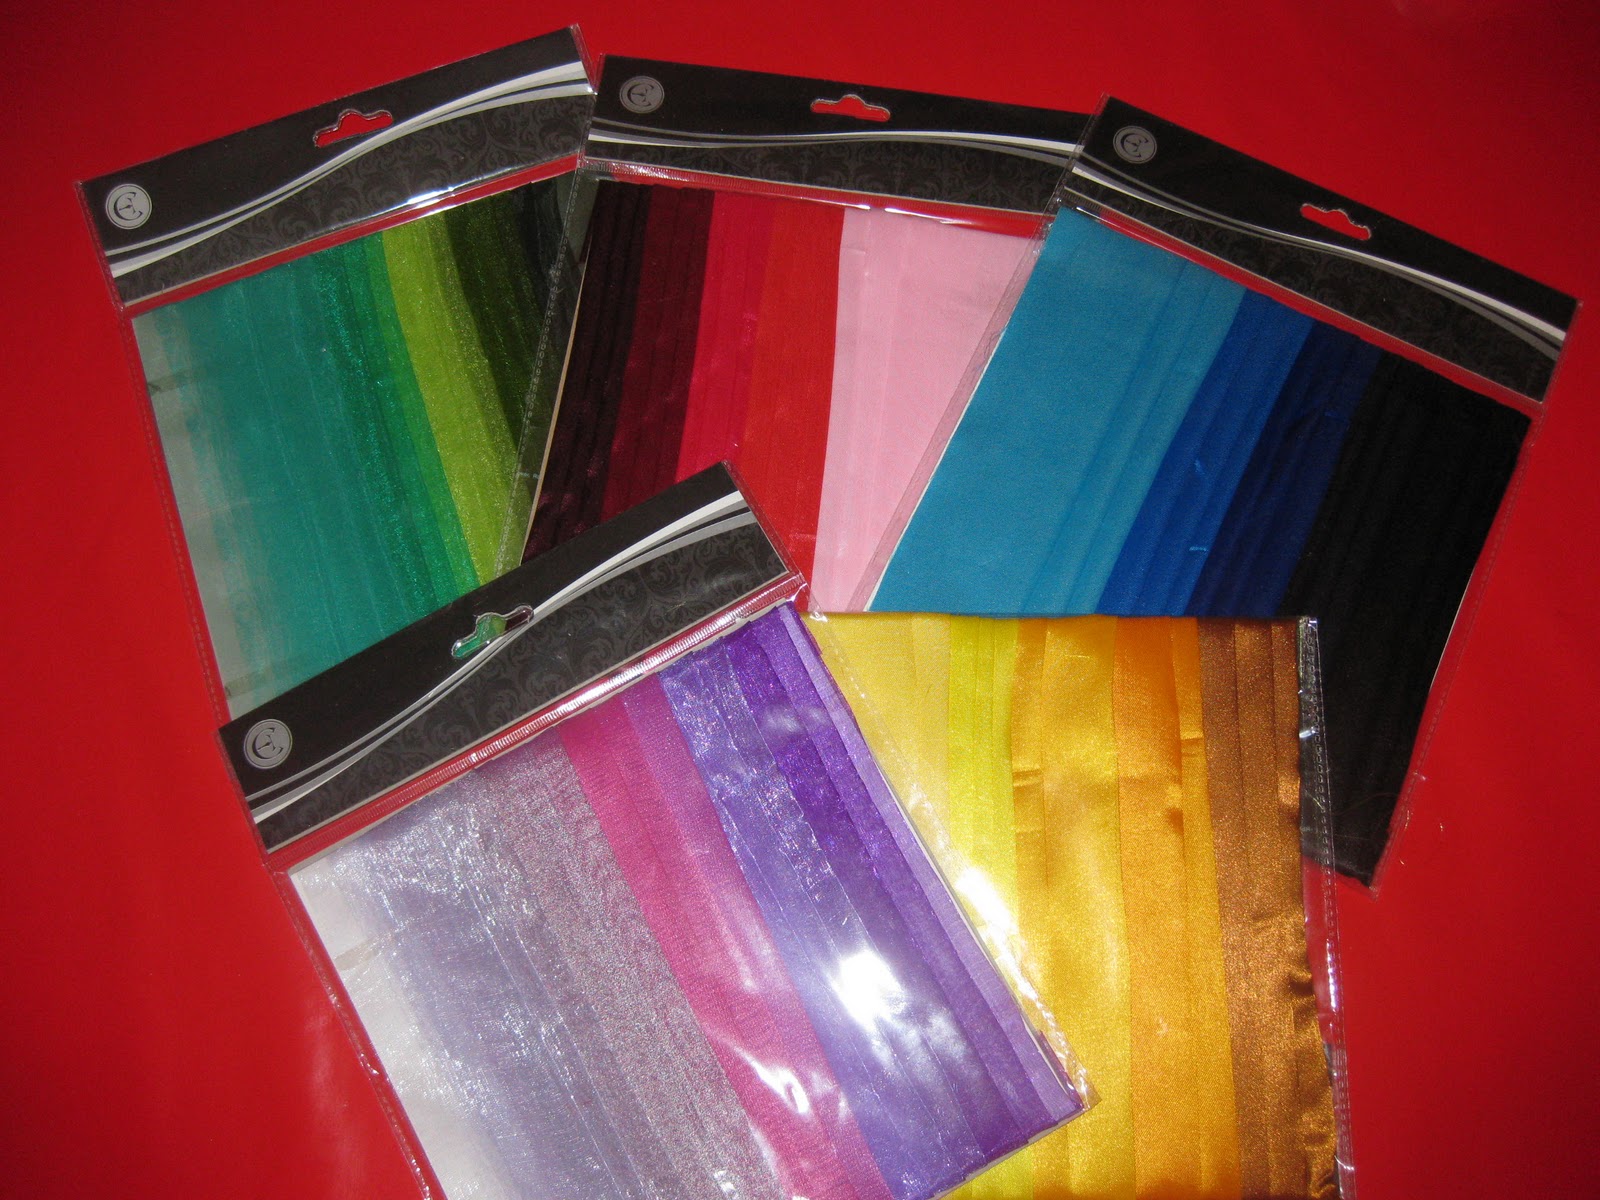
On one of my recent forays in our local Poundland shop, I spotted packs of beautiful coloured organza strips. I loaded up my basket with packs of purples, blues, yellows, greens and reds.
They have now been sitting in the craft cupboard for a few weeks while I pondered what to do with them. After a trawl through google, I stumbled across a lovely blog tutorial showing how to make fabric flowers.
Simply Vintage Girl gives a very professional tutorial which is easy to follow, however, one of the links made my computer go a bit loopy with virus alerts. Readers of my blog are not used to such professional ‘how-to’s’, so in my own inimitably, wobbly style, I shall take you through the steps here, and give you some tips I have picked up already in my very early career of fabric flower production.
I do love this craft already. It is so simple, requires no real precision, artistic skill, appeals to my pyromaniac tendencies, is wonderfully relaxing, gives very pleasing results and is highly addictive! Perfect.
Here’s what you’ll need:
- Synthetic silky fabric
- Card for template making
- Needle and thread
- Buttons or beads
- A candle or tea light
- Scissors

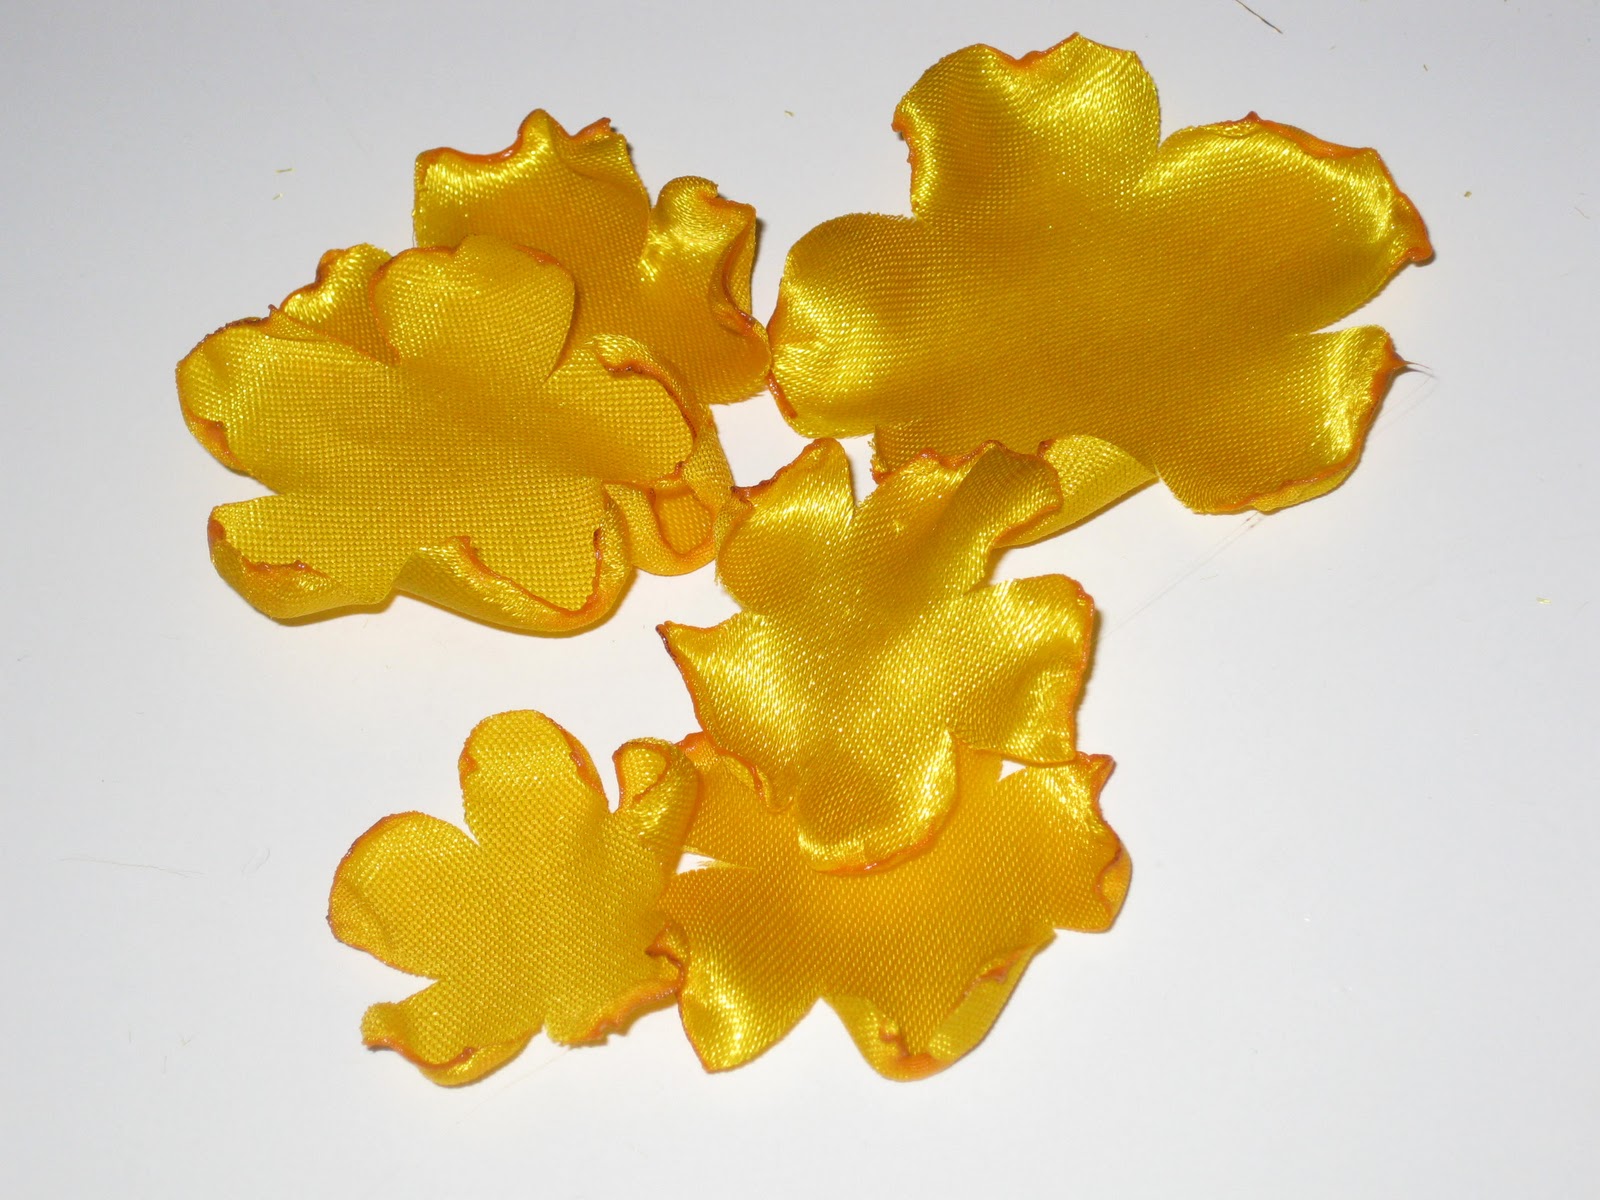
To begin you’ll need to make your circle templates. For possibly the first time ever since leaving school, I have found a use for my compass – my old maths teacher would be so proud! If you are using the fabric strips from Poundland, I’ve found you can get 6 circles of decreasing diameter, with the largest being approx 6.5cm and the smallest 4cm. I wouldn’t recommend going much smaller than this, as it makes the later stages quite difficult (and dangerous!). Experiment with different sizes and amounts of circles – the more circles you use, the ‘fuller’ the flower. As a guide, this finished flower will be about 1cm smaller than your largest disc.
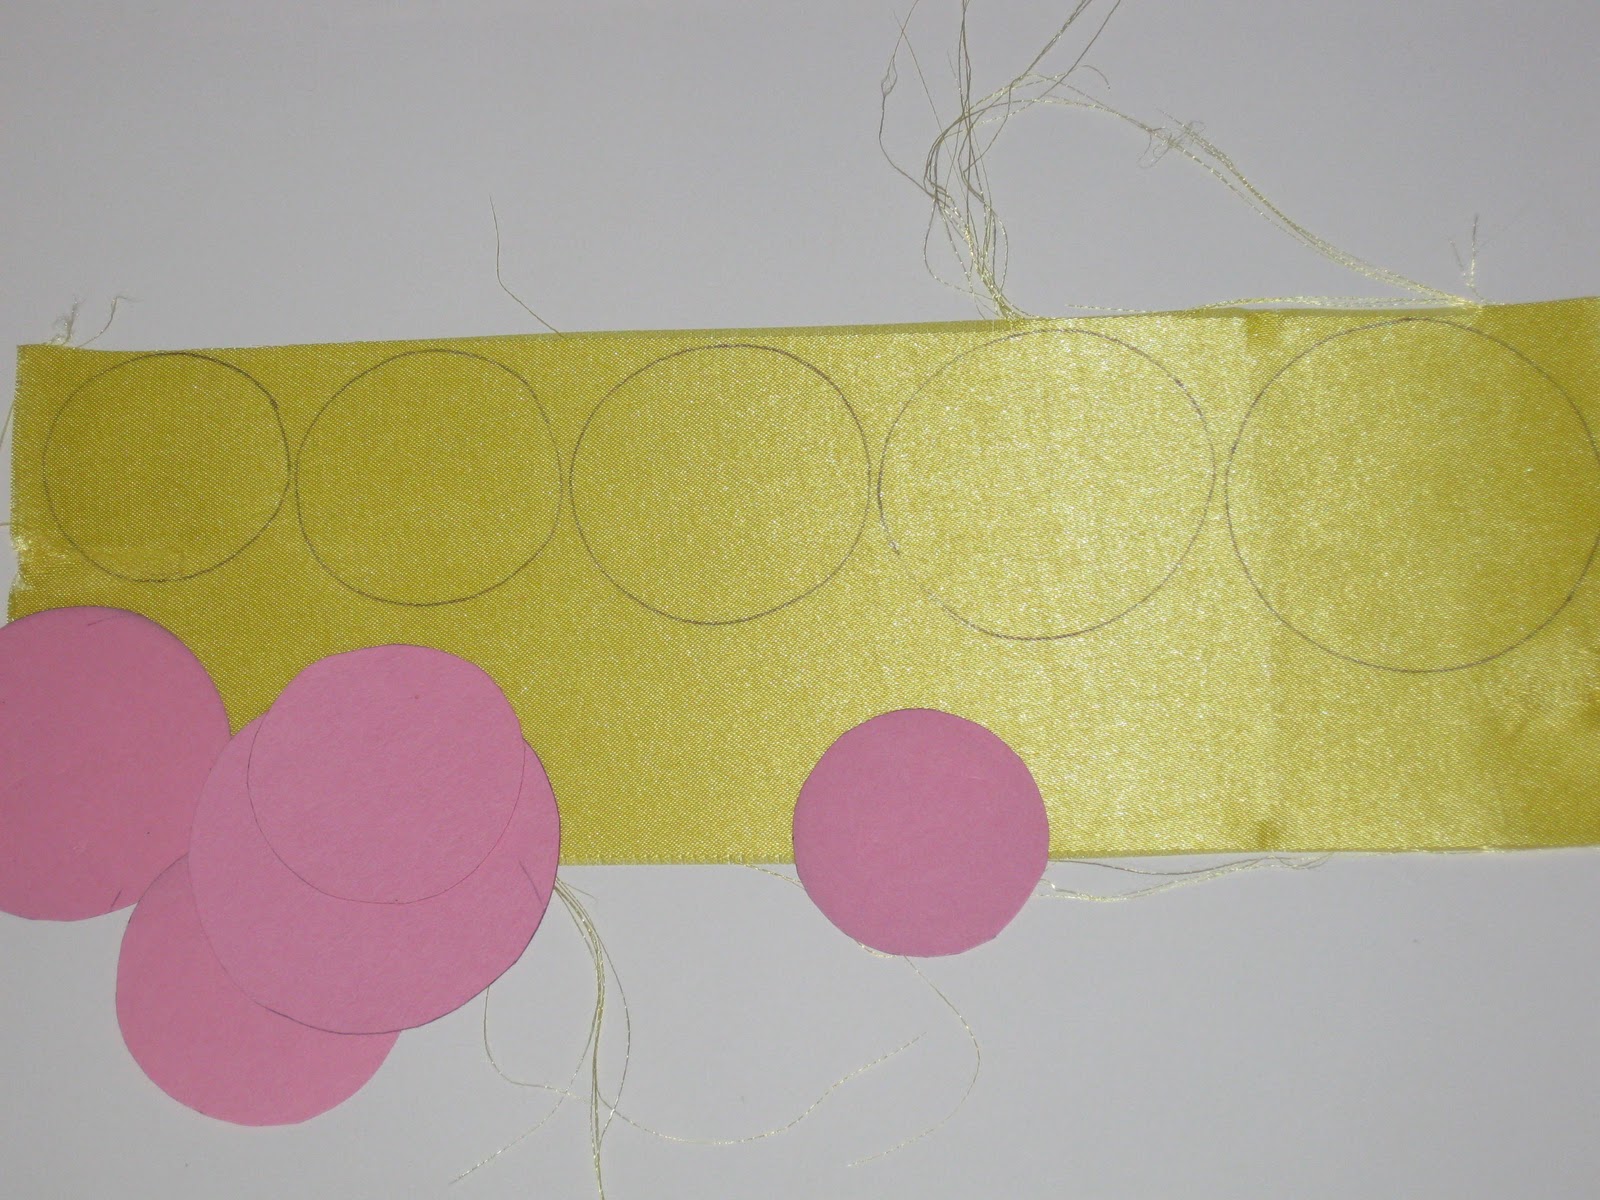
Draw around your templates directly onto the fabric and cut out. You don’t need to worry too much about pen lines (biro pen works well) as these shouldn’t show. Also, precise cutting is not too important as you are not creating perfectly uniform petals.

Once you have all your discs cut, snip your ‘petals’ by cutting into the circle to about halfway. It’s up to you how many snips you make, but try to space them evenly around the circle – 5 or 6 works well.

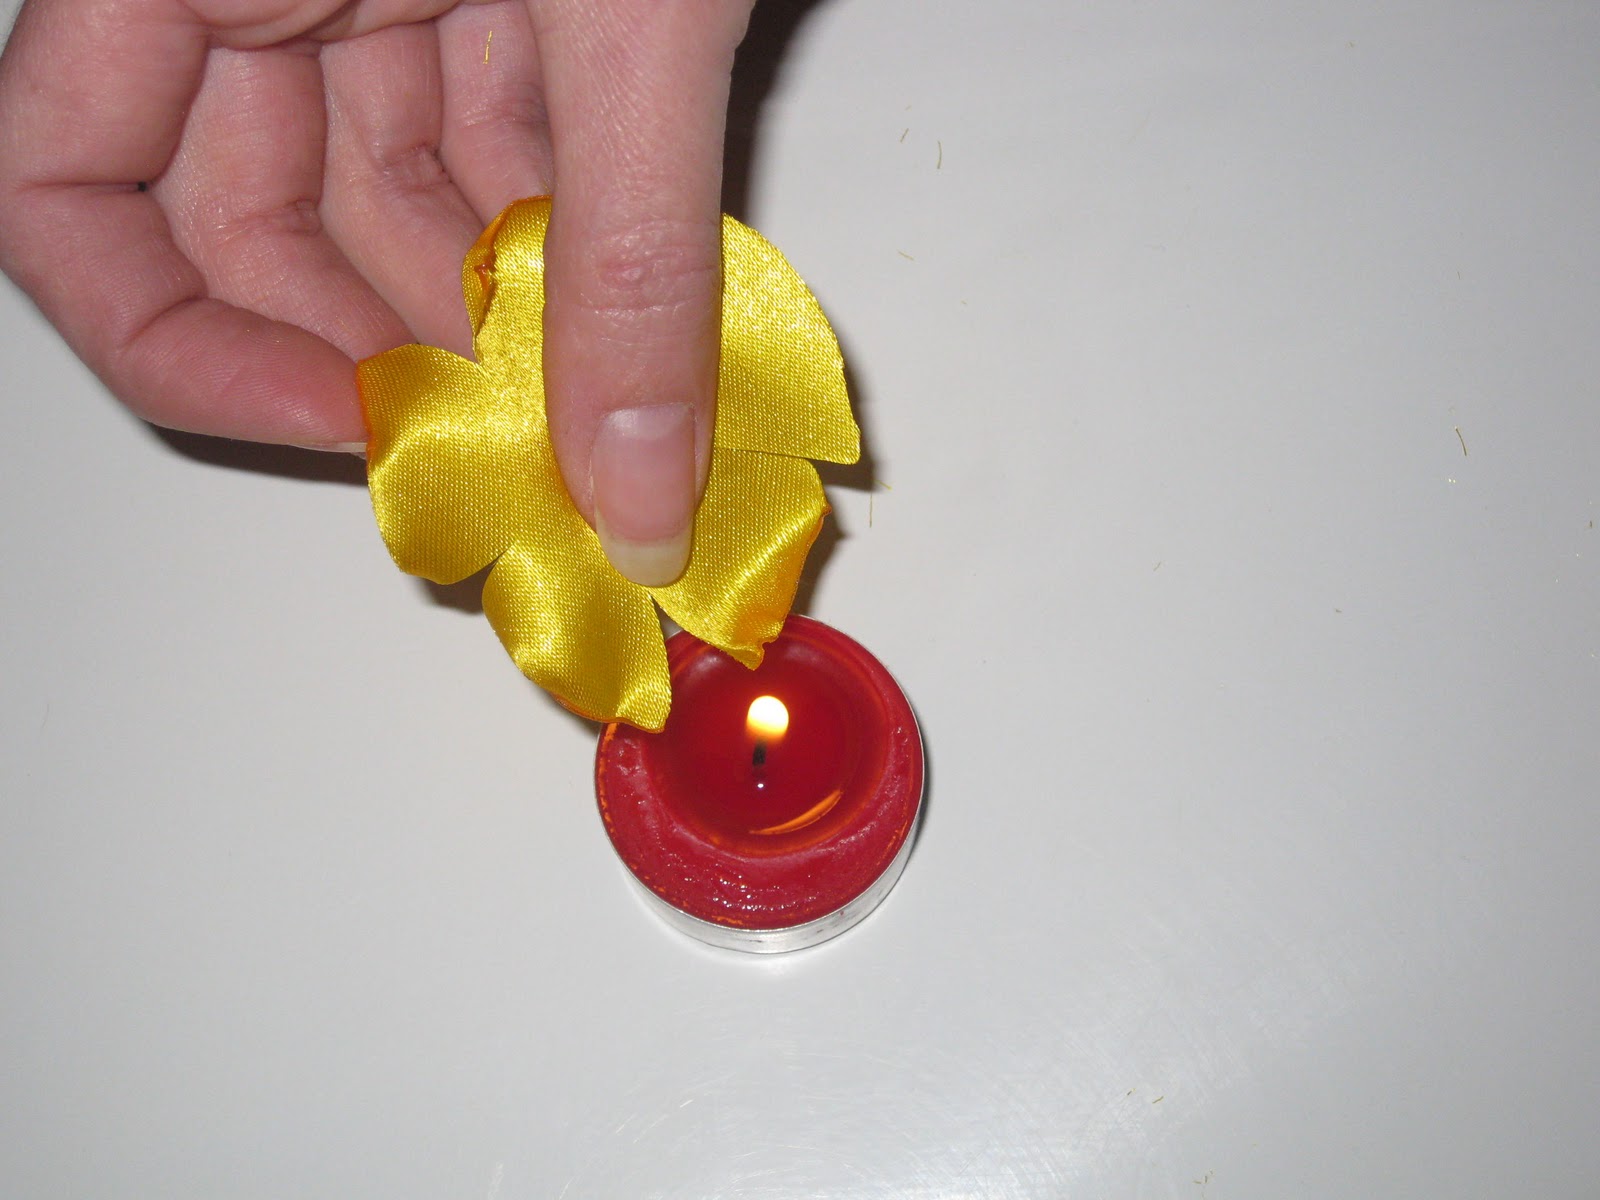
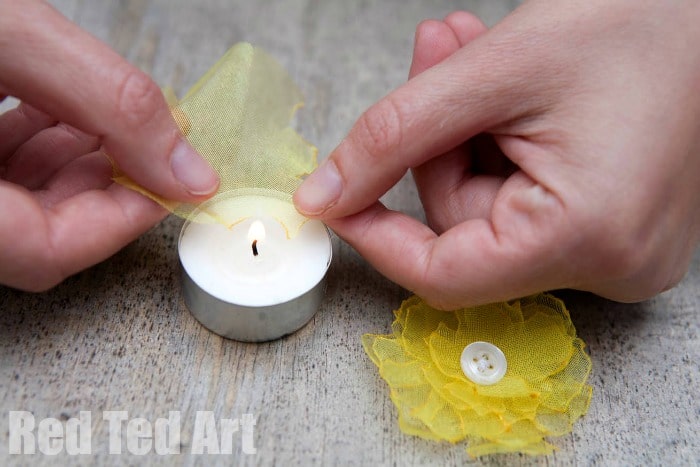
Next comes the fun part!! Hold your fabric between thumb and forefinger about 3 or 4 inches above a candle flame. Rotate the circle around, and you’ll see the petals start to curl up under the heat. BE VERY CAREFUL!! Clearly, this is not a craft for kids! It is very easy to catch the fabric alight, so make sure you keep turning. If you do catch alight – blow it out! I can assure you trying to put it out with your fingers is not a good idea as you’ll end up with molten fabric stuck to you (doh!). Don’t worry if some curl inwards and some outwards, as you can turn them back after it’s cooled. If a petal does accidentally catch light, it is usually salvageable by snipping the burnt edge off with scissors!
Continue until you have curled the edges of all your discs.
Then assemble your flower in your hand, starting with the largest and layering.
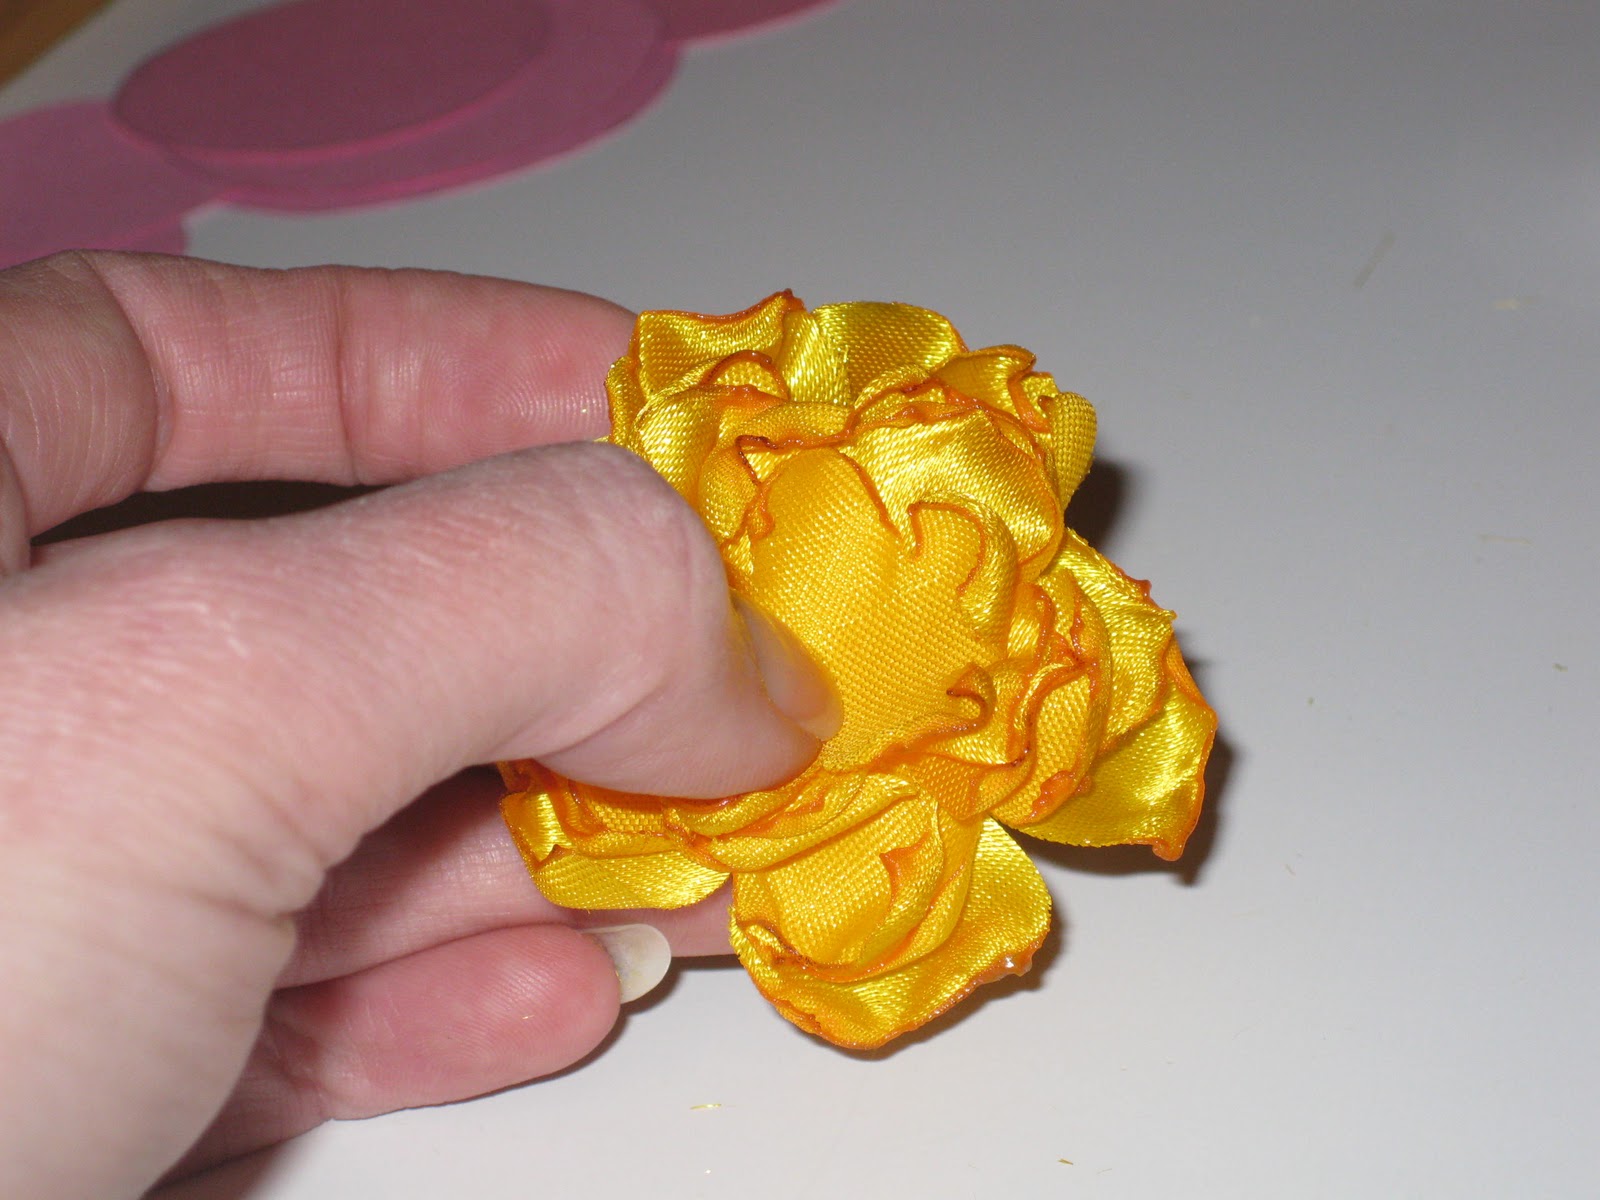
When you’re happy with the arrangement, take a needle and thread and put a couple of stitches in the centre to secure. Again, this doesn’t have to be too neat as you’ll cover it with a button.

Finally, stitch on a button or bead to make the centre. This is a great way for me to use some of my vintage buttons, and I’m going to have a lovely time matching buttons to fabric!
Et voila!
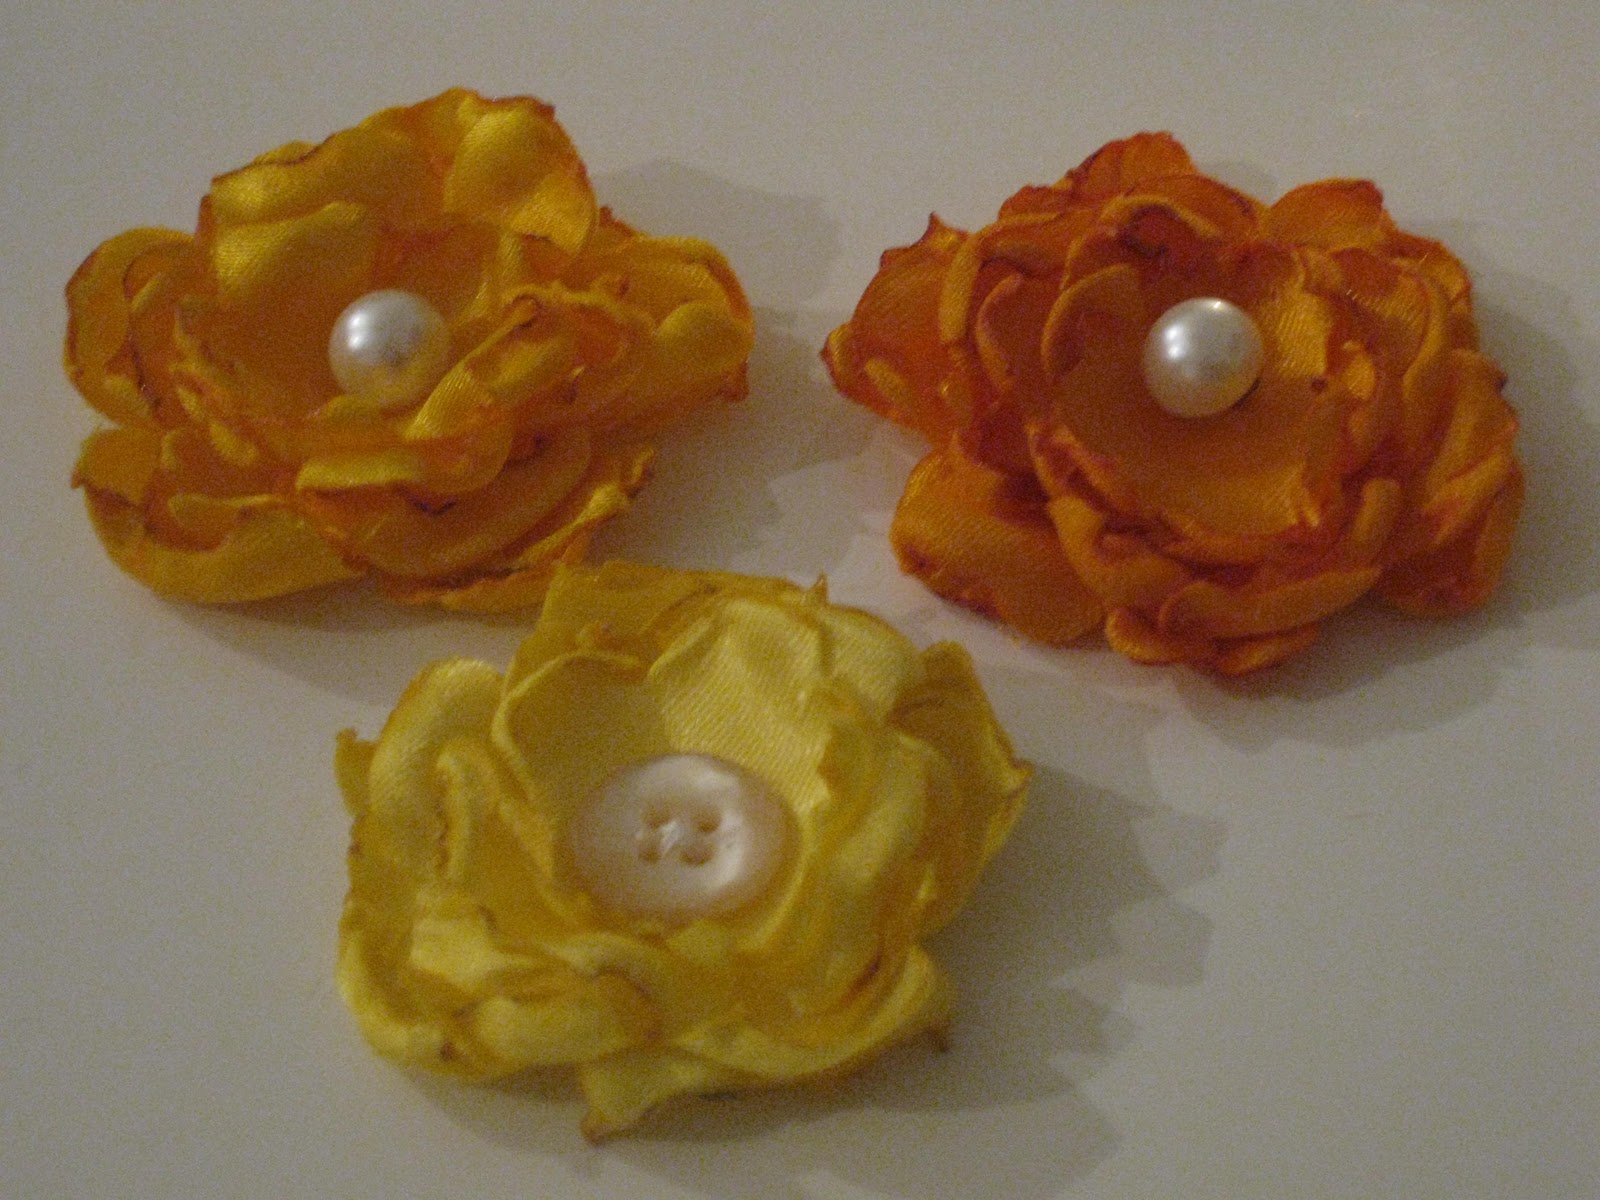
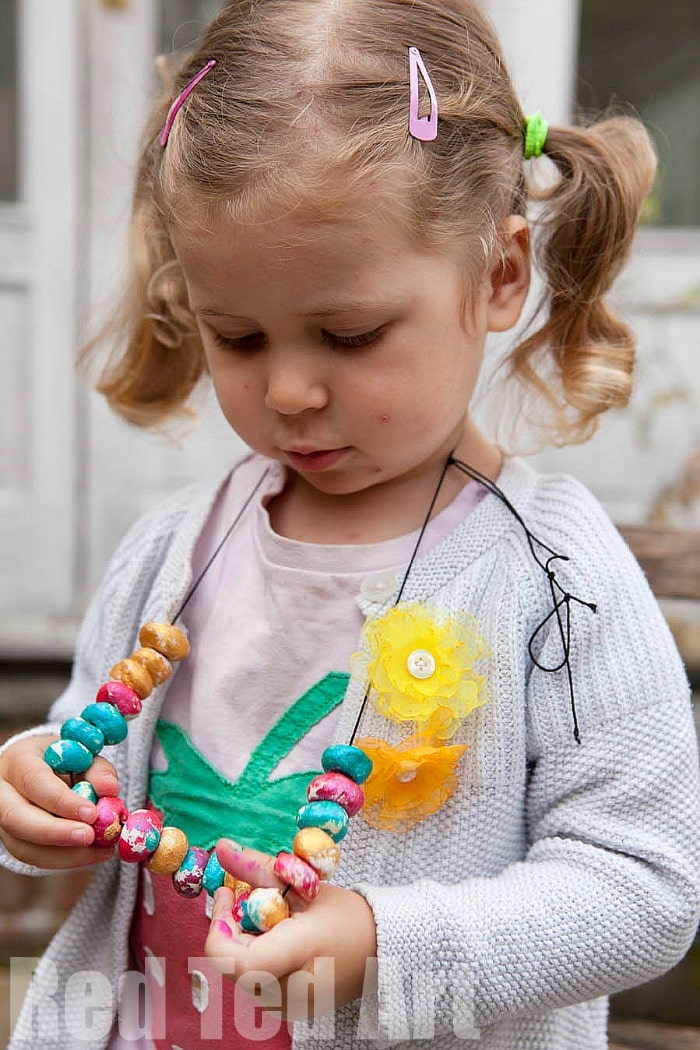
I’m totally hooked on these now. But that’s fine as I have thought of a million and one ways to use them. You can stitch them to hair slides and bobbles, sew onto bags, make brooches, stick to magnets and pegs for noticeboards….
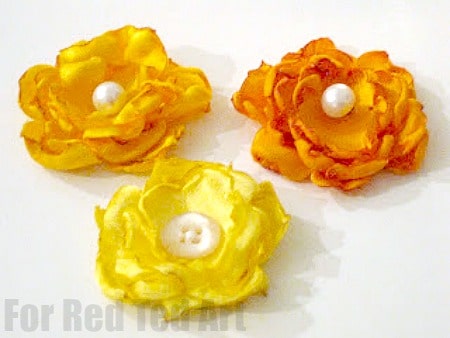
Aren’t these Organza Flowers simply lovely? And they seem quite easy to make.. go on.. have a go!