
Easy Fish Origami for Beginners
Learn to make an easy origami fish today! Making this simple paper fish is quick and fun. You can use ordinary printer paper, origami paper of construction paper to make this cute craft! A great way to get stuck into some easy origami for beginners!
Our love affair with EASY Origami for kids continues. Many people are “frightened” of Origami and think it is “too hard” or that if you don’t get the origami folds “just so”, the origami pattern will not work. Not true! Of course SOME origami is like that and of course the neater your make the folds the better, but there are also many many origami projects for kids, that are super child friendly and the perfect origami for beginners.
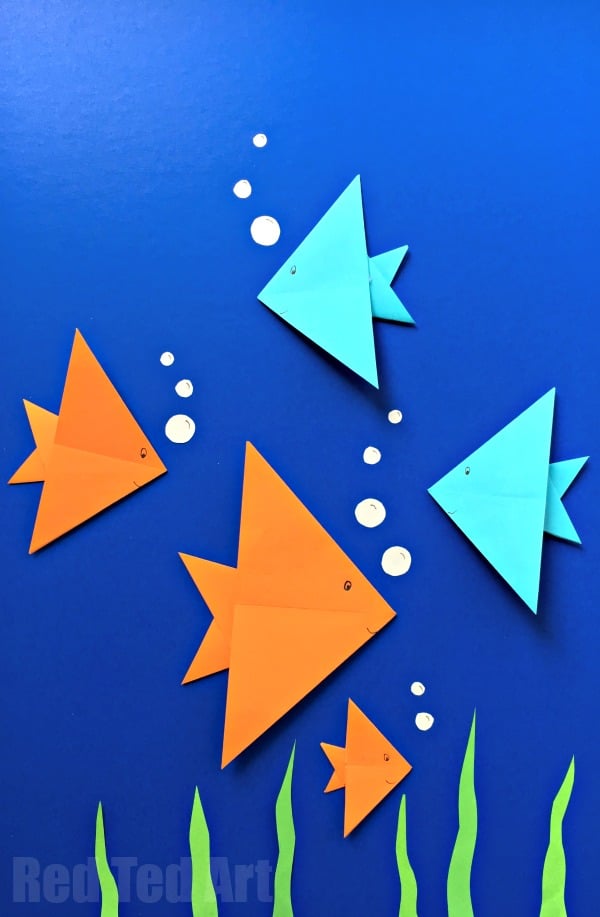
They help you develop fine motor skills, cognitive skills in following patterns as well as help you develop your origami folding confidence. Today we would like to share a super duper EASY FISH ORIGAMI. This cute little fish is indeed very easy. It is a great beginners project, learning to next “type” of Origami fold. It looks lovely on the front of Greeting Cards (maybe make them as part of a summer camp project), as part of a under the sea collage (maybe add some of our Origami whales to it?), and could also look lovely as a simple Origami Fish mobile.
Supplies needed to make an origami fish
- We used a sheet of A5 paper and cut it down to square (15 x 15 cm is nice) – using the left over “strip” for making the little baby origami fish. Of course you can just use standard square origami paper!
- Pens for decorating
Our origami paper fish resembles an angelfish best! Don’t you agree?
How to fold and easy origami fish
As mentioned before, this is a great Easy Fish Origami. And as with MANY of our Origami Projects, we have a fabulous short video tutorial (on auto play) to help explain the steps. It really is great for visual learning (and oh, you may like out wee little Fish Animation at the beginning too!! Teehee, so cute). As mentioned, it introduce a great classic fold for Origami Beginners and a great way to learn and practice your origami skills!
Alternative check out our step by step written instructions!
Step by step paper fish instructions
This paper fish origami, is easier than you think! Once you get the hang of making this simple fish, you will want to make it over and over again!
Making the folds to create the paper fish body
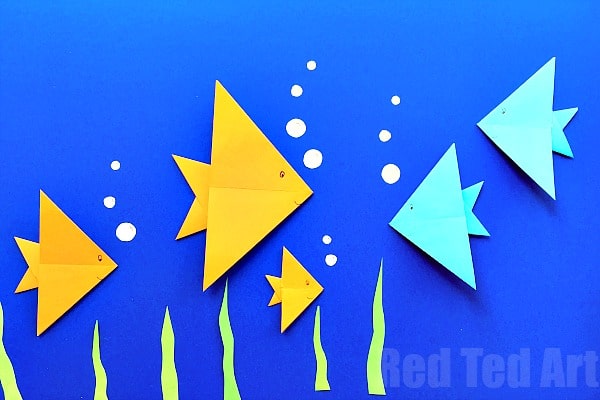
Origami fish step one – pick your paper in vibrant colors! We started of with an organge fish and later made some blue fish too.

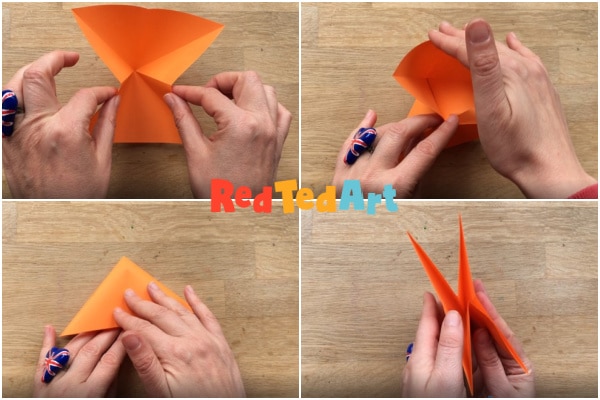
As mentioned, we started of with a rectangular piece of paper. Which you need to turn into a square first. Bring up the bottom corner to meet the straight edge (top left image).
Trim off the strip on the side. This can be kept for making baby fish or for other craft projects.
You have made your first crease already by folding the paper up. And should now have a triangle (top right image).
Open up the triangle (bottom left).
Rotate by 90 degrees and fold the across the diagnoal again (bottom right).

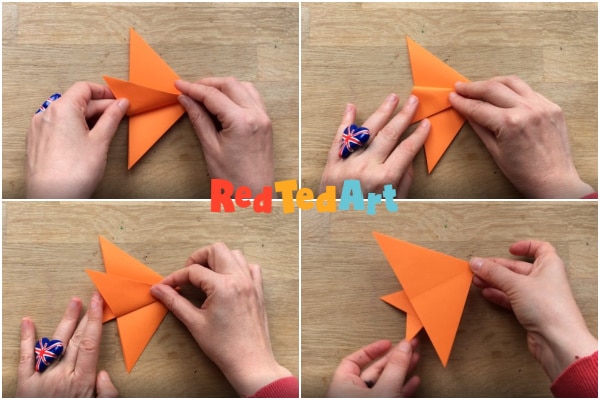
Open up all the creases and FLIP your paper over. The flip is important, as it will help you make some inward creases later.
Fold the bottom edge up to meet the top edge (top right corner image).
Open up the the fold. Rotated by 90 degrees. And repeat (bottom left corner image).
Now when you unfold everything, you should have creases shaped like a star – with lines running through the center of the paper – as per the bottom right hand corner image.
Now, when you take the centre of the right edge and the centre of the left edge, you should be able to move them towards each other and crease and inverted fold. (Top left image).
Gently bring these together until they meet and bring down the top flap and make a neat crease (top right and bottom left images).
You should have a new smaller triangle.
From the side it looks like the image in the bottom right.
Make your angelfish fins
Make the right angle corner face point right.
Lift up the bottom flap and make a neat crease (top left). Open the flap again.
Fold down the top flap to meet the crease you made (top right image).
Now fold the bottom flap OVER this flap to create the tail fins (bottom left image).
Flip the origami model and you have made your basic paper fish (bottom right).
Deocrate your origami fish

Now all is left to do is decorate your origami fish. I decided to keep it simple and only added an eye and a mouth. However, stripes would be fun too and would turn the simple wish into said angel fish mentioned earlier. Have a play with different coloured papers to make your different fish – make orange paper fish, blue paper fish, green paper fish! Make lots of colorful origami fish! Whatever takes you fancy! Either way, you have now completed your first origami fish.
This really is a cute and fun origami project for beginners. I hope you have enjoyed this creative idea too!
Creative ideas for your origami fish
Here are ways you can use your sea creatures
- create a collage – this can be with just paper, or you can combine other art elements and materials
- greeting cards – adding a few fish to the front of a card would be super cute
- decorate a wall – my daughter made 10s of these and stuck on her wall
- make a garland – tape them to some baker’s twine and hang them up
Hope you love this cute origami fish!
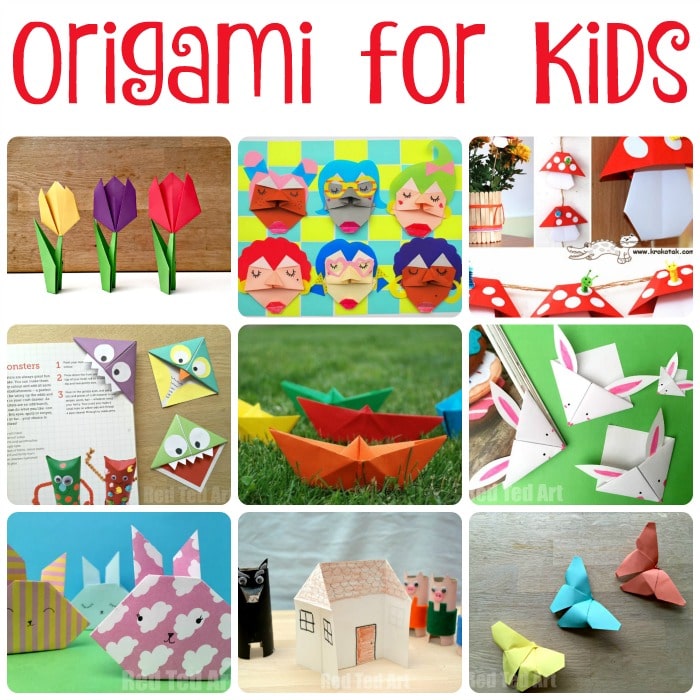
Also popular on Red Ted Art are these DIY Origami For Kids projects:
Hope you have a go at making these wonderful Easy Origami Fish!!
Our origami fish tutorial is also available on YouTube if you find that handy!