
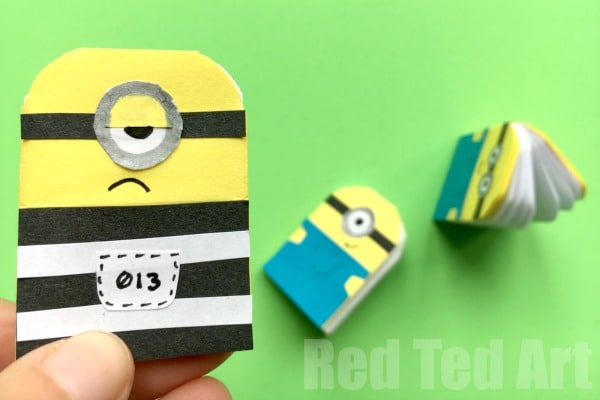
Easy Paper Minion Notebook DIY
You know us and paper crafts. The love affair continues (a bit like when the kids where young and all our crafts were Toilet Paper Roll Crafts!! Ha! You can tell my kids are growing up! Though we are still rather partial to hoarding TP Rolls). Anyway, as per usual, I am massively digressing. Today it is all about MINION Paper Crafts – yes those loveable characters from the Despicable Me movie.. and today, I decided not only to make a Mini Minion Notebook DIY, but to also add one of the new Despicable Me 3 characters – the Prison Minion! It is a super simple and fun addition to any Minion DIY you may be doing and they do look just as adorable as a regular Minion Craft. So. Today is all about notebooks – mini notebooks in fact. If you choose to “colour” your notebook, you can in fact make TWO of these Minion Notebooks from ONE sheet of paper.

Materials needed to make your Mini Minion Notebook DIY

As mentioned you can use ONE sheet of paper to make TWO of these paper notebooks. You will then need a set of pens in the right colours for decorating (yellow, blue, black and silver). If you make this version, this in fact makes this a “No Glue Paper Book DIY”. Yep. NO GLUE need to make these cute mini notebooks! Alternatively you will need –
- 1 sheet Yellow paper (will make 4 covers)
- 1 sheet White paper (will make between 2-4 mini books, depending on number of pages you wish to have)
- Paper scraps in blue, black and white
- Silver and black pen
- Scissors and glue sticks.
How to make a Minion Notebook DIY

We have shared how to make this particular mini notebook design before – at the time we turned those paper books into POKEMON Books. Totally adorable. This time, we adapt the pattern slightly, in order to shape it into a super cute paper Minion and of course decorate the book differently… perfect for new Despicable Me 3 characters. So. Here is the video. (Aalternatively, follow the step by step written instructions below).
How to make a Minion Notebook DIY – Step by Step Instructions
The front cover of your paper mini notebook DIY
- You will need an A6* sheet of paper to make the cover of your minion notebook. You can cut a regular sheet of A4 paper down, but folding it in half one way and then folding it in half the other way and creating 4 equal rectangles. Cut one out in yellow.
NOTE: *you do not need to use the A4/ A6 format. Use the paper dimensions available in your country and continue to follow these instructions, you will get a notebook that is inporportion to your country’s paper dimensions
- Fold your A6 sheet of paper length wise.
- Then fold in the out edge to meet the middle and repeat on the other side. You should have a long piece of paper with two flaps folded towards the middle.
- Fold the paper in half width with – this will create a “centre parting”
- Bring the out edges towards this centre parting but leave 1-2m space free. Repeat for both sides.
You have now created a book cover with “flaps”
The pages of your DIY Mini Notebook
- Fold your A4 sheet of paper length wise in half. Fold length wise in half again. Your paper is now crease into 4 thin lines.
- You will need either one of two of these lines per book – depending how thick you want to make it.
- Cut out one thin line – but cut it 1-2mm thinner than the crease. This will allow the page to slip into the book cover later own. Also trim a 1cm piec of the end of your long strip for the same reason.
- Take your long piece of paper, fold it in half (length wise), fold it again and again. Unfold.
- Now use the creased made to concertina your paper. These are your pages.
Finishing of your Mini Notebook
- You can insert your pages into your book cover now.
- And finished.
You can now decorate your homemade notebook as a minion!! Woohoo!
Love the Minions? Find MANY more fantastic Minion Paper Crafts here (including many free printables that are perfect for any Minion Party Planning!)
