
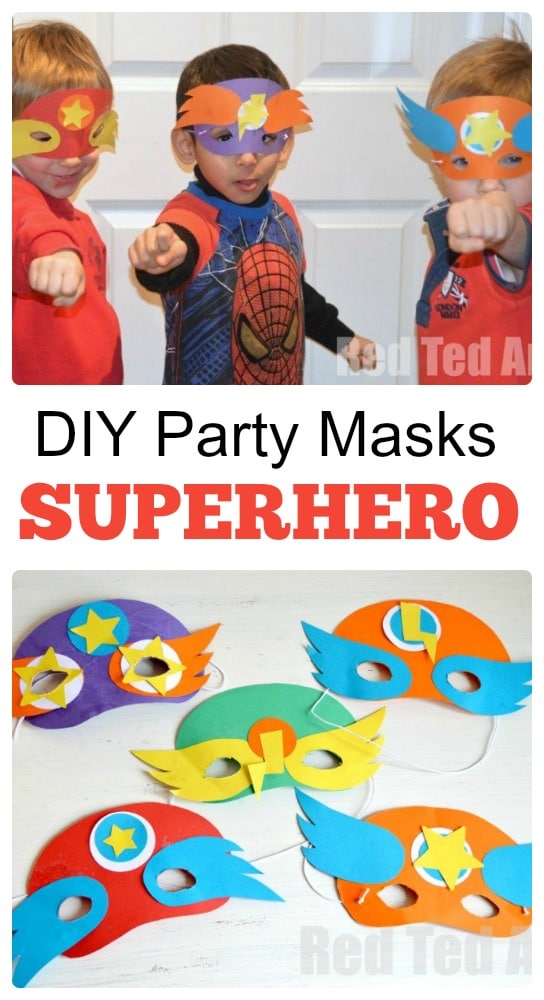
Kids Crafts: Superhero Masks (+ Template)
Welcome back to this weeks Kids Crafts – things for kids to make. Today, we are sharing our DIY Superhero Masks!
Some of you may know that Red Ted recently turned 5 (Happy Birthday dear Boy!) and that he had a SUPERHERO birthday party! I really wanted to do a birthday party craft activity of sorts with the kids. (In my view) the key to any party activity is simplicity and preparation.
So I thought about our Superhero Stick Puppets – they really are nice and simple, but then decided against them, as already printed out lots of bits and pieces for bunting and cake toppers and I (!) was getting a little bored. I also thought about the Superhero Stress balls, but decided it would be helpful to have more adults “help” for this, and we decided to run the party show with two adults (my husband and I) and ten kids! (in retro spect these would have made great part favours!). These Superhero masks are also great as a No Sew Halloween Costume! It is also the perfect addition to our Crafts for Boys series.
And then I thought about masks! Well, actually Red Ted asked if we could make masks. I know many of his friends do NOT like colouring or drawing, so it had to be an “assembling and sticking craft” of sorts. Enough rambling. The craft:
Materials needed to make your masks:
- sheets of light card in assorted colours,
- scissors,
- glue,
- elastic +
- a bit of tap
Enter $0 at check out to get this freebie superhero mask printable!

How to make your Superherp Masks
You could buy a set of stars and circles pre cut – either from craft foam or card. You could make the hole mask as a foam superhero mask or even a felt superhero mask – your call!
If making the masks for a small group (e.g. 2-3 kids), cutting these by hand is tolerable.
I used my brand new Cricut Mini to cut stars and circles. It was the first time I had use it and it was pretty self explanatory (though there are a number of online tutorials that help. I just downloaded the “Cricut Craft Room” and went from there. I selected the free stars and circle images and arranged them on my page. They did have some “bolts” in their image stock, but they were part of a package and I didn’t need the whole package, so left it for now and cut the bolts by hand. The Cricut Mini was SUPER easy to use (I was rather impressed). My favourite part of it, is the “sticky feed map”. As you don’t have to use a WHOLE A4 sheet of card, but by placing smaller parts on the gridded feed map, you can easily use up odds and ends of card. Just be sure to match your grids on screen with the those on the feed map. Very clever and very thrifty indeed. I look forward to using my Cricut more!
1) Use these free printables for basic mask templates (print to fit A4). I managed to cut 5 masks at a time using the template – we cut the eye holes in at the very end, to make sure it fit each child.
2) Cut your embellishments and masks. As this is for a party, I decided that I needed to precut everything. I wanted to give the kids lots of colour and shape choices – so needed to cut extra – sod’s law one child would want 5 stars or something. That is where the cricut came in handy. If I had only been crafting with my two, I would have asked them what colours and shapes they wanted and cut it all as we went along. So I cut lots of circles in blue, white and orange. Lots of stars in yellow, blue and white and some yellow bolts. I also cut the “eye wings” ahead of time. We had 10 kids coming and I cut out 12 masks. Giving us two as back up.
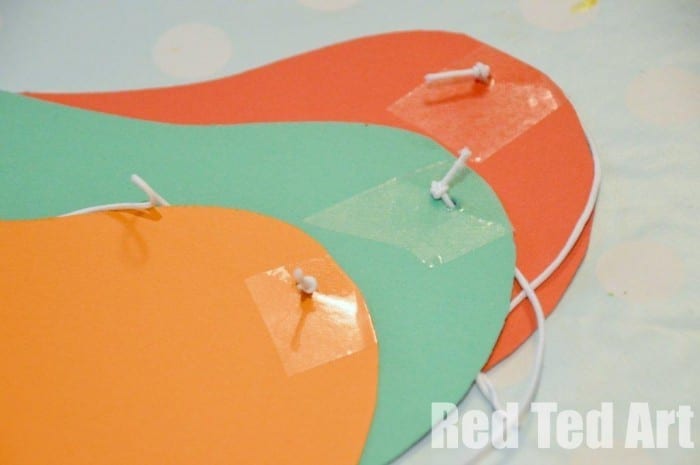
3) Add the elastic first. Knot and tape in place – the tape will help prevent the card from tearing.
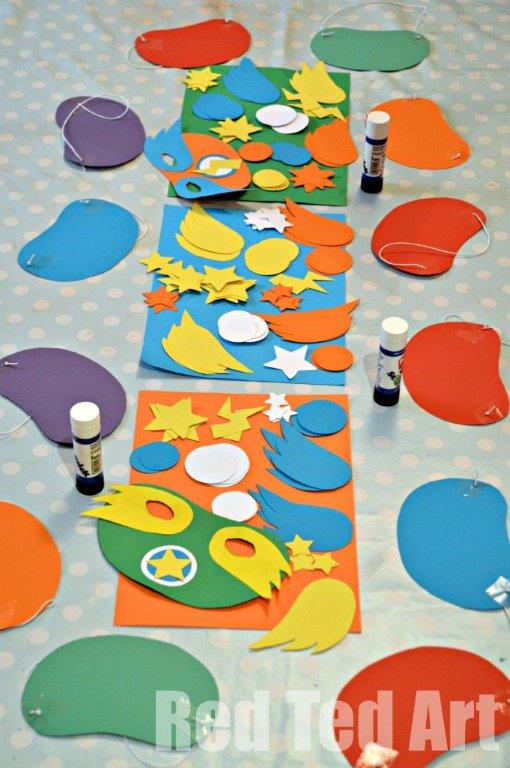
4) I prepped the table ahead of time. Again, if I was making this with just my kids, I would be doing a lot more “as we go along”. But with 10 kids, it is good to have everything ready. Arm the children with glue and let them get on with it.
5) Once they are done double check placement of eyes. Use the template as a guide, but place over child’s face and check. We used point nail scissors (that I have for crafting) to cut the eyes out.
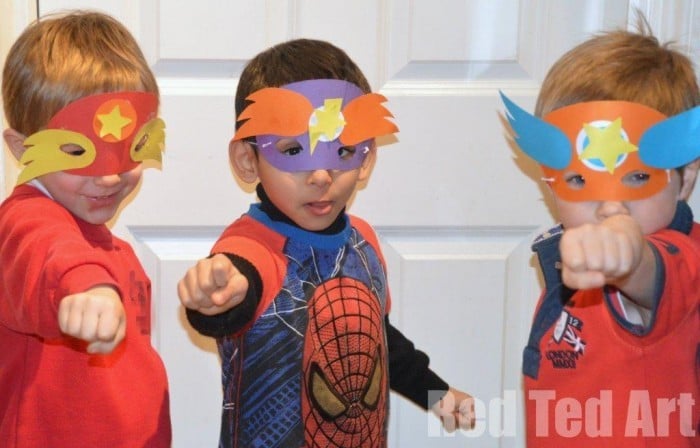
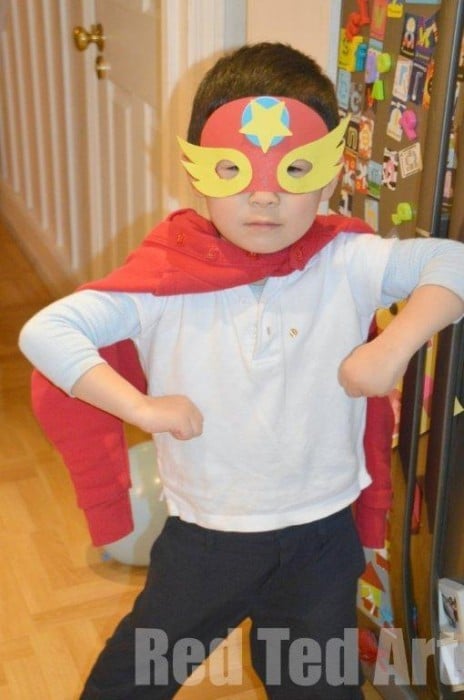
6) Wear proudly and let mum take lots of photos! Done.
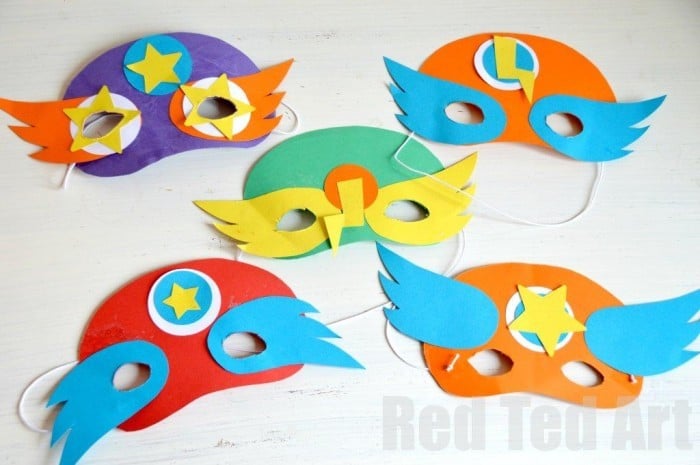
Pip Squeak did the one on the top left – the ones with the stars for eyes. It blew me away. I love how young children just have their own ideas and imagination and she wanted “star eyes”, so “star eyes” she got. Lovely.
Refuel with some Superhero Cupcakes:

(And whilst you are here, check out our super simple Superhero Party Invites).
What are your favourite Superhero Craft Ideas? And what are your top birthday party ideas and tips?
Need some more No Sew Halloween Costumes? Check out the full set:

Happy Trick or Treating!