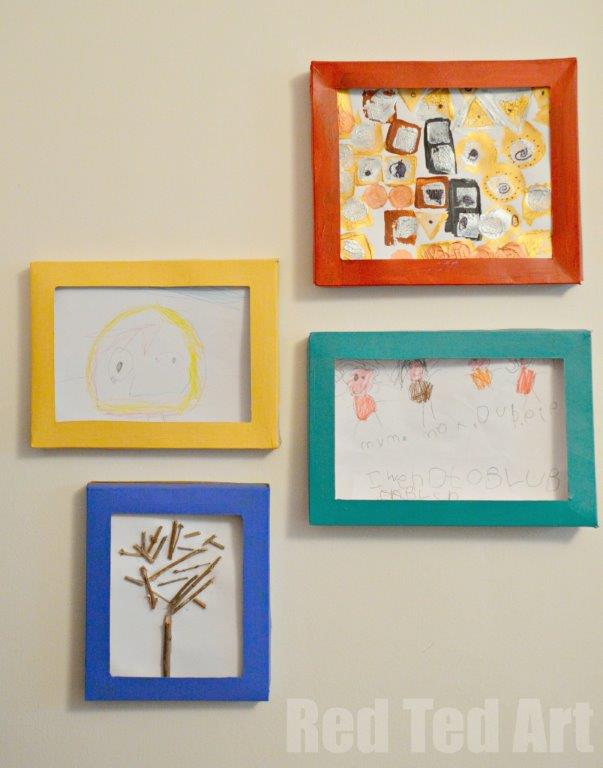
How do you manage your kids’ art? Well, we try our best, but I know I don’t manage it as well as I could. We save a lot and Granny gets a lot and we recycle a lot (into other things). And then I got together with crafty bloggers to discuss what to “make from a cereal box” and I had a light bulb moment: Box Frames. A friend of mine has a lovely white one for her kids art. They are super quick to make. I made 3 in about 35 minutes. Really quick and they look great and make the kids art look lovely. You can store about 8-10 bits of art per box and display one at a time.
For these Cereal Box Frames you will need:
- cereal box,
- scissors,ย
- Stanleyย knife and ruler,
- acrylic paint (though you could try decoupage?)
How to make your display Frames from a cereal box
UPDATE: PLEASE NOTE – it is hard to paint on the “shiny” part of a cereal box – you need to use acrylics for this and not everyone likes to use them…. so. When you take your box appart as per the above, you can also “turn it inside out”, so you have the soft grey area showing outside and the shiny bit on the inside. This makes it MUCH easier to paint!
1) Cut your box into two halves – but rather than cutting it in the exact middle – cut it approx 1cm from the edge – this will make the width of your frame. Check the photo. I also cut away the flaps on one end from ONE half of the carton, I decided to make the access o the side, but you can do it at the top too.
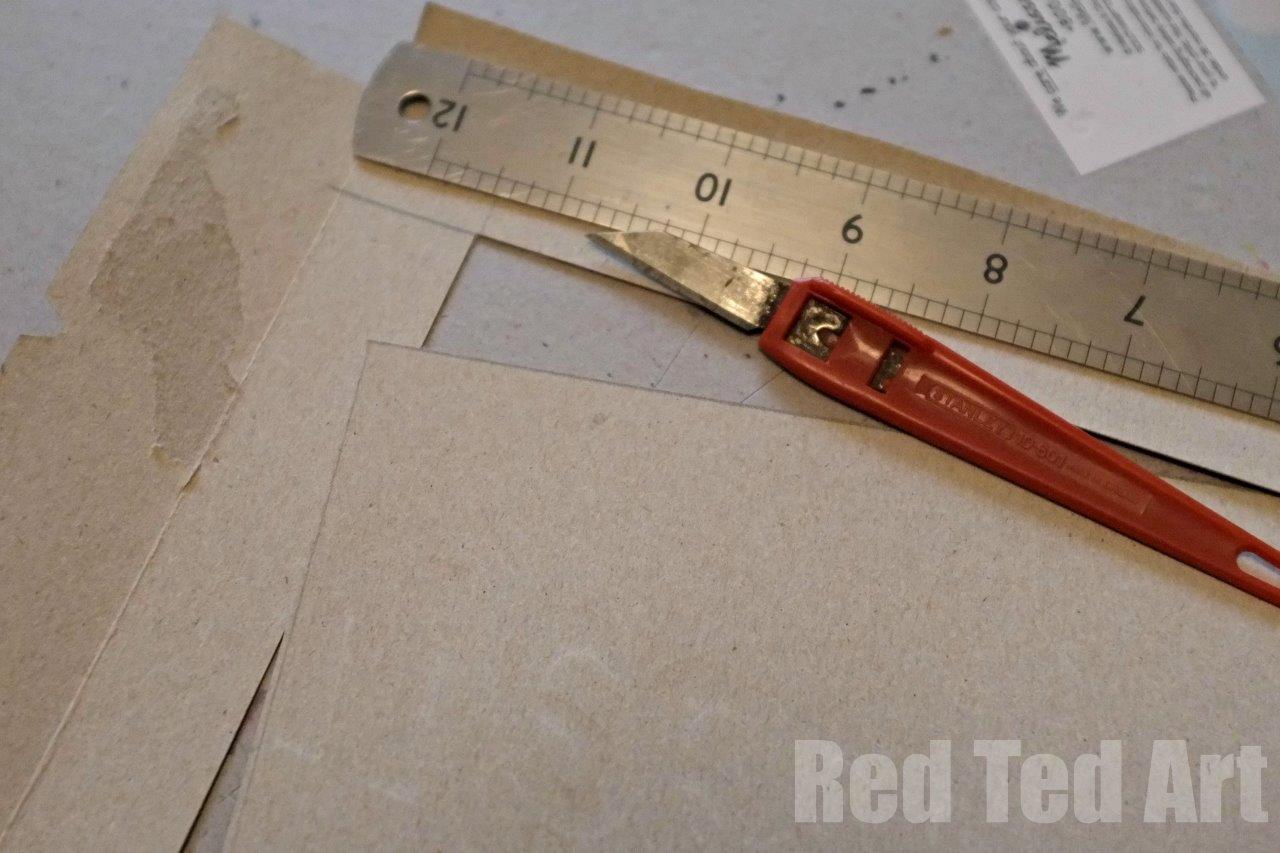
2) Using a metal ruler and stanly knife, cut out the display section.
UPDATE: if you turn your Cereal box inside out, I grey side out, not the shiny part out, then it is easier to paint and you will only need one layer
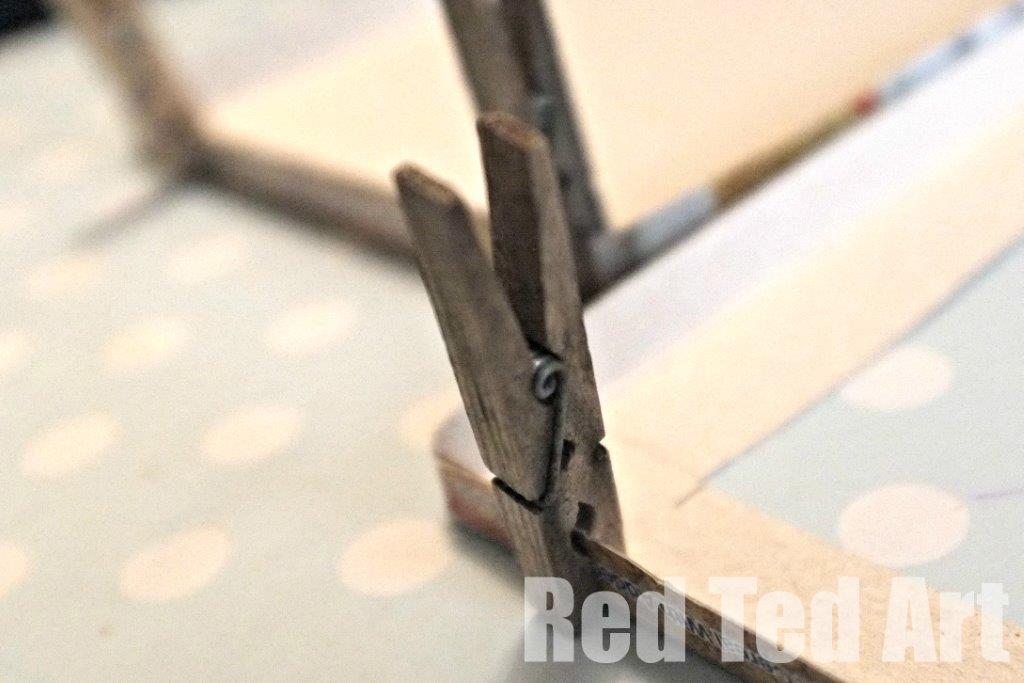
3) Glue flaps back in place and hold with clothes peg.
4) Glue the two halves together – by sliding the one with the display hole OVER the back.
5) Paint in whatever colours suit you! Note: depending on how your acrylics are made – you may have to paint a white layer below your final colour OR you may want to add a “thicker” colour underneath it or mix in some white. White usually is Opaque, so are pastels. Pure reds, blues and yellows aren’t always. Alternatively papier mache your frames. OR you can turn your cereal box inside out before you put it back together again – exposing the grey area.
6) Hang. Fill with pictures. Stand back and admire!
More great Cereal Box Crafts here!
Carolina J. says
Brilliant idea! We will definitely try this one out! Thank you!
candle making supply says
Aww thanks for the tutorial, I just love these making craft and things. Will a corn flakes box work, we don’t eat weetabix in our house :).
Really creative idea as well.
Sarah Midland.
Red Ted Art says
Yes of course it will – we had 4 different boxes!
Emma @Sciencesparks says
I LOVE this Maggy, great idea. xxx
PragmaticMom says
Love this idea! How amazing they turned out too!
Red Ted Art says
Thank you! Was really happy with the result too!
Faigie says
Framing is really a great way to make process only art look really good. When I taught 3 yr olds they really can only make messy looking art but, I found if I frame it and even write on top “spring” or whatever the theme is, it really makes it look professional.
jackie says
You are a genius. This is totally fabulous.
Red Ted Art says
**BEAM**
Kim says
Made one tonight! Will paint tomorrow. This will make an excellent Mother’s Day (Mothering Sunday?) gift. Thank you! (Also, the bit cut away to leave space for the art, when cut in half, is almost exactly postcard sized! Penpals away!)
Fouzia Nawaz says
It was brilliant and a good way to reduce and recycle waste creatively..I loved it
Katherine of Aurora Spitfire says
We’ve been going through cereal like crazy here lately-what a great way to use the boxes and decorate our walls at the same time. My usual method of using painter’s tape to stick art to the wall just isn’t as charming, now is it? ๐
Hazel says
So we are trying these picture frames but having a couple of problems. We cut the display hole slightly smaller than an A4 piece of paper, as that is what the kids usually draw on. But, of course the picture drops below the hole when it is in the box. So part of it dissapears at the bottom and at the top the edge of the paper is below the edge of the hole. Does that make sense? I guess I need to make the hole much smaller, but the piece of paper is always going to drop down. Hmmm.
Red Ted Art says
We don’t have that problem as the majority of ours are a little bigger (so I have to cut them down), could you take some of the left over card (from the hole you cut) and fold it and put it at the bottom of your frame as a prop?
Hazel says
I think it will have to be something like that, or I just make a smaller one!
Kylie says
Thanks for the great idea! We made this today and I can see it’s going to be filled constantly!
CapeMommyo3 says
Thank you so much for this idea! I will use it to help my Junior Girl Scout troop earn their Drawing badge. After exploring different ways to paint and draw they are required to show off their work. This is a cheap and fun way for them to do so!
Chrisy says
We live in earthquake country so have been looking for something to hang the kids art over the bed which won’t hurt if it falls-these are perfect! How do you hang them on the wall though? You don’t show that. Thanks!
Red Ted Art says
A little hook does best!