
How to make T-Shirt Yarn
This is a great and simple how to make t-shirt yarn tutorial. Making T-shirt Yarn really is easy and it is a great way to upcycle either old t-shirts past their wear or those “free” commerical T-shirts that are far too big and no one wants to wear in the house. So instead of throwing them out or using them as cleaning rags… turn your old (or new) T-Shirts into this easy T-shirt Yarn. T-shirt yarn can be used for many things, including Finger Knitting, Crochet, large scale weaving projects and for Paracord DIYs – like these Paracord Dragonflies.
Follow today’s step by step instructions for how to make T-shirt Yarn – a continuous strand!
Oh and these balls of T-shirt Yarn? They make WONDERFUL DIY Upcycled Juggling Balls just the way they are! So you have a “craft basics” here, as well as fun little Juggling Ball DIY!!

T-Shirt Yarn DIY – Materials –
JUST t-shirts.. well and scissors 🙂
But seriously, all you need are T-shirts and I find those “free” corporate T-shirts you sometimes get at company events are perfect for this DIY. Don’t worry if you T-shirt has patterns on it, it will work just as well!
T-Shirt Yarn DIY – How to Make T-Shirt Yarn:
I have BOTH step by step photos AND a video how to this time. So please follow the method that you find easier to learn from! I will begin with the How To Make T-Shirt Yarn VIDEO how to , followed by the detailed step by step photo guide tutorial.
I hope you liked the video. If you enjoy our videos, don’t forget to hop over to YouTube and subscribe today!
Now to the Step By Step DIY T-shirt Yarn instructions:
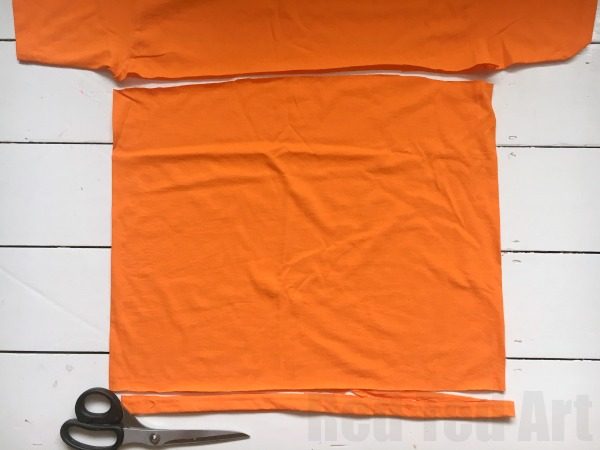
Begin by cutting straight across your t-shirt – just under the armpits, as well as trimming of the bottom seam of your T-Shirt.
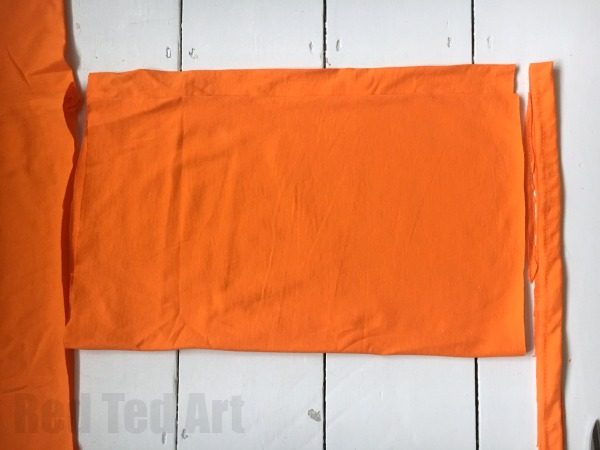
Note the image has been rotated 90 Degrees..
Next fold over your left side over to your right…. making sure you leave a 1inch gap
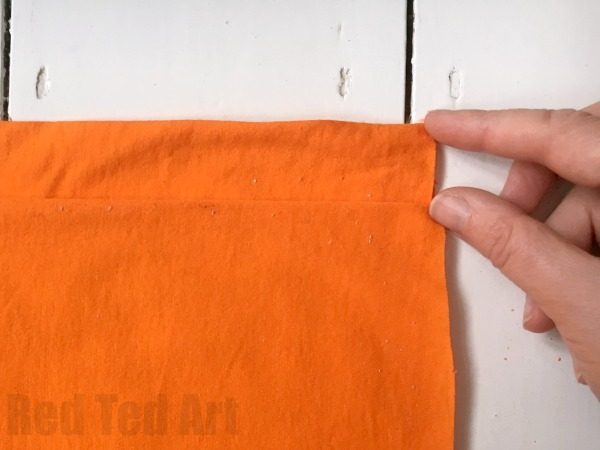
Here is a close up, showing the 1 inch gap! This bit is VERY important.
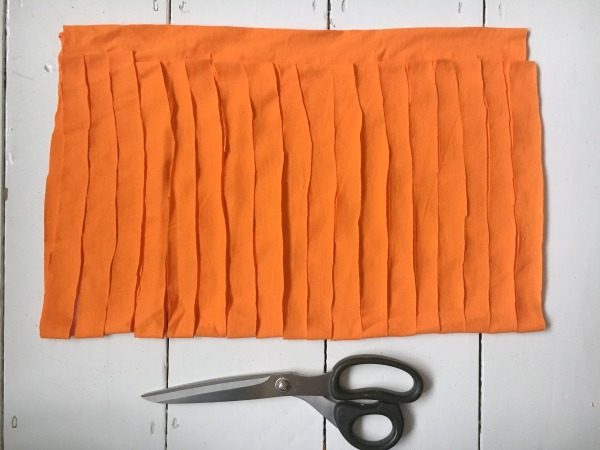
Now you need to cut 1 inch strips along the whole of your t-shirt. You WILL cut into the lower fold but NOT the top inch you have kept free.
Unfold the side – and you will have a ribbed pattern.
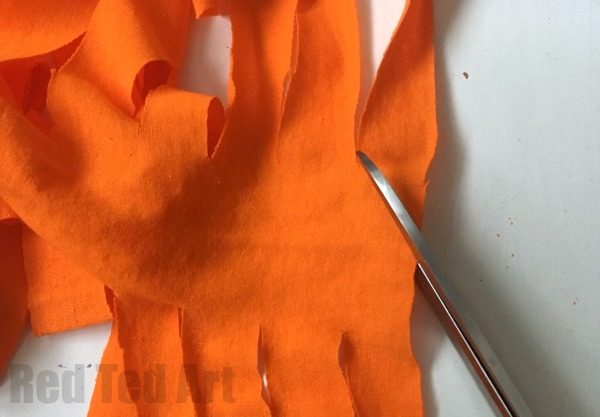
You now need to cut DIAGONALLY across.
Start at the centre of the edge of the fabric and cut across to the first slit.

The next row cut diagonally across again. Ie from row 1 to row 2. Then from 2 to row 3 and so on…. Keep going until you have finished.
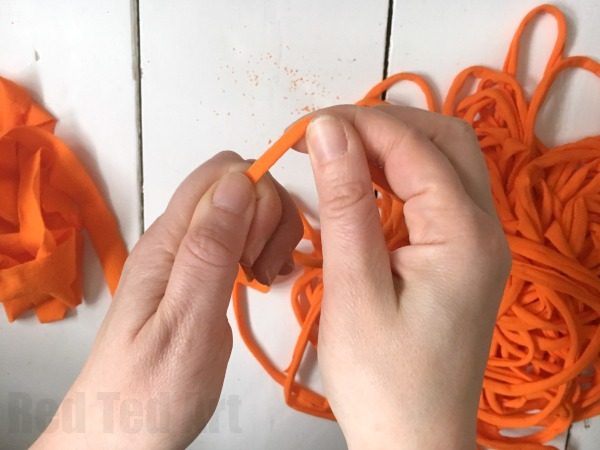
Now your finally step is t o “curl” the yarn, simply by pulling it through your hands. I like to do this twice, but once usually is enough. And you are done! You have made our own T-Shirt Yarn.
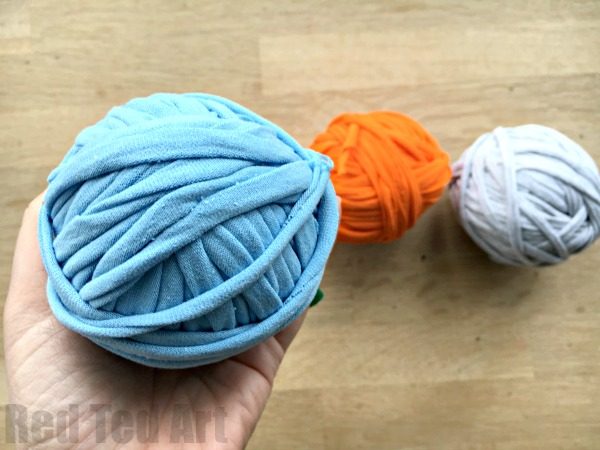
You can now wrap your DIY T-Shirt Yarn into a ball!
Check out the rest of our T-Shirt Yarn DIY ideas:
