
Folded Paper Ornaments for the Christmas Tree
I love discovering new a fabulous crafters online. And today I have a new wonderful Russian DIY channel for you to check out – Lerita VT handiwork! Don’t worry.. all the videos are with “music only”, so the video instructions are clear and do not need a voice over. You will be able to follow Lerita regardless of where you are from! It is a channel of tutorials for Paper Craft lovers and has some wonderful ideas – both easy (like today’s Folded Paper Ornaments) and intricate for those wanting a bit more of a Paper DIY challenge and are perfect as part of our collection of Paper Christmas Ornament DIYs.
DIY Folder Paper Ornaments
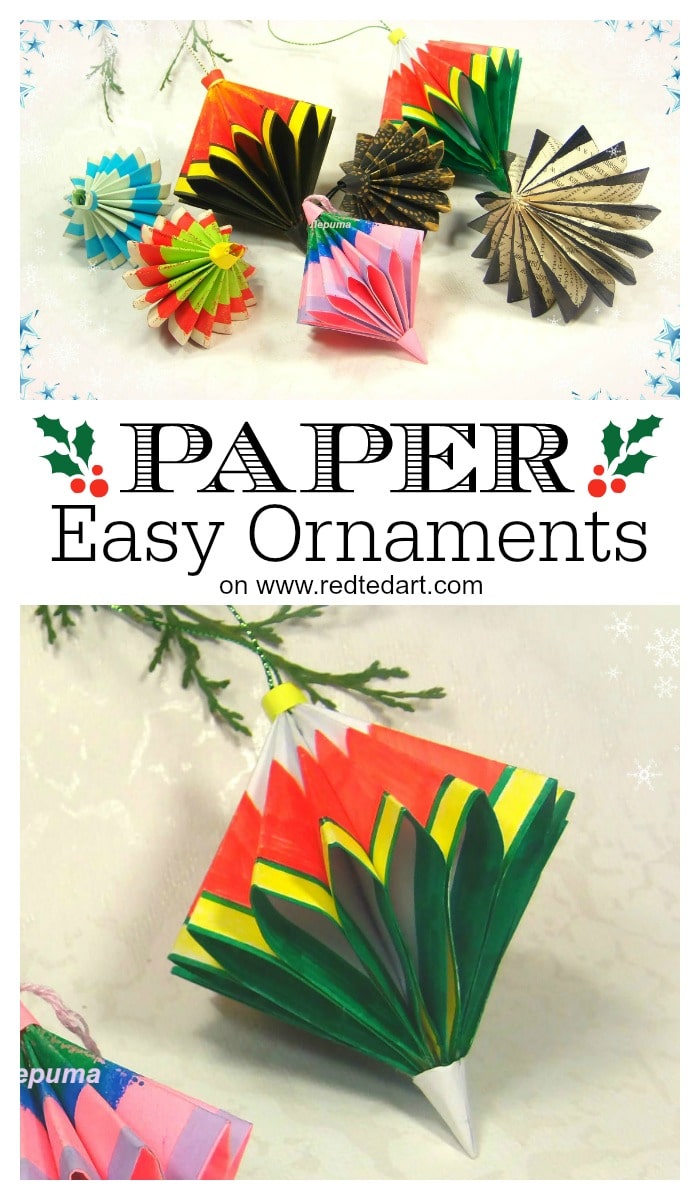
Today, Lerita has allowed me to share her Paper Ornaments made from 4 sheets of Square paper.. that is right.. just four sheets of SQUARE paper (no tricky cutting) and you too can make these gorgeous gorgeous Paper Christmas Ornament DIY.
These paper ornaments are so delightful and will really looking stunning in your Christmas Trees! They would also make a great gift, or look wonderful as part of Christmas Gift Wrap!
I also love that these ornaments are more or less only made from pieces of paper – making these wonderful eco friendly Christmas Decorations.
PLEASE NOTE: this tutorial was reproduced here with permission.
Paper Ornaments Supplies
This ornaments will not cost you a lot of money to make.. they are super thrifty and eco friendly too! To make these Christmas decorations you will need:
- Four square sheets of paper* 15cm x 15cm work well + some scraps
- A piece of twine, ribbon or thead as a hanger
- Pens for decorating
- Glue stick or hot glue gun or regular glue
- (scissors to trim scraps)
- Optional: beads
*any paper can be used, you will see that Lerita uses pens to decorate regular paper, you can use old damaged book pages too, or use scrapbook paper or origami paper in pretty patterns – any cheery paper goes really. Though thinner is better, construction paper is not so good, as the folds will get a little too thick. Cardstock is also not suitable.
How to make Paper Ornaments from Square Paper
Video Tutorial for folded paper ornaments
This is another fabulous paper craft, that really lends itself to the video viewing format. Though I have highlighted the basic steps instrucions below. Remember that this is a video kindly shared by Lerita VT handiwork. If you like her work (I do!!) please do SUBSCRIBE to her channel today!
In the meantime.. sit back and enjoy.. see how very easy it is to make these beautiful Paper Ornaments!! Love!!
You only need basic folding skills to make this ornament, but thinner paper and neat creases are highly recommended!
Step by step instructions
1) Create some guide lines

First you will need to create some guide lines as highlighted in the image – make sure your creases as super neat by running the edge of your nail across them.
Take your square paper and fold across the diagonal. Open up.
Turn and fold across the opposite diagonal. Open up.
Now fold across the middle horizontal. Open up.
Turn and fold across the perpendicular. Open up.
You should now have a criss cross of folds as shown above.
2 Fold in the corners

Now bring the corners into the centre (a bit like with the first steps of a basic cootie catcher) until, all four corners are in the centere and you have a “new” smaller square.
3 Fold inwards to create a new small square


For this bit, it is important that your creases are neat and “strong”, as it will make the inward fold or “collapse inward fold” much easier. If need be, strengthen this diagonals and horizontal folds.
Then push diagonal folds in, whilst holding onto the horizontal ones. You will be left with a new smaller square or diamond (see images).
4 Fold to make a triangle


Fold again into a triangle. From the side, you will see several flaps.
5 Open up and decorate


Now you can have fun with decorating your paper! You can also add a little decore to the reverse side. If you have used pretty origami paper or patterned scrapbook paper, you can skip this step!
Make for of these. And refold!

Secure the tips with a little glue, to avoid them springing open later. Let dry fully.
6 Assembly of your paper folded ornament – this will require gluing!


Fold into a triangle again.
Now add glue to the edge. And add the next triangle top.
Add glue again and add the next triangle. Until you have all four in a “stack”.

Add a piece of twine and glue, then stick the first triangle, together with the fourth!
Your basic folded paper ornament is finished! All that remains now is final paper scrap embellishments or beads if you wish to add them!
7 Final Paper Ornament Embellishments

Here the embellishments are a simple paper strip quilled bead popped over the loop and a paper strip cone added to the top and bottom of your DIY ornament!
So.. are you feeling inspired yet? I do hope you have a go at this simple paper ornament folding technique.
It really is a LOT easier than many of the Origami Ornaments out there… and I hope you will agree with me.. that they are as equally pretty!

We do love Paper Christmas Ornaments and have a beautiful set of ideas for you here:

And we have many more Christmas Paper Crafts for Kids here:
