
Papier Mache Summer Fruit Bowls
A great use for shredded paper, is to turn it into a shredded paper pulp or papier mache clay. This is a fun medium to work with and can be quickly and easily turned into fun Summer Fruit bowls. Mix our homemade papier mache recipe with paper pulp! So easy and a lovely decoration for Summer parties or for anyone looking for fun Watermelon DIYs!
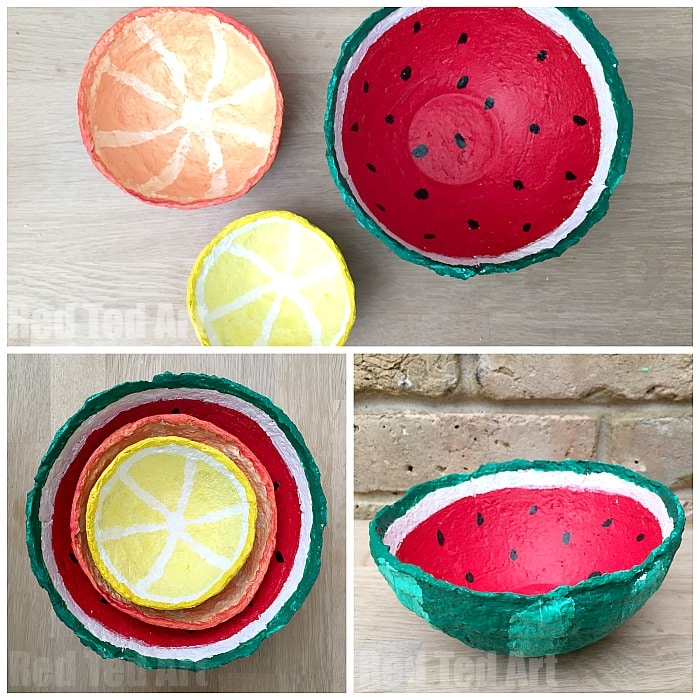
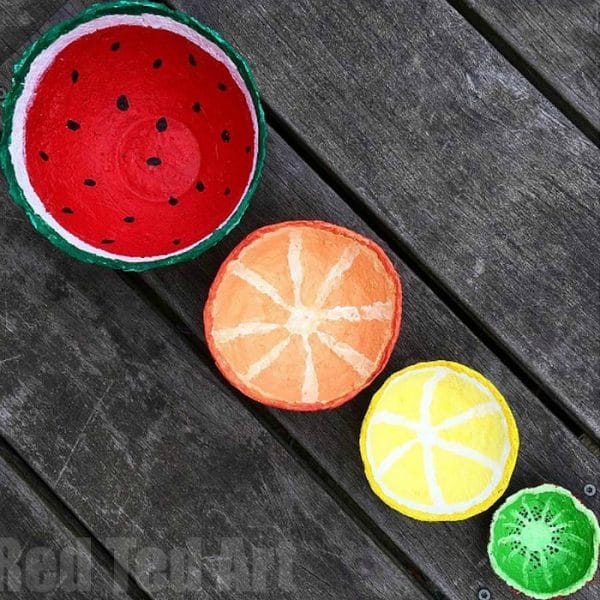
You can then paint to you heart’s desire. We decided to make ours into Summer Fruit Bowls – a melon, orange, lemon and kiwi fruit bowl. Together they look gorgeous.
These would look so LOVELY with our Summer Pencil Holders too!! Summer room decor for tweens sorted.
Some background to our paper mache bowls (sorry… you can skip it!! Hahaha)
Over the Easter holidays, the kids and I shredded two bin bags worth of paper. Left with the two bags of shredded paper, we were looking at different shredded paper things to make! We are a big fan of “papier mache” and using”layers of newspaper strips” and have made all sorts in the past (from Dino Piggy Banks, to Easter Baskets), but we have never work with paper pulp/ paper clay before. So this was interesting and exciting and new for us. We made a number of shredded paper diys…
What is diy Paper Clay?
Paper clay is basically “mashed up” version of paper mache. Think paper. Think homemade paper mache paste. Bring it all together, break it down into a thick pulp and you have paper clay!
It can be used and moulded in many ways like “normal” clay, but you are a little limited in size and detail. Paper clay is super fun to work with and great for using with moulds. Like using an existing bowl and making paper clay bowls.
From Paper Clay to Watermelon Bowls
With summer fruit designs – melon bowls, orange bowls and lemon bowls – we think these make great summer holiday projects. Also, as papier pulp is quite wet.. the summer is a great time to make these, as they will dry much quicker in the sunshine. Having said that, we made these at Easter… it just took 2-3 days longer to dry. So you can make them at any time of the year really! What I REALLY love about these papier mache bowls however, is that they are so so so thrifty and eco friendly.
We used our papier mache paste, that is made from flour and water and yields great results! (Find 19 more great uses for shredded paper here). We also have MORE Summer Fruits fun, with this adorable and quick to make Summer Fruits Bookmark Set! Or have a look at our Melon Paper Fans. Gorgeous – and yes, these are all part of our collection of DIY Watermelon Craft Ideas!
Supplies needed to make Watermelon Paper Mache Bowls
for the paper pulp:
- shredded paper
- a large bowl for soaking
- hand held blender (please ask for permission from the owner first!)
for the papier-mâché paste:
- 1 cup of flour
- 2 cups of water
- a microwave
to make 3 bowls, we used only one very small cup of flour… you really won’t need much, it just depends on the size of your project or how many students you are working with! We love the diy flour and water paste mixture – as it is inexpensive and eco friendly. You will be surprised by how strong and what a hard material this paper mash becomes – the starch in the flour works its magic. No white glue or school glue needed!
for making the bowls:
- other bowls as moulds (different sizes or even different shapes is great)
- cling film/ saran wrap
- acrylic paints (we LOVE these – US/ UK (affiliate links))
This is a great way for making paper mache bowls, as you don’t need a balloon.. just a bowl. So a little eco friendlier too (though a layer of plastic wrap is helpful – not necessary – just to help remove it from the bowl after. A light layer of vaseline can do the trick too). Some people like to paint the basic bowl with white acrylic paint first, to create a “white canvas”… but I think just go straight in there and paint the interesting designs that you want.
How To Paper Mâché Bowls DIY
Watch our how to make a paper clay bowl video tutorial on auto play (I recently edited it condense it a bit for easy viewing!) and you can scroll down for the step by step photo instructions, as well as to watch our “Painting” video, which I sped up and is fun to watch!
Or take a look at our step by step photos – Papier Mache Bowls!
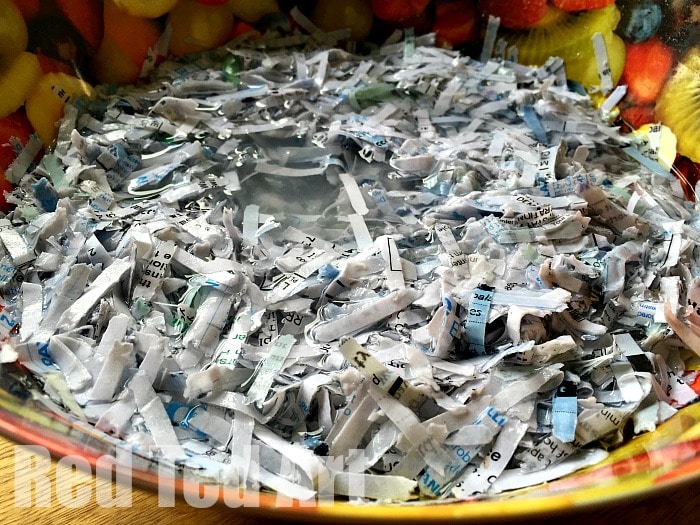
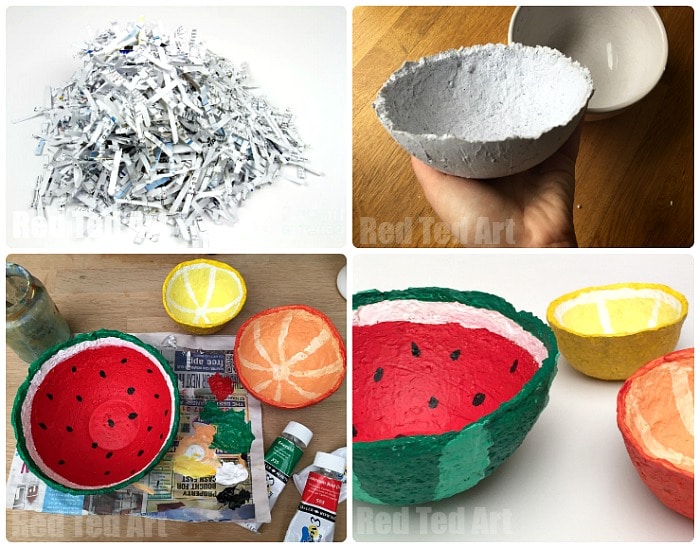
1) Soak your shredded paper overnight (or for a couple of hours)
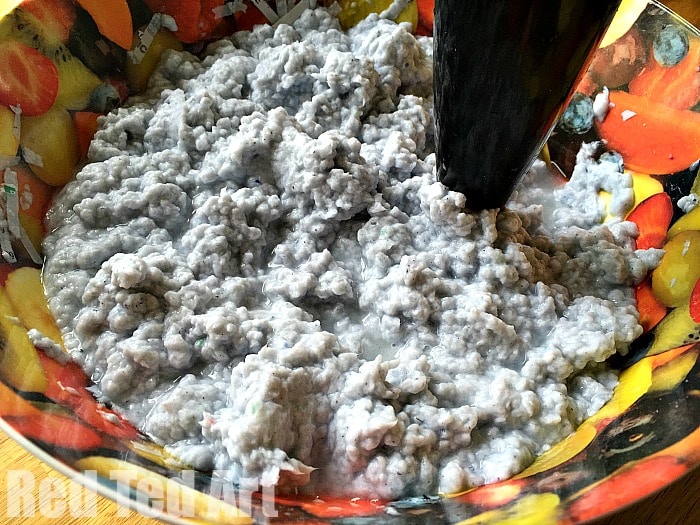
2) Use your hand blender to pulp it as smoothly as you can.
3) Make your papier mache paste – mix 1 part of flour with 2 part of water. Pop it in the microwave at full heat for 10-20 second intervals. Keep stirring. Ours took about 50sec. It is ready when you have a thick paste with a thick glue-like consistency. Try and squish out any lumps and air bubbles.
4) Mix 1 part papier mache paste with 3 parts of the papier mache pulp – BUT SQUEEZE OUT AS MUCH WATER AS POSSIBLE FIRST.
Time to FORM you bowls
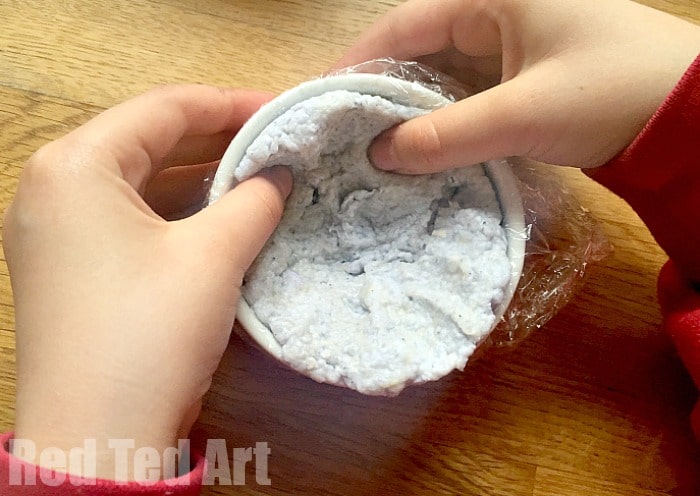
5) Line your bowls with cling film. You can use the OUTSIDE of the bowls too – BUT – these bowls tend to shrink as they dry, so if you use the oustide of a bowl, be sure to remove your bowl, when it is still a little damp, else it will be quite tricky to get it off the bowl. The inside is easier, as the bowl shrinks and actually pushes away from the sides.
Carefully layer up the bowl approx 1/3 of a cm. Not too thick. Not too thin.
LET DRY – this can take UP TO A WEEK!
If you remove when still ever so slightly damp, you can use scissors to trim the top of the bowl a little (if you wish!)
6) Once dry, peel of the plastic carefully. If you need to pop them into the oven at low heat for an extra blast of drying.. I tend to pop it into the oven (without plastic!!) AFTER I have cooked something – ie using the energy used to heat the oven already – no “extra energy used”!
Time to PAINT your Papier Mache Bowls
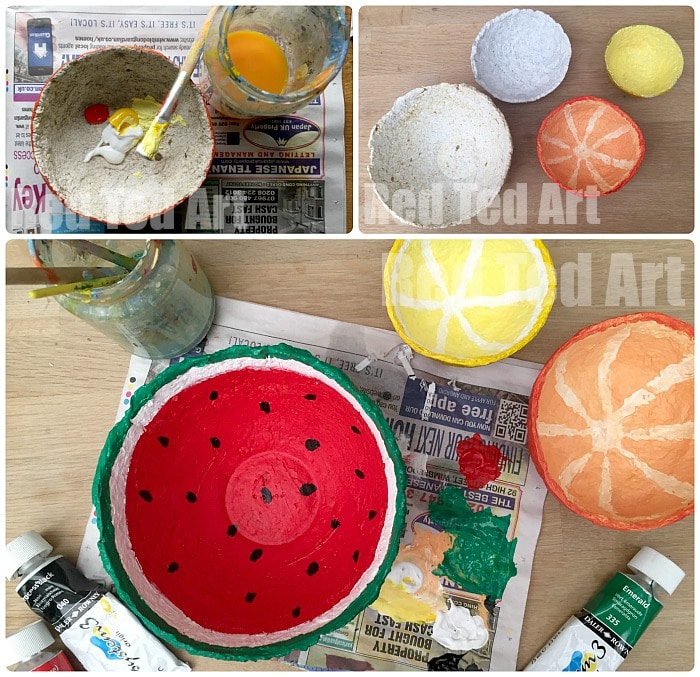
7) Start painting. Paint them any way you wish – we turned ours into summer fruit – a watermelon bowl, an orange bowl and a lemon bowl. But you can paint them anyway you want – they can be dotty, splogy, stripey, monochrome, primary colours.. anything you want. Maybe make an earth day one?!
Check out the this lovely little video showing how to paint a watermelon bowl:
We did it in this order:
- Paint the inside first (right up the rim)
- Let dry
- Turn around and paint the outside!
And finished. Aren’t these papier mache bowls simply beautiful? I love love love them. They would make a great Mother’s Day gift or Christmas gift for kids to make too!
Check out these other 19 fabulous uses for shredded paper:
More great DIY Watermelon Craft Ideas:

Looking for more Gifts That Kids Can Make? Take a look a these:
Our paper clay bowl video tutorial is also available on YouTube