
Valentine’s Cards: Paper Quilling for Kids
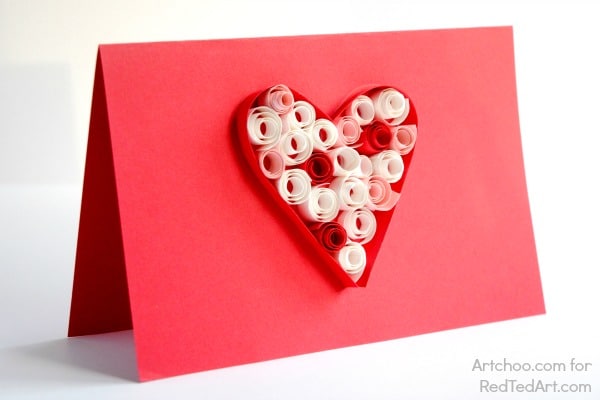
Awesome paper quilling valentine cards! We love homemade Valentine’s Day Cards for kids and these paper quilled hearts are a great art project for kids to make. The results are beautiful and the process is super fun!

A wonderful Paper Quilling for Kids Project – learn how to make these adorable Paper Quilled Hearts – using big paper quills for smaller hands. If your the kids are feeling more confident, why not take a look at these wonderful Paper Quilled Daisies or Paper Quilled Wreaths?!
Over to Jeanette!
Hi, all! I’m Jeanette Nyberg from Craft Whack where I offer all sorts of art projects for kids and design for kids on Craft Whack. I live in the Chicago area with my family and I love coming up with easy ideas for kids to be creative every day.
We are big fans of paper projects here and I’ve been wanting to try a basic quilling project for some time. This is extremely basic – if your kids enjoy this they may want to explore some more complicated quilling techniques. I found some amazing videos on You Tube.
In any event, this project will introduce to your kids (or reinforce) the idea of using paper as a 3-dimensional medium instead of it always being flat. Poor paper just wanted to evolve…

UPDATE: we also have a Paper Quilled Emoji version for you to check out!!
UPDATE: We Made a Craft Video of Paper Quilling for Kids
Materials:
- Colored Card Stock
- Scissors
- Glue
- Something to coil the paper around (we used a small paintbrush handle. A pencil was too thick and made the insides of the paper spirals too open.)
Directions:
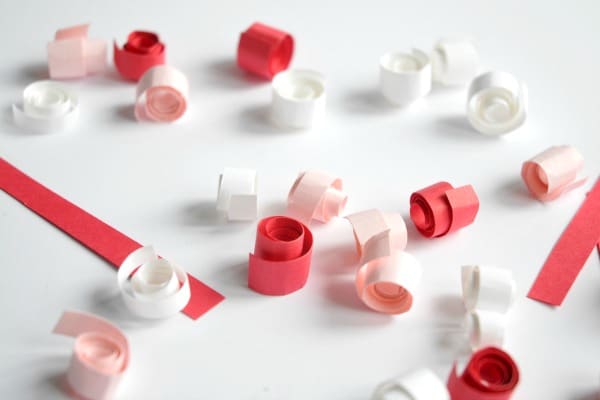
Cut small strips of colored card stock. We used white, light pink, and red. The strips were approximately 14 x 1 cm. Older kids can use a craft knife to cut strips, but we found scissors worked quite well- the strips don’t need to be perfectly even.
Coil the strips, one by one, tightly around the paintbrush handle. They will stay coiled when you remove them.
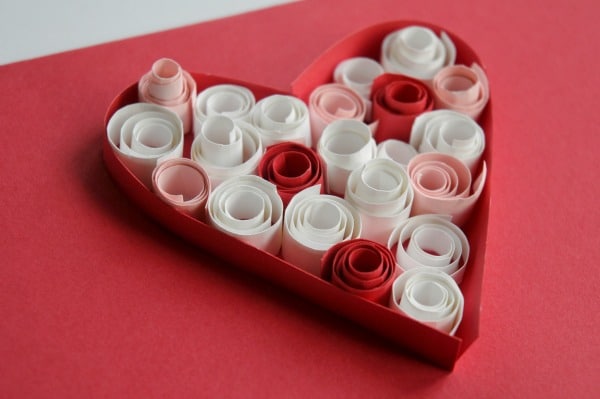
Fold a full piece of colored card stock in half (this is the card itself). Using 2 strips of card stock, form a heart shape and glue the strips onto the front of the card. We applied glue to the edge of the strip and held it in place for about a minute per strip. I then placed a light box over the heart to keep it in place while it dried for about 1/2 hour.

Now is the fun part! Dip each coil into a puddle of glue and place inside the heart. We used 3 colors, but feel free to experiment with more or fewer colors.
That’s it! Don’t forget to inscribe the card with a sweet message to your valentine…
Be sure to visit Artchoo for more creative ideas for kids, including these projects:


More wonderful Valentines Day Cards for Kids to make here: