
Super Chunky Finger Knitted Necklace
As you know, we love love love Finger Knitting and most of the Finger Knitting on my blog focusses on Finger Knitting Projects for Kids.. but what to do if your kids grow up (like mine?)…. well fear not, there are PLENTY of cool No Needle Knitting Projects to can explore. Today, we have a super duper quick taster project the Finger Knitted Necklace (though technically Finger Crochet Necklace, but there is always an overlap)… with more exciting projects for you to explore in a brand new book!

Please note: this project has been reproduced with permission from the publisher and is not allowed to be republished in any way, without their constent. It is for personal use only.
Also note: affiliate links have been added to this post – should you choose to purchase via these, I will earn a small commission that goes towards the upkeep of this site!
No Needles Knitting Book
First to the No Needles Knitting Book!
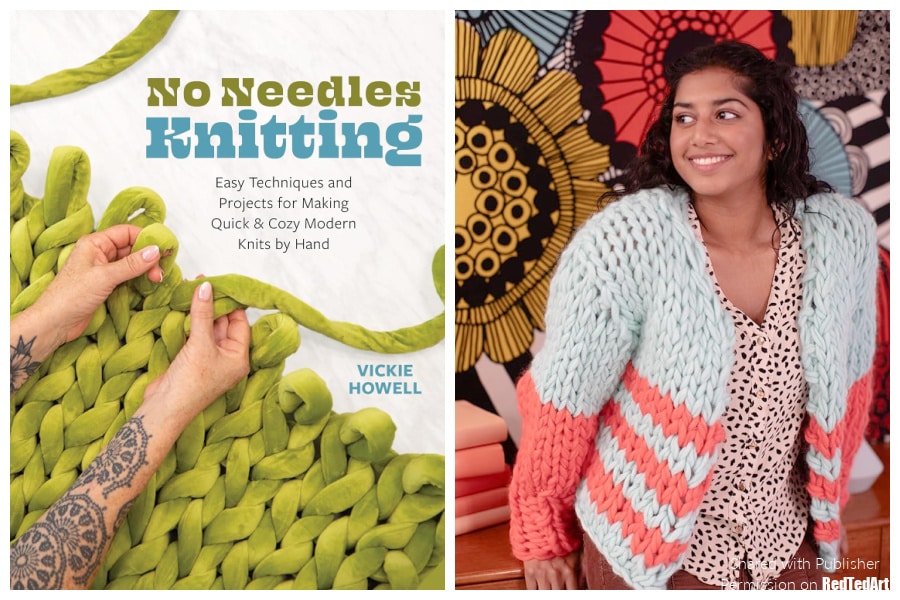
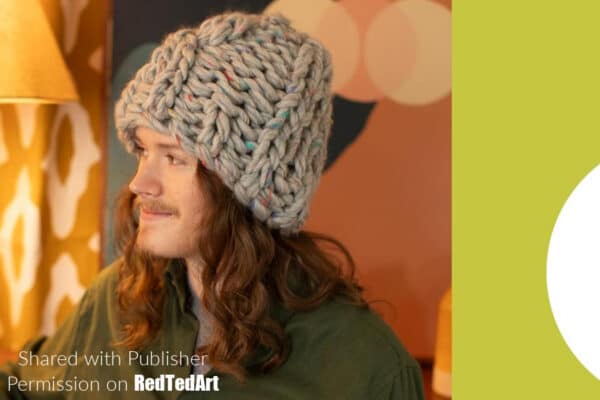
This book is by Vickie Howell – you can find her on her own website Vickie Howell but also on Instagram (and basically all social media platforms). Vickie (like us) is a long term lover of Finger Knitting and as HER kids grow, so do her knitting projects too. And with that has published this amazing book of Finger knits. As you can see from the cover, she will teach you how to knit blankets and scarves, but I have to say, I am rather taken by the Finger Knitted Cardigan and Hat! SO COOL! Especially the cardigan.
The book has lots of wonderful step by step photos (you will see a sample of these below) to guide you through the process of finger knitting and finger crochet (there is an overlap!). Working with super chunky yarn is really fun and there are great things you can make. So.. if you love the look of this simple Finger Knitted Necklace shared today, as well as the clear step by step photos, then you should go and pop this book in your shopping basket ASAP!!! It is available on Amazon or Quarto as well as all good bookstores of course!
- No Needles Knitting: Easy Techniques and Projects for Making Quick and Cozy Modern Knits by Hand – on Amazon or Quarto
- Vickie Howell
- FRONTLIST | Nov 11, 2025 | On Sale Date: Nov 11, 2025
- ISBN: 9780760396759
- Quarry Books
Chain-gling – Velvety Chain Necklace
Quick craft, and a cute necklace chain—yes, please! In 30 minutes or less and with nothing but a foundation chain, turn those velvety scraps into an attractive accessory.
Make it and wear it today!
Supplies
- Giant yarn (#8), 100% polyester (tube), in one color Shown: Lion Brand Cover Story Cozy Lux 10.5 oz/300 g, 16 yd/15 m, 100% polyester)
- Hand-sewing needle and coordinating thread
- Two 30 mm jump rings
- Three 8 mm jump rings
- Lobster clasp
- Jewelry pliers
GAUGE
Approximately 2.5 stitches = 4″ (10 cm) in foundation chain stitch.
FINISHED MEASUREMENTS
23″ (58.5 cm) long, excluding jewelry findings.
This necklace sizing is customizable. Simply lengthen or shorten tails at both ends of the piece.
How to make your Chain Necklace
Fun Fact
The foundation chain stitch for hand knitting can also be called a finger-crocheted chain!
Leaving an 8″ (20 cm) tail, chain 3 as follows:
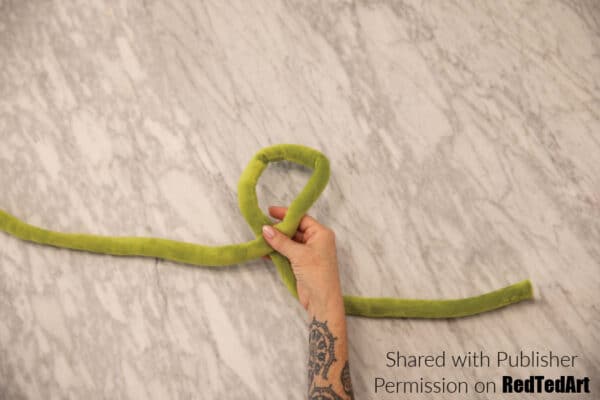
1. Leaving a 6″ (15 cm) tail for weaving in later, make slipknot by folding the yarn in a loop-de-loop (with the working yarn, aka the yarn connected to the ball) on top.

2. Bring the working yarn under the loop, then push it through, creating a new loop.
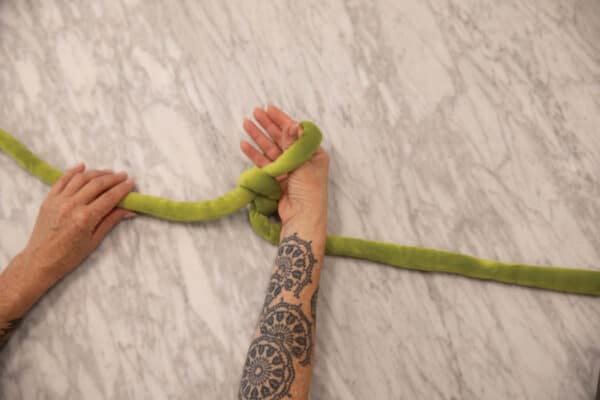
3. Pull so knot is taut, but loop is still large enough to fit over two of your fingers.
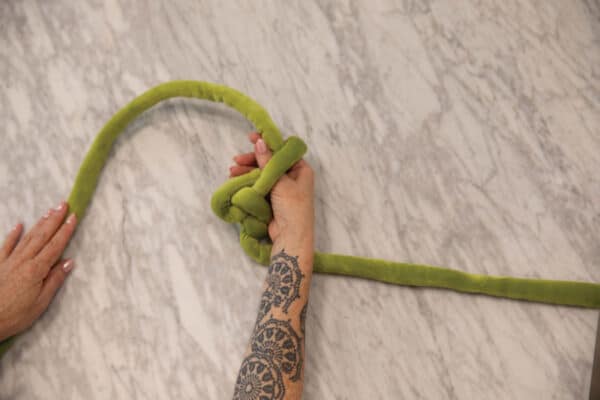
4. Place the slipknot loop over your “pincher” fingers (thumb and forefinger). Pull the working yarn through the loop.

5. One chain stitch created.
6. Continue pulling a working yarn loop through the loop on your fingers, until chain is desired length (or number of stitches).
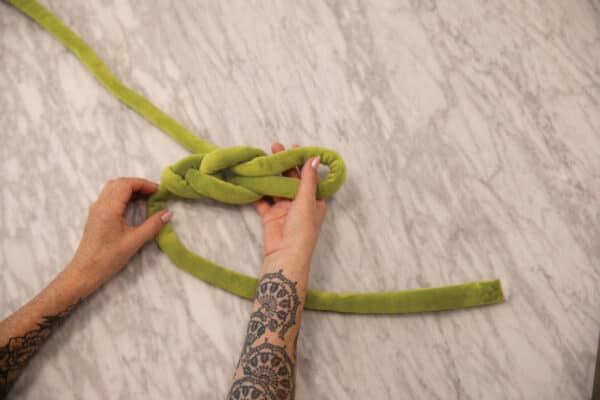
Fasten off and make a simple knot butted up against the last chain (this will mirror the knot on the opposite end of your chain, created by the beginning slip knot).
Cut yarn, leaving an 8″ (20 cm) tail.
Finishing & ASSEMBLE NECKLACE
- Pull about 1″ (2.5 cm) worth of stuff out of each end of the tube yarn.
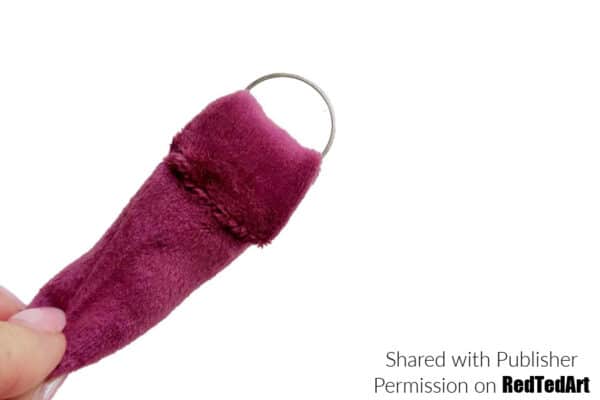
- Thread an end through one larger jump ring and fold unstuffed end over it; fold fabric inside for a clean finish.
- Using sewing thread and hand-sewing needle,
- stitch end down to the underside of yarn tail; repeat for opposite end.
- Using jewelry pliers, manufacturers’ instructions, and photo as a guide, attach smaller jump rings and lobster clasp.
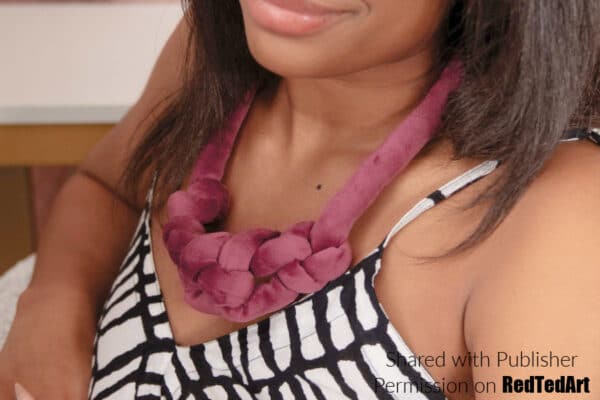
Isn’t it gorgeous? So fun and a great quick accessory to make and wear.
If you are inspired to take Finger Knitting to the next level, do check out Vickie’s new book on Amazon or Quarto today!
