
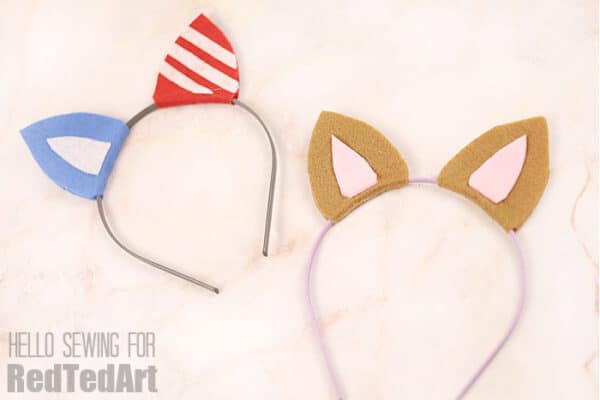
DIY Cat Ear Headband
Need an adorable DIY Cat Ear Headband in a hurry? A cute little Cat Headband for a last minute cat costume – whether for Halloween, a school play, or even the 4th July.. learn how to make these felt Cat Ears today! We love show casing different websites and blogs for you to discover! Today’s craft is by the wonderful Hello Sewing! I hope you enjoy it as much as I did!
Over to Hello Sewing!
Need to make an outfit for a party or Halloween in a hurry? We have the answer – a costume within minutes! One of the easiest costumes is a cat costume. All you need to make is the Cat Ear Headband. Black tights and a black long-sleeved T-shirt will complete the outfit for the cutest kitten look. The cat ear headbands suit everyone from three years upwards. All you need to purchase is the correct size headband, then use felt scraps from your stash to create the ears.
Choose a headband similar to the hair colour of the person for whom you are making the DIY cat ear headband. It allows the headband to blend with the hair so the cute little ears peek out, looking quite natural. The felt fabric colour chosen for the ears is up to you – you can go realistic with white ears with a pink lining, black ears with a white lining, or brown with a pale orange lining. Maybe you want to go wild and do purple ears with a lilac lining?
Supplies needed to make a Cat Headband

The cat ear pattern is a lovely freebie by Hello Sewing! Pop over to their website via the links provided to download it. You will also find some handy video tutorials there too, if you find those easier to follow!
- You’ll need a small quantity of felt – two pieces for the outer ear and a contrasting colour for the inner ear.
- Free printed cat ear headband pattern
- Fabric marking pen or a pencil or ballpoint pen will do
- Hot Glue Gun*
- A headband
* instead of a glue gun, you can of course also hand sew these! Hand sewing would give these little ears a lovely finish. But the glue gun is quick and easy!

How to make an Easy Cat Ears Headband
Step 1
Find the centre of the headband and make a mark on the underside of the headband. This will allow the ears to be placed equidistantly on either side of the centre so you don’t have crooked kitty ears.

Step 2 – Mark out the free cat ear pattern
Print and cut out the FREE cat ear headband pattern supplied for the kitty ear itself as well as the inner ear piece. Mark around the pattern using a fabric marking pen onto the chosen colour felt. Cut out two kitty ears with the base of the ear on the fold of the felt.

Step 3 – Cut out the ears
Cut out two of the inner ear pieces in your colour of choice.

Step 4 – position the ear in the correct place and glue
Set up your glue gun to warm up while you mark where you want to place the ear’s inner edge from the headband’s centre point. One inch (2.5 cm) should be sufficient, making the total width between the ears 2 inches (5 cm).
Step 5
Use a small piece of sandpaper over the section on the headband where you have decided to place the ears – if it’s a plastic headband, the area where the ear folds and attaches to the headband needs to be a little rough so the glue sticks well and you don’t risk the ears sliding around on the headband. If the headband is already covered in fabric this won’t be necessary.

Step 6
Lay out one ear, and using the glue gun, place a line of glue right around the edge of the ear and some across the centre fold where it will touch the headband.
Step 7
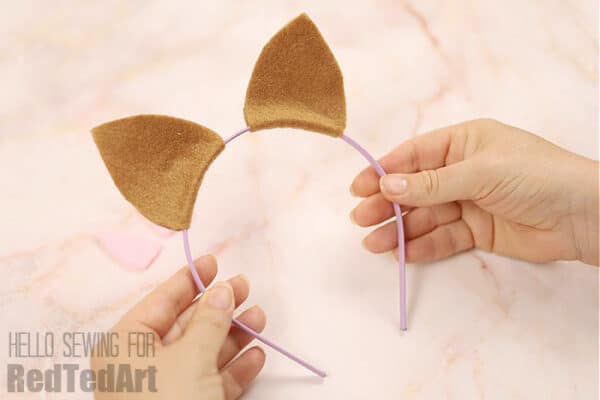
Place the inner edge of the fold of the ear on the point you marked and fold the ear up and over the headband. Line up the edges and press them together to seal. Make sure the glue is attached to the headband across the fold – you don’t want the ear shifting position on the headband. Repeat the process with the other ear.

Step 8
Take an inner ear piece and glue around the edges, then place it down centrally on the cat ear. Press down firmly to attach. Repeat with the other ear, so you have two cute cat ears with a light lining.
Voila, your DIY cat ears are ready to use. Have fun with them.
Now you can have fun playing with the colours and the designs! You can so easily adapt it for different events – like this adorable 4th July Headband! Isn’t it cute?
A bit thank you to Hello Sewing for sharing this cute craft as well as printable pattern with us today!
Happy making!