
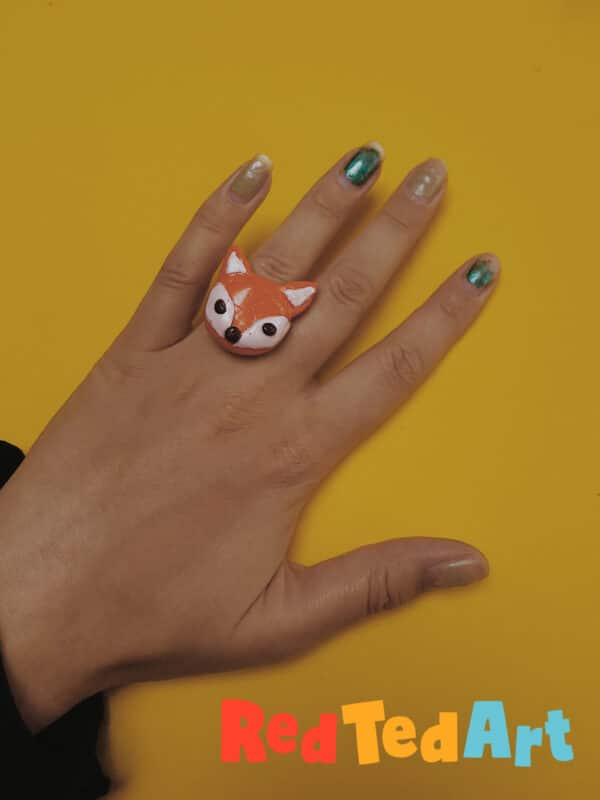
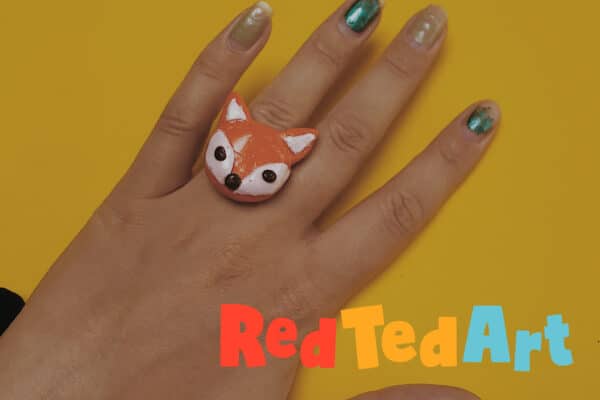
How to make a Fox Ring DIY
Chunky clay rings will forever be a gorgeous fashion statement and the best thing about them is, they’re the sort of thing you can make at home and they still come out looking super cute and professional! This DIY Fox Ring is a perfect example of that. It doesn’t take an expert artist to make and it once finished it’s definitely something you can wear out and about whether you’re old or young. It’s an adorable addition to whatever your choice of outfit is.
Materials Needed For DIY Fox Clay Ring:
- Polymer clay
- Metal adjustable ring
- Very strong PVA glue
- Clear nail varnish or any other type of varnish
How To Make It:
Making the base:
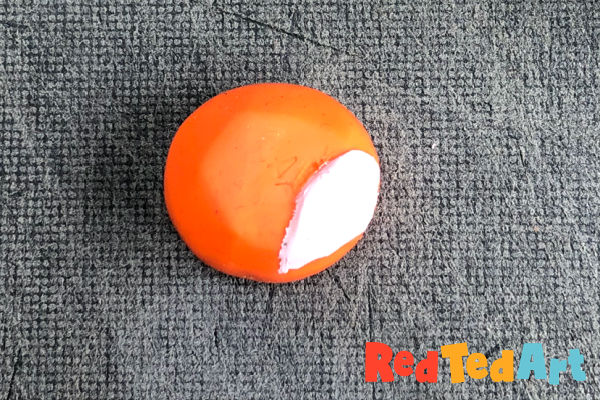
Start by making a round disk that will be the base for your ring out of the polymer clay.
(As you can see we’ve already started the next steps here!)
Make sure its smooth and the underneath is fairly flat so that the ring can hold into it easily.
Cut out your shapes:

Cut out two leaf like shapes.
This will be make the white detailing on the fox’s face.
Stick that to the clay base:
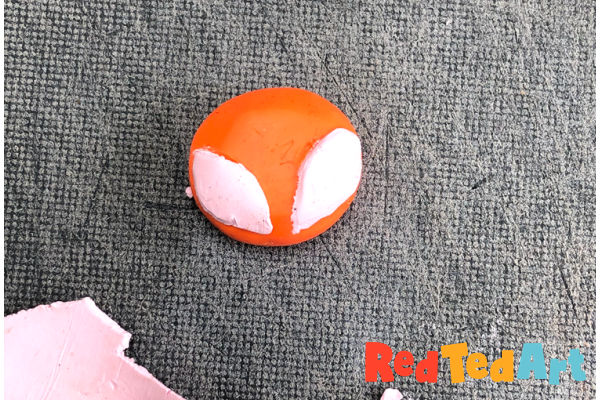
Press the pink shapes down to stick them to the base of your fox.
make sure to position on the Lowe half, angled downwards as above.
Add the ears:
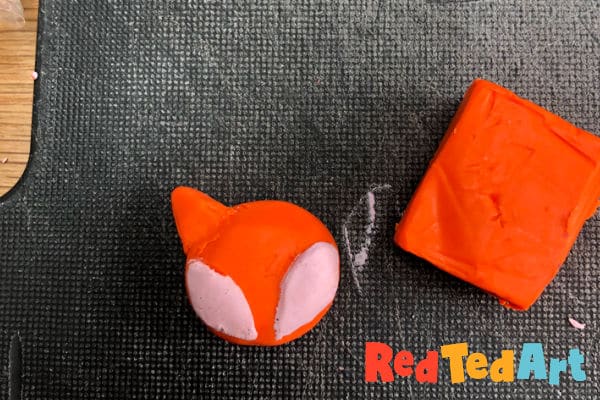
Mold a triangular shape out of the orange clay.
Press it to the side of the disk to create the ears.
Make sure to mold it properly onto the base so it doesn’t fall off when it is baked! (You can do this by scraping the clay down to fuse it to the disk)
Carve the ear details
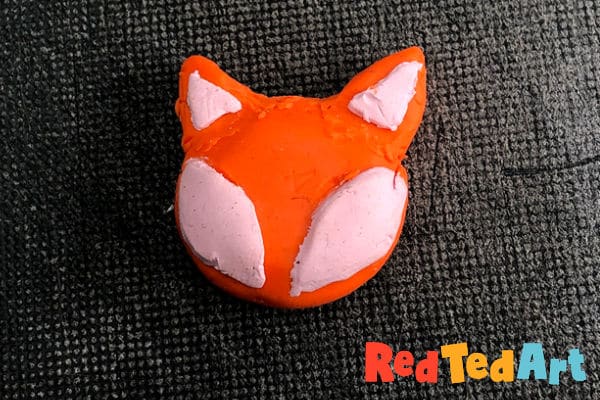
Carve triangular shapes from the pink clay.
Press the pink shapes onto the ears to add the detail.
Make sure the triangles are smaller than the actual ears so you can see the orange behind.
Use brown clay to add the eyes and the nose:
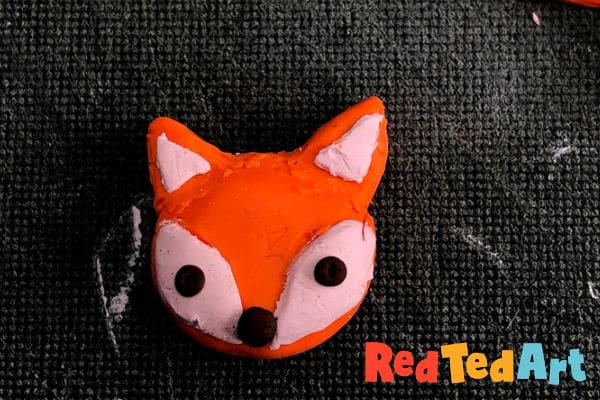
You can roll tiny balls of brown clay and press them onto your fox face to make eyes and a nose.
Feel free to indent them to add extra details.
Indent the clay:
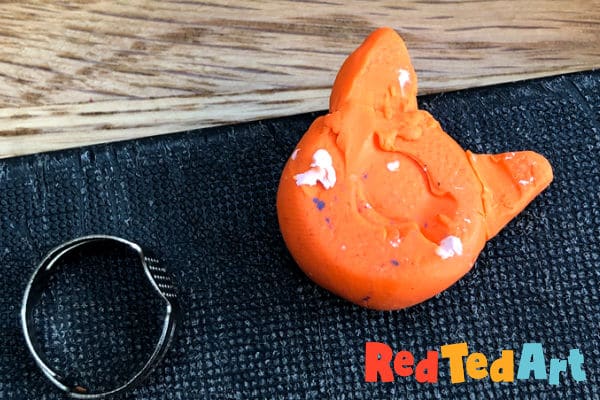
Press your ring into the back of your clay fox head to indent it.
When it’s baked it will stick more easily that way.
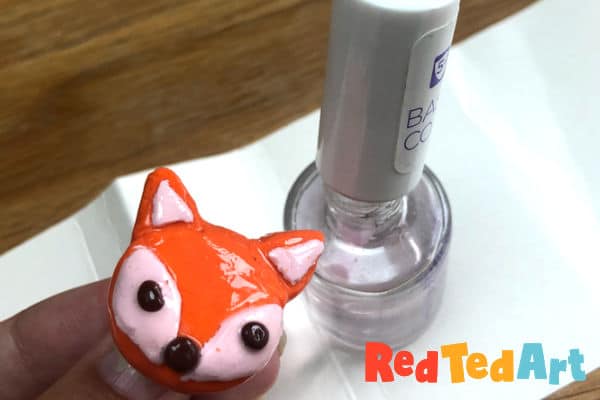
Bake in the oven, glue and coat in varnish
Bake at 120C (check the instructions on your clay though to make sure you bake at the right temperature).
You can then glue the clay head to your ring using very strong PVA glue and leave it to dry fully.
Then coat in varnish of your choice, we used clear nail varnish which worked well!
Leave to dry.
If you enjoyed this DIY Ring Craft, take peak at our other Ring Designs too!
We have lots more wonderful Fox Crafts here:
