Red Ted Art - Make crafting with kids easy & fun

Cute & Easy Crafts for Kids

  • Home
  • START HERE
  • Preschool Crafts
  • Easy Crafts for Kids
  • Paper Crafts
  • Free Printables
  • About
  • Join Our Newsletter
  • Cookies, Privacy Policies & Disclosure

How to… make a dolly (from onesies?) (Guest Post)

June 14, 2021

I have been wanting to make a dolly for Pip Squeak for a number of weeks now. The idea was to use some her onesies and make them into a keepsake doll (as much as a keepsake for me as for her!!). And although, I don’t think making a doll is hard, you do need to come up with a lovely design – design, in this case is everything! And I just haven’t had the time to sit down and “draw”. And then I saw Nicole at 60 Piggies.

Oh my oh my oh my. Why design something new, when a gorgeous little doll is already there? Nicole kindly agreed to share it with us. Now… if you haven’t been to ย 60 Piggies, you really must go and take a look. Nicole is wonderfully creative – she bakes and crafts with her kids, she shares with your her thoughts AND takes gorgeous photos in the process. A really lovely blog to browse through and be inspired by! Go on. Hop over and take a look. You will not regret it!

Now ย to Nicole and her lovely Keepsake Doll Pattern:

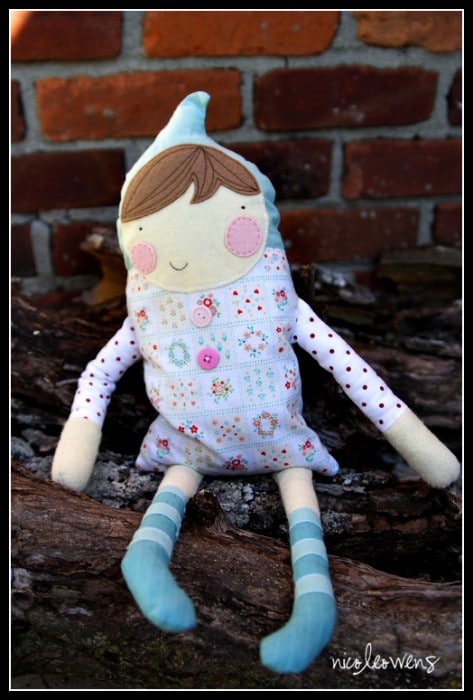
as you may recall, a couple weeks [now a couple of months] ago i stitched together this doll for elle’s birthday.

This gorgeous guest post was first shared in Jan 2011!

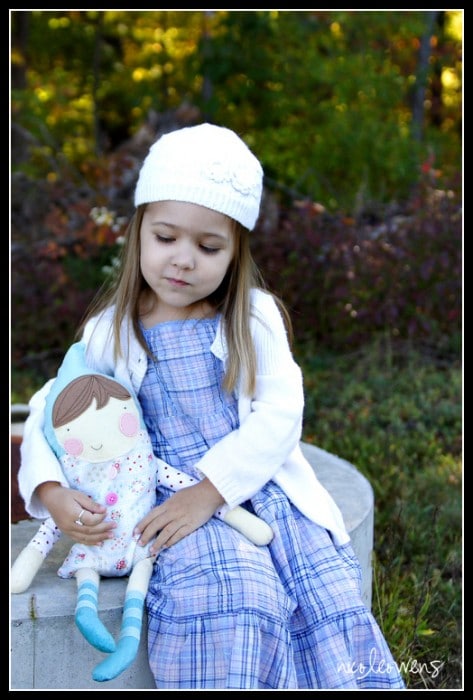
they have become fast friends. elle calls her softie “frost” and totes her along just about everywhere.

want to make your own? here’s a basic doll making tutorial…

materials:

  • felted wool (3 colors for skin, cheeks, and hair)
  • variety of fabric (printed cotton wovens, corduroy, etc)
  • variety of colored thread
  • stuffing material
  • dried beans, optional
  • fusing material, such as heat n bond [or bondaweb]

1. sketch and cut out the pattern. i use heavier stock magazine/catalog pages for durability, but you may prefer tissue paper for ease of pinning.

here’s the general pattern i’ve drawn up; feel free to use this one or alter as desired.
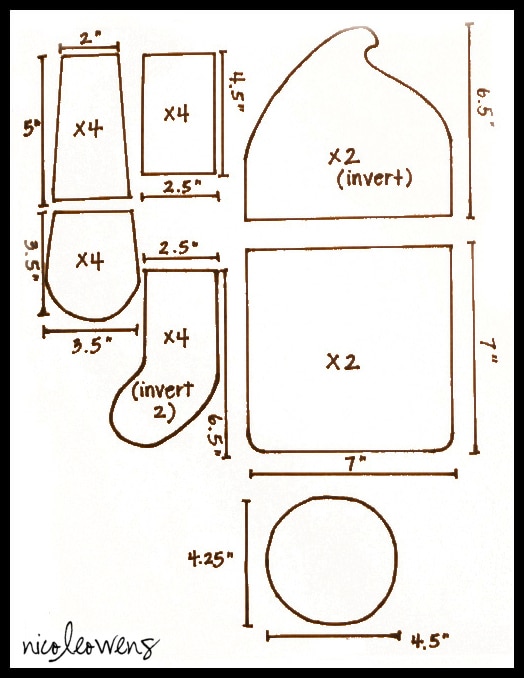
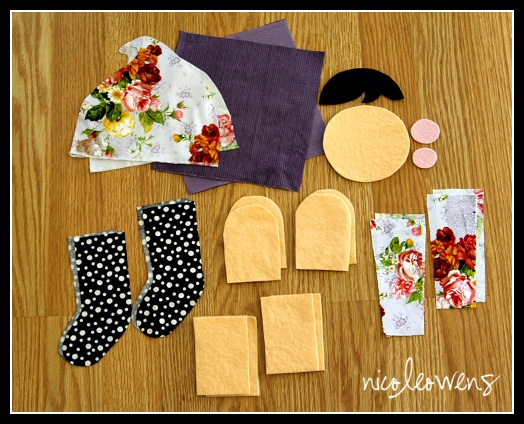
2. pin your pattern pieces on the fabric/felted wool and cut out each piece (unless you’d prefer to go this route** in step 5, as i often do). you’ll also need to cut out a wool piece for the hair, as well as two cheek rounds. i like my rounds to be different sizes for a touch of whimsy, but if the type-A in you brandishes a heavy stick at the thought of this, feel free to make yours identical.

(note: seam allowances are included, so no need to add your own unless you’d like a slightly larger doll.)

you should end up with something like this:
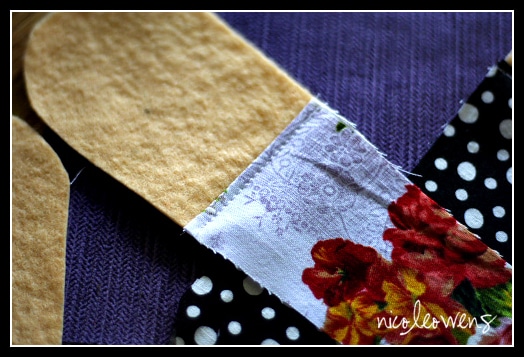
3. pair a hand piece with a sleeve piece; pin right sides together and sew.
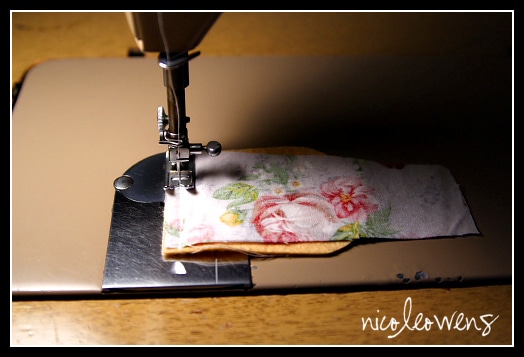
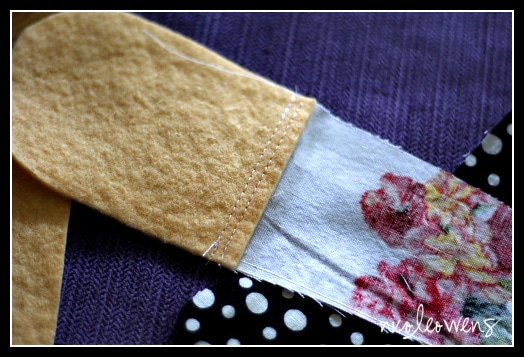
open, press the seam flat, and topstitch.

the right side should look like this:

and the underside like so:
repeat with the remaining arm pieces and the leg/sock pieces.

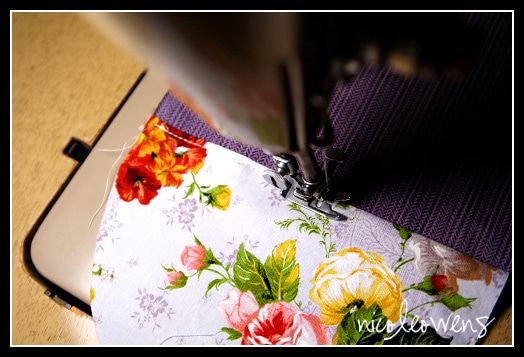
4. pair a hood and body piece, right sides together, and sew. open, press, and topstitch. repeat with the remaining hood and body piece.
5. fuse one side of the heat n bond onto the backs of the felted wool face, cheeks, and hair pieces. **instead of cutting out the wool pieces separately (in step 2), i personally like to trace the pattern onto the heat n bond, cut out the pieces with a slight margin, fuse them on to felted wool, and then cut out the fusing and wool together.

peel off the waxed paper backing from the face, fuse to the doll’s front piece, and topstitch around the perimeter. repeat with the hair and cheek rounds; topstitch decoratively as desired. (on elle’s softie i hand-stitched the cheeks; on penelope–below–i machine-stitched a circular swirly.)
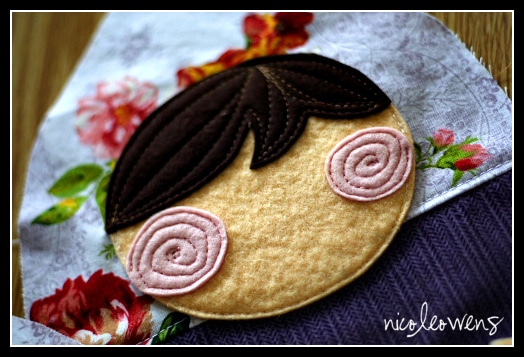
now you should have this:
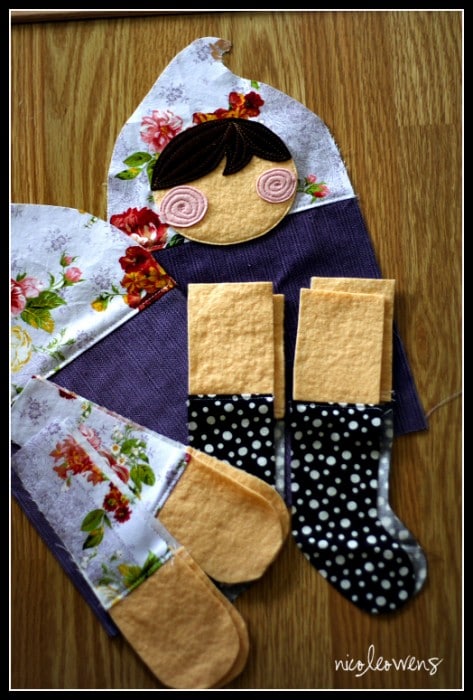
6. pair up the arm pieces and sew right sides together. sew a second seam to reinforce the stitching. trim seam allowances and flip right-side out. repeat with the legs.

with cotton-ball size puffs, stuff the arms and legs with your stuffing material. push each piece in with a pencil firmly to the end of the appendage; if you try to stuff too many puffs at once or too large of a piece of stuffing, you’ll end up with lumps.

7. baste stitch the arms and legs where you’d like them to attach on the right side of the doll’s front piece. the appendages should all be sewn facing inward at this point.

8. pin front and back pieces, right-sides together, with the arms/legs sandwiched in between (the sandwiching is the tricky bit). sew together along the outer edges, leaving about a 3 inch space to turn the doll right side out. reinforce your stitching by sewing back over the seam.

9. turn the doll right side out and say hello to your almost-completed softie.
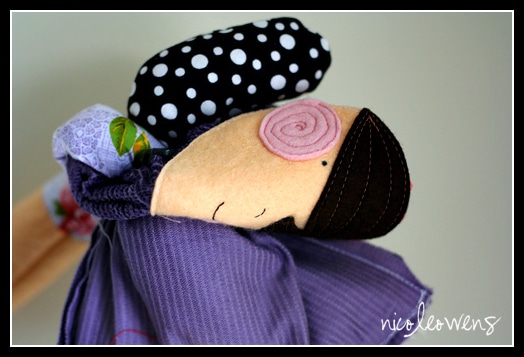
10. stuff body with small tufts of stuffing (if you want the softie to be self-sitting, you can fill the bottom fourth with dried beans or a similar weighted filling).

11. hand stitch the gap closed, and voila. meet penelope.
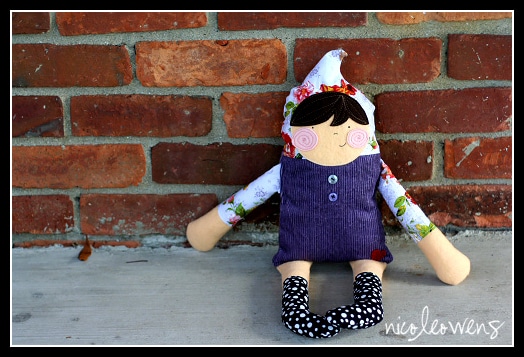
All I can say is aaaaah. I want one… and will be making one (but maybe stitching mine by hand!). Thank you Nicole!

More great sewing patterns for all ages here:

«
»

Filed Under: How To's, Recycling, Sewing 39 Comments

Comments

  1. Make do mum says

    January 21, 2011 at 10:16 am

    Oh I love it, will have to dust off the sewing machine for this one. Only problem is that going through K’s tiny babygros will make my broody!

    Reply
  2. Red Ted Art says

    January 21, 2011 at 10:24 am

    Oh very good point… it is “dangerous” handling baby clothes… ๐Ÿ˜‰

    Reply
  3. Chris says

    January 21, 2011 at 2:17 pm

    How absolutely gorgeous! I think my daughter would love making these with me. She is very reluctant to let go of favourite shirts and dresses so these could be a solution!

    Reply
    • Red Ted Art says

      January 21, 2011 at 4:27 pm

      Chris – I believe your to do list is indeed growing!!!! Would love to see you finished article if you do manage to make one with DD… I made a doll as a teenager (with help) that I love and still have today. The kids now have it…

      Reply
  4. maryanne says

    January 21, 2011 at 3:34 pm

    This is darling! Thanks for sharing your pattern!

    Reply
  5. Alethea says

    January 21, 2011 at 7:07 pm

    Those are gorgeous. I may attempt a ‘boy’ version for the Little Man!

    Reply
  6. Red Ted Art says

    January 21, 2011 at 7:11 pm

    Ooh what a great idea to try and make a boy version! Do send us a link or picture if you do make one!!!

    Reply
  7. Valerie @ Frugal Family Fun Blog says

    January 21, 2011 at 8:24 pm

    So cute!!!! What a great guest post — my daughters would LOVE some of these! I’ll be busy for awhile… ๐Ÿ˜‰

    Reply
  8. Little Wonders' Days says

    January 23, 2011 at 4:35 pm

    Great post. What a cute doll.

    Reply
  9. creativejewishmom/sara says

    January 25, 2011 at 9:28 am

    Great doll, love it! Thanks so very much for sharing on Craft Schooling Sunday!

    Reply
  10. Amanda says

    January 25, 2011 at 11:54 am

    Such a cute doll, thanks for sharing!

    Reply
  11. Lorajean says

    January 26, 2011 at 4:19 am

    This is so adorable!! Thanks for sharing!!

    Reply
  12. Sarah says

    January 26, 2011 at 3:07 pm

    Adorable!!! I sooo need to make on of these for each of kids! They would love them!!! Thanks for this great tutorial!

    Reply
  13. cathy@nurturestore says

    January 26, 2011 at 6:04 pm

    Thanks for linking up to the Play Academy Maggy (but I think the comment I left on this a few days ago has disappeared?)

    Reply
  14. Red Ted Art says

    January 26, 2011 at 6:10 pm

    Oh no Cathy! No idea what happened there.. sorry if it got deleted by accident (can’t think how else it would disappear…) will see if I can find it, but my trash folder is so full of spam… grrrr

    Reply
  15. maleahbliss says

    January 27, 2011 at 1:00 am

    I love these kind of dolls! Can’t wait till I have a little girl to appreciate one! I’d love for you to link up to my new linky party, Tute {Yourself} Tuesday!
    LittleEme.blogspot.com
    The linky will be open until this evening. ๐Ÿ™‚

    Reply
  16. Red Ted Art says

    January 27, 2011 at 8:19 am

    I did try and come and visit, but couldnโ€™t see the link up?

    Reply
  17. Jennifer @ Life with the Lebedas says

    January 27, 2011 at 3:19 pm

    That is too precious!
    Thanks for linking up to Craftify Thursday! ;D
    Have a great day!
    Jennifer

    Reply
  18. Love and Lollipops says

    January 27, 2011 at 9:23 pm

    Oh how lovely lovely lovely!

    Reply
  19. Sheri@childmade.com says

    January 28, 2011 at 6:12 am

    She is adorable! I love the ‘softie’ dolls over the manufactured ones. Thanks for linking!

    Reply
  20. Anne says

    January 28, 2011 at 2:59 pm

    I love love LOVE this dollie!!! I linked to your post on Craft Gossip Sewing: http://sewing.craftgossip.com/free-pattern-sweet-soft-dollie/2011/01/28/

    –Anne

    Reply
  21. Kath Parklover says

    January 28, 2011 at 4:48 pm

    Oh, those are just fabulous. I’m itching to have a go!

    Reply
  22. monica says

    January 28, 2011 at 10:56 pm

    So great, I love at first sight!!!! I only have two boys but i’m doing one for me, ๐Ÿ™‚

    Reply
  23. yenling says

    February 1, 2011 at 11:34 pm

    wow! love it !! i’m going to make for my 3 girls !! thanks for share ๐Ÿ™‚

    Reply
  24. AnnaDrai says

    February 4, 2011 at 10:19 am

    lovely! thanks for sharing ๐Ÿ™‚

    Reply
  25. Beth says

    August 27, 2011 at 1:01 pm

    Such a cute dolly! Thanks for sharing the how-to ๐Ÿ™‚

    Reply
  26. Laura says

    August 27, 2011 at 5:45 pm

    How sweet! What a fun way to reuse old onesies.

    Reply
  27. Fi says

    August 29, 2011 at 8:16 pm

    This is so, so lovely! I’m going to try and make one, possibly adapt it a little for my daughters 2nd birthday! Thanks so much for sharing!

    Reply
  28. Red Ted Art says

    August 29, 2011 at 8:21 pm

    Snap! Something special about 2nd birthdays… I am making one too.. if I can get my machine working again!!!

    Reply
  29. Ligoakoma says

    August 29, 2011 at 10:51 pm

    So lovely and gorgeous! I keep a little dress from my daughter just because I couldn’t throw it away. Now I know what to do with it. Many thanks.

    Reply
  30. Love In The Nest says

    August 30, 2011 at 12:58 pm

    This is such a lovely idea! I have bags full of E’s little clothes, I’m going to have a go at one of these once I have brushed up my sewing skills!

    Reply
  31. Sara says

    August 31, 2011 at 2:35 am

    So cute!! Would LOVE it if you would share this at my turquoise lovin’ party going on right now! ๐Ÿ˜‰

    Reply
  32. Red Ted Art says

    August 31, 2011 at 7:05 am

    Thanks for the invite and linked!!

    Reply
  33. Hilary says

    August 31, 2011 at 2:28 pm

    So cute. I’ve been looking for ideas to make a doll. Thanks.

    Reply
  34. Jenn Erickson/Rook No. 17 says

    September 8, 2011 at 12:44 am

    Such a wonderful, adorable doll and a great tutorial too! So glad I saw your project featured over at Milk & Cuddles!

    Jenn/Rook No. 17

    Reply
  35. Carly says

    January 9, 2012 at 3:14 pm

    Oh my, this is so gorgeous! Not sure I would do such a good job but I LOVE it!

    Reply
    • Red Ted Art says

      January 9, 2012 at 3:32 pm

      It is lovely, isn’t it?!

      Reply

Trackbacks

  1. Red Ted Art's Blog » Blog Archive » How to… make a cute Keepsake Bunny from Onesies (Guest Post) says:
    February 25, 2011 at 4:22 am

    […] our cute cute onesies Doll? Well, if dolls are not your thing, maybe bunnies are? Especially now that Easter is coming up! I […]

    Reply
  2. February Link Luve | All My Loose Ends says:
    February 27, 2011 at 12:05 pm

    […] How to make a dolly from onesies–a perfect project for a sentimental mama reluctant to part with no longer needed baby things […]

    Reply

Leave a Reply Cancel reply

Your email address will not be published. Required fields are marked *

Recipe Rating


Welcome!

Welcome

Hello! I am Maggy and I love all things crafty and sharing my craft ideas and how tos.

The aim of this site is to provide easy, do-able and fun crafts for all ages.

Categories

Archives

Crafty Blogs

Copyright © 2022 ยท Website Design By Jumping Jax Designs