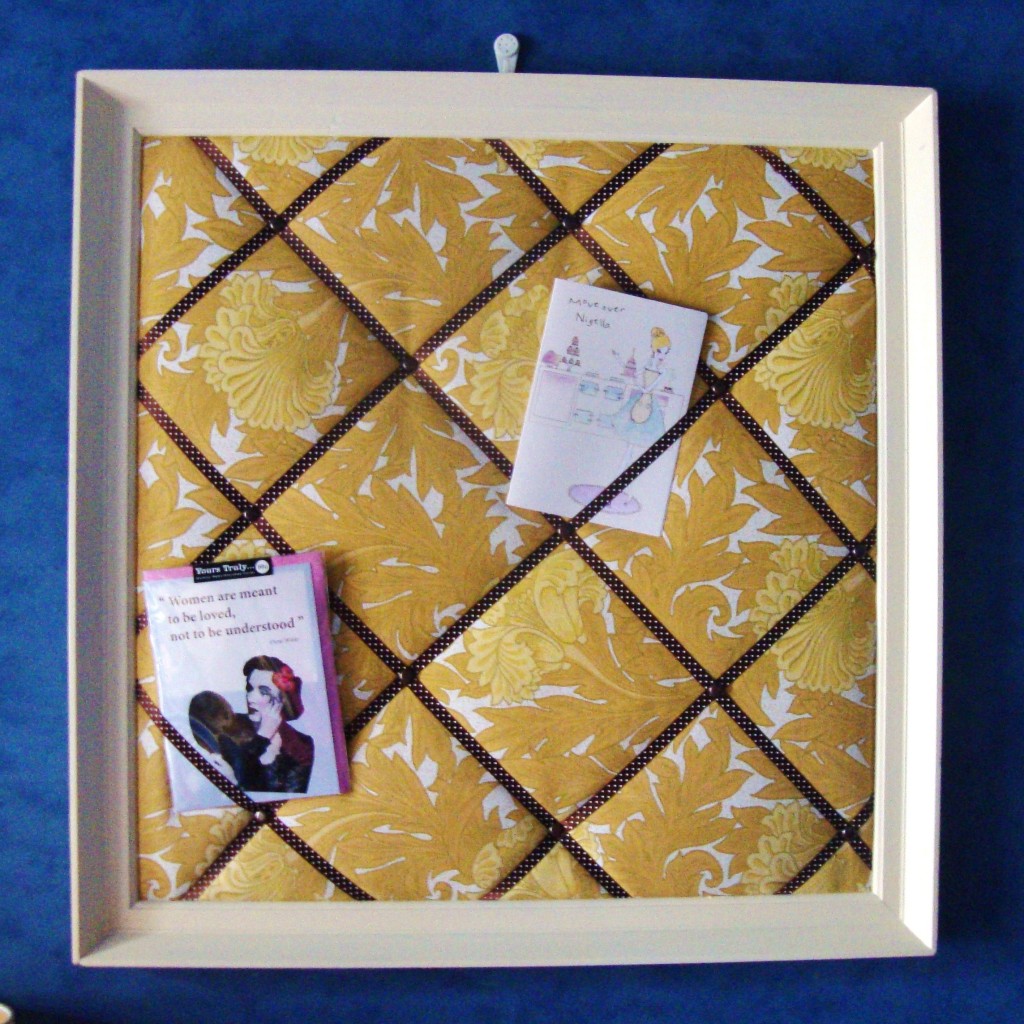
How to… make a Fabric Notice Board (Guest Post)

 Welcome back to this week’s “How To”, we have a “How to Make a Fabric Notice Board” for you.. What to do with an old frame? Upcycle of course! The lovely Kelly Innes from Domestic Goddesque is visiting again (she shared her fabulous Peg Wreath a couple of weeks ago). If you didn’t get a chance to visit her blog then, do take a look today. It really is a great all rounder blog for any mum – from recipes, to toddler tantrums, to crafts! And today we get to see her beautifully upcycled noticed board… great for any time of year, but make one now and use it for your Christmas cards?! Over to Kelly!
Making a fabric notice board is easier than you think. I know, because I recently made one. I saw the most fabulous frame in a charity shop and just knew this was exactly what I wanted to do with it!
To make one too, just follow my (slightly vague) instructions:
Materials: A frame (& sanding paper), paint, backing board, wadding/ old fleece, fabric, staple gun, hot glue gun (optional), ribbon, upholstery pins.
Firstly, you will need to remove the backing board from your frame. If you don’t have one, then you will need to get one: most DIY stores cut plywood to size, or you could ask at your local framing shop. To prepare your frame, sand down thoroughly and clean off with sugar soap to leave it grease free. Once dry, apply a couple of coats of your chosen paint (I used spray gloss.)
With your frame ready to go, take your backing board (it helps if it is about 5mm smaller than the frame.) and use it as a template. Cut a piece of wadding (I used quilter’s batting, but you could use an old towel or fleece) the same size as your board.
Next you need to cut from your chosen fabric a piece that is 5cm larger than your board on all sides.
Turn your fabric over so that the right side is against the table. Lay the wadding centred on the top of the fabric, and the board (right-side-down) on top of that. Now you will need to secure the excess fabric to the back of the board. I find that the best thing to do is to use a hot glue gun to hold the fabric in place and then staple the fabric (fold the raw edge over for a neat finish) for added security, which is particularly important at the corners where you have more layers of fabric.
Once that is done, you need to cut up your ribbon. I do this by eye, laying it on top of the board until I am happy before re-laying the ribbon (right-side down) on the table and putting the covered board (right-side-down) on top. Once again, secure in place with glue then staples.
Now you need to firmly whack an upholstery pin into each of the points at which your ribbons cross over each other.
Finally, put the board back into the frame, securing with small nails around the sides, and (if it hasn’t already been done) string your frame. And hang it. Then stick a few pretty things in it, stand back and feel just a little bit smug.
What do you think? The DIY Notice Board looks fabulous, doesn’t it? And don’t forget to visit Domestic Goddesque!
If you liked this project, you may also like this DIY Tufted Headboard. Take a look!

