***New to Red Ted Art?! Would LOVE for you to either subscribe to the blog (top right hand corner) or join me on Facebook – never miss out on the latest groovy craft again!***
I have amended the instructions from Em slightly, as I found you could simplify it just a little, to make it more suitable for homecrafting. But overall it is all Em’s brainchild.
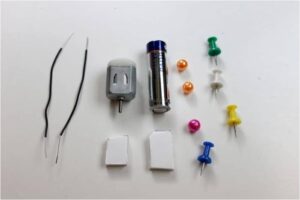
Materials: 2 x bits of wire, 1 x 3v motor, 1 x AA battery, 3 x beads (a third one too if wanted), 2 x pieces of foamboard (or more if desired), Some legs (your choice what materials – we used paper clips, the instructions so toothbrush heads, the above show drawing pins). A Hot Glue Gun.
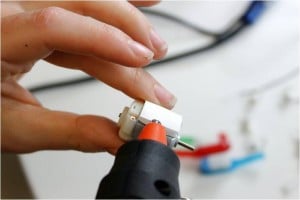
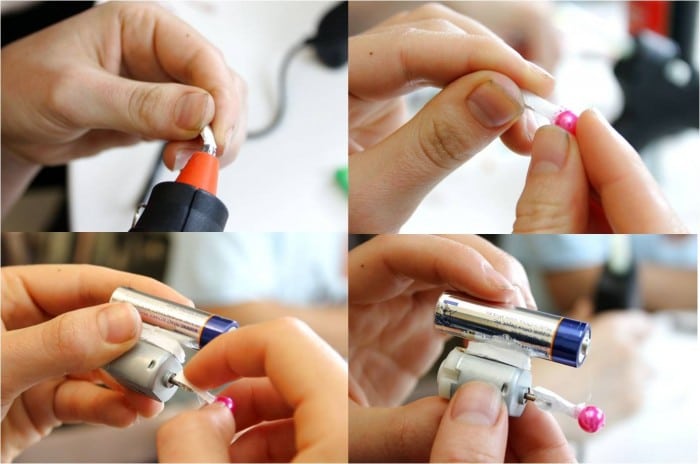
1. Securing the battery to your motor: Glue the bigger piece of foamboard onto the Motor with the metal contacts at the top. Glue the bigger piece of foamboard onto the Motor with the metal contacts at the top.
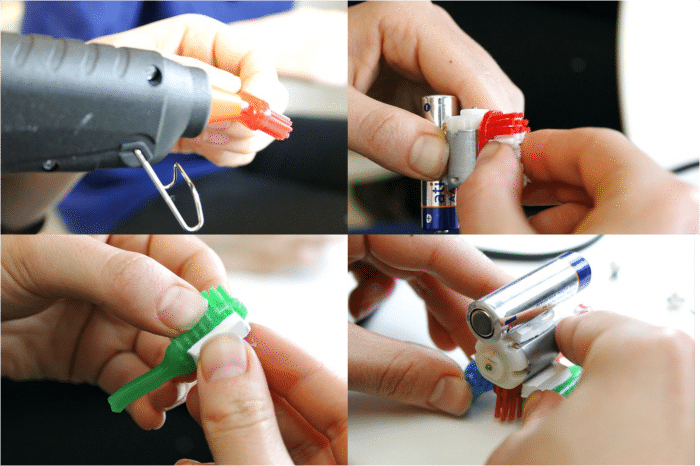
2. Unbalancer: Now this step may seem a little random.. but what you are doing is “unbalancing” the motor, which in turn creates the movement of the little thing. So make sure you don’t skip this bit! Glue a small piece of foam board onto the end of the motor to help unbalance your robot. You can also stick a bead on if you wish. Leave this all to dry for a couple of minutes.
3. Legs: You now need to stick your robots legs onto the bottom of the motor. If using toothbrushes, you might want to stick some foamboard in between. Leave to dry for a couple of minutes.
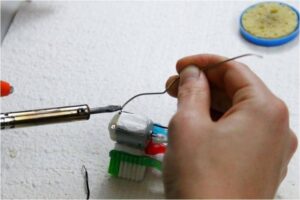
4. Connecting to your Motor: You can either “twist” them on or solder them on. Soldering will probably give your little robot more longevity, but isn’t strictly necessary.
Take your pieces of wire and solder one of each onto a metal contact on the motor. This is quite fiddly so be careful. The best technique is to hold the iron on the metal Contact and bring the solder towards it, letting it melt onto the contact and form a seal. Make sure that you frequently wipe the solder iron with a sponge to get any burnt solder off it.
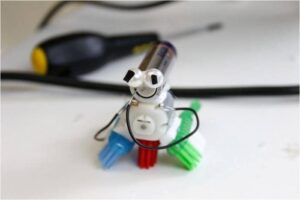
At this point your little robot should look something like this.
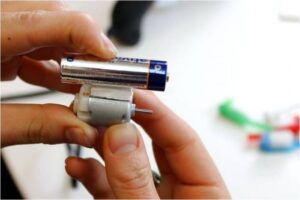
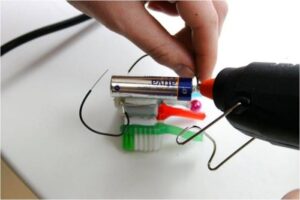
5. Connecting to the Battery: Using your hot glue one of your wires to one end of your battery, your choice which one. It is very important that you create a contact between the wire and the battery – too much glue and you will seal the wire… for some reason, I “just couldn’t get this bit right”, so on MY mini robot, I used some electrical tape. Glueing is better though.
6. Eyes: Now stick your robot’s eyes on the appropriate end of the battery. Either end is fine, just choose and end that you like!
7. Final Connection: Now to make your robot move! Take your second wire and stick it to the non wired end of your battery using some tape. By doing this rather than using the glue gun you have flexibility on when the motor is on or off.
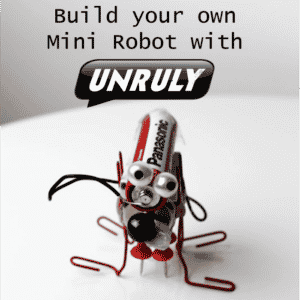
And there you have it! Your own mini robot!
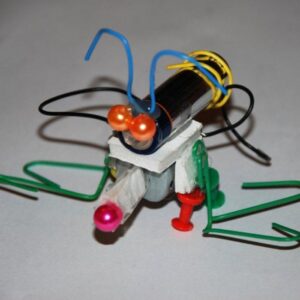
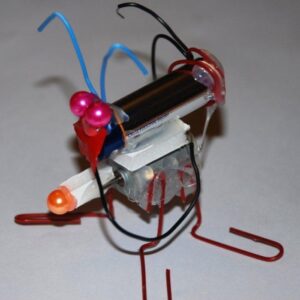
Here is what we made:
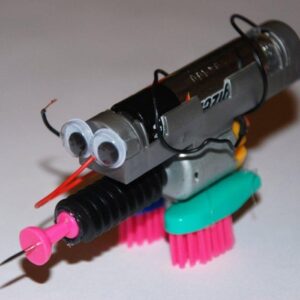
And the neighbour’s boy saw ours. Went off. Found “some bits” and made:
And he is only 8!!!! How cool?
A little video of them in action:
Emma @Mummymummymum says
oh wow, that looks amazing! I want to make one. xx
coolgurl says
ha the robot worked great
Holie johnson says
hay where did u learn how to make theses things my son loved it and he’s 3
Jason says
How do u turn it on ?
Red Ted Art says
You connect the wires and then disconnect them again to switch it off.
jhon says
where can i get the motor and i got a 1.5-3vdc motor is that good? plz reply right away
Red Ted Art says
Have you tried Amazon or your local hardware store?
Isil says
These look amazing and great fun!
Red Ted Art says
Thank you Emma and Isil. They were great to make and my 2yrs old in particularly loved playing with it.. It was called our bee (due to the sound it makes when on!)
camille says
love these, we made \’bristlebots\’ a couple of years ago from tooth brush heads and watch batteries, the kids loved how fast they moved.
Red Ted Art says
Oooh they sound fun! 🙂 great idea to use watch batteries!
PinkOddy says
That is fab! You must be very proud.
Happy new year.
Red Ted Art says
Thank you! We had lost of fun! And it is easier than you think!
Milly Gandy says
My Son\’s 7th Birthday this weekend and we\’re having a robot party … Great timing, I am sure we can squeeze this one in 😉 off to find some cheap motors …..
Jignesh M Solanki says
Did it work? I am also planning for birthday party
Red Ted Art says
Yes, you can see the little video?
claire says
These look great,Thanks for joining us at Creative Mondays 🙂
Janel @ Hating Martha says
These are great! I made one of these for a library program last summer and the kids just loved watching it walking around. Great post!
Michelle Breum says
These look so fun!!!! My kids have hex bugs we bought from the store. These robots remind of them. We ARE going to make these. Thanks for sharing!
MillyGandy says
We did it! Chaos, noise, pizza, Lego robots and a mini electronics project … what more can a 7yo want for his birthday party. Total joy 🙂
Lots more inspiration
http://www.bbc.co.uk/bbcone/wallaceandgromit/hands-on/
Red Ted Art says
Oh wow! Sounds fabulous!! Have you got a picture!?
Kari says
Where\’d you buy your motors?
Red Ted Art says
In the UK:
http://www.rapidonline.com/Electrical-Power/3V-13100-Rpm-Dc-Motor-37-0140/?sid=c90f44ef-fed6-41df-b63b-97d155687604
Or http://www.maplin.co.uk/small-motor-3738
Max says
I don\’t have a soldering iron, how can I do this.
Red Ted Art says
Yes, you can make this without a soldering iron! The official instructions say use one, but you can attach the wires to the motor by twisting the wire on and attach the wire to the battery with tape and the hot glue gun. My robot does not use a soldering iron! Have fun!
Helen says
Hello, just wanted to say \’thank you sooooo much\’ for these instructions. We spent a lovely afternoon making one with our son yesterday and he is thrilled to pieces with the robot he made. He\’s even taken it to \’show and tell\’ at school today. Thank you so much!
Red Ted Art says
Aaaaah I am SOOOO CHUFFED! Thank you for coming back and letting me know! Hooray for Mini Robots!
Lindsey says
Awesome!! I have been searching for hours for a science project for my 3rd grader! We were given a motor and 2 AA batteries and told to do something with it. This will be perfect for her! Thank You!!
dharm says
it was really awesome i would really like to make one.
Darci the STEM Mom says
Amazing project. I’m loving the idea of a mini robot! I am looking for great engineering and technology posts for a week-long linky I’m hosting this week. Would love if you could link up this idea!
http://www.stemmom.org/2013/02/stem-themed-linky-party-2.html
Darci the STEM Mom
Red Ted Art says
Oooh thanks will pop by!
Jola says
This is awesome! 🙂
Hyman Barrett says
Most important thing to be kept in mind when working with soldering iron is not to touch the tip of the iron as it is extremely hot. Soldering material used for the purpose is an alloy of tin and lead and is called flux. Before you put solder over the required area, heat up the surface to be soldered by touching the tip of the hot iron. Application of the solder is called “tinning”since percentage of tin is more in the flux. However, flux can be of various types depending upon the things to be soldered.
Red Ted Art says
Or you could just not use a soldering iron, but a hot glue gun!
babise says
hey they are cool
vince says
does it walk?
Red Ted Art says
They buzz around. Have added a little (old) clip of them in action.
Kasturi Natalie says
hey,can you tell me,what do i have to do to move it?
Red Ted Art says
If you have made it correctly, it should move by itself, when you attach the final wire.
Kasturi Natalie says
um,okay..and to stop it moving?
Red Ted Art says
You remove the little wire
Sofi says
We’re can I find the 1x3v motor?
Red Ted Art says
Try on Amazon? They seem to have EVERYTHING these days!
mano kick says
u can make male and female bees . it’s looks awesome !!!!!!
Jenny @ The Brick Castle says
It’s so creative and nice, I can’t wait for my 2 youngest to reach this stage – I loved it when my teenagers were experimenting with making robots 🙂
jeannine: waddleeahchaa says
My son made a very similar robot all by himself. He asked for a toothbrush and found one of those small round batteries. Then, he took apart one of his broken airplane toys. He put them all together and connected the wires to the battery. It worked! He’s so much smater than me. 🙂
marzia says
mine isnt working!! can u tell me the way how it moves??
Red Ted Art says
Have you connect the wires correctly?
emeka says
that is exactly what i meant
emeka says
because it is not connected well
clement says
can i use AAA batteries,i love your robot
Red Ted Art says
So long as the battery is compatible with the motor!
clement says
where can i get 1 x 3v motor,please answer immediately.
Red Ted Art says
ebay, amazon or maybe your local hard ware store!
Akhil.A.V says
This is the first robot I made
Red Ted Art says
awesome!
emeka says
what does the robot do?
emeka says
it is anice robot i love it
can you make more
Shouma Davis says
Awesome
NA says
Where can you get bits of wire?
Red Ted Art says
Try amazon or a hardware store?
Curious says
What is the average amount of time it takes to build this? Thanks for sharing!
Red Ted Art says
half an hour? 20 min?
Louise Burrows says
Where can I get the mini motors for the robots, please?
Red Ted Art says
Try amazon?
tori hudson says
can it avoid walls?
Red Ted Art says
No
Red Ted Art says
No I guess it may buzzzz around them?