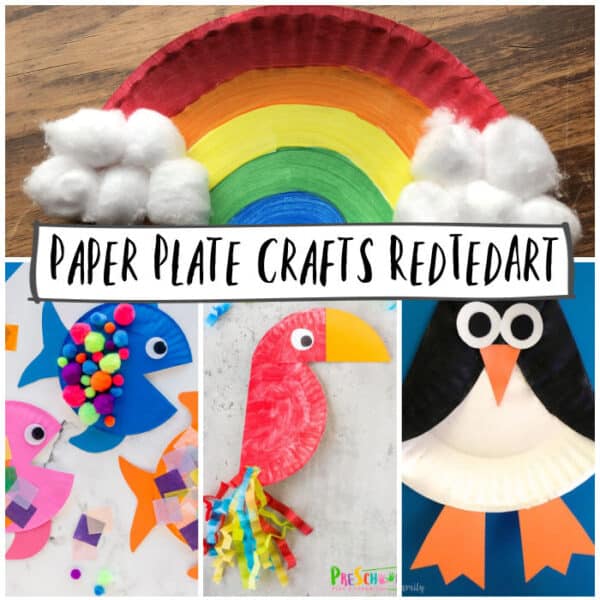
Paper Plate Weaving: A Colorful and Creative Art Project for Kids
Looking for a fun and easy art project for kids? Look no further than paper plate weaving! Paper plate crafts are always a hit with kids of all ages! This colorful craft is sure to keep your little ones entertained and engaged, and it’s a great way to introduce them to the joys of weaving.

At Red Ted Art, we love finding new and exciting ways to create beautiful crafts with simple, everyday materials. That’s why we’re so excited to share this paper plate weaving project with you! With just a few household items, your kids can create a one-of-a-kind masterpiece that they’ll be proud to show off.
This is a great craft for summer camp!
Paper Plate Weaving supplies
- Paper plates
- Scissors
- Yarn in various colors*
- Tape or glue
- Pencil or marker
*this is a great opportunity to sort through your wool and yarn stash and use up any left over odds and ends!
Step-by-Step Instructions – Paper Plate Weaving
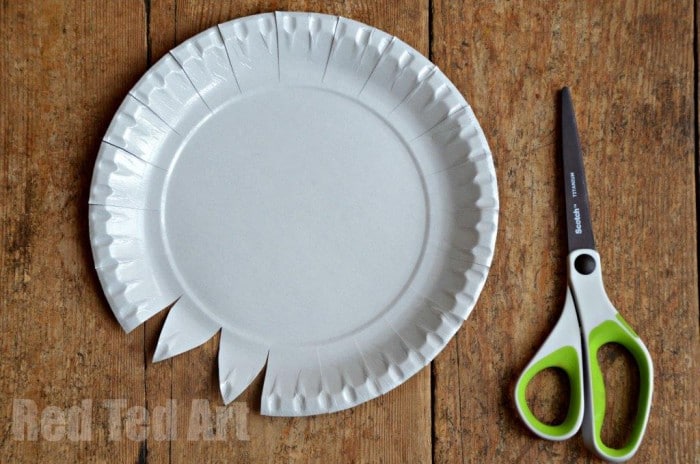
Step 1: Mark the Plate
Using a pencil or marker, mark the paper plate at regular intervals around the circle. You will need an ODD NUMBER for this to work.
PLEASE DON’T GET THI STEP WRONG! The UNEVEN NUMBER IS VERY IMPORTANT!
Step 1: Cut the Paper Plate into petals or slits
If working with preschoolers, adults will need to do this step for them! Now using the marks – assume these are the “centre of your petal and cut a petal into each one”. If the petals are too fiddly for you, you can also just cut simple slits!

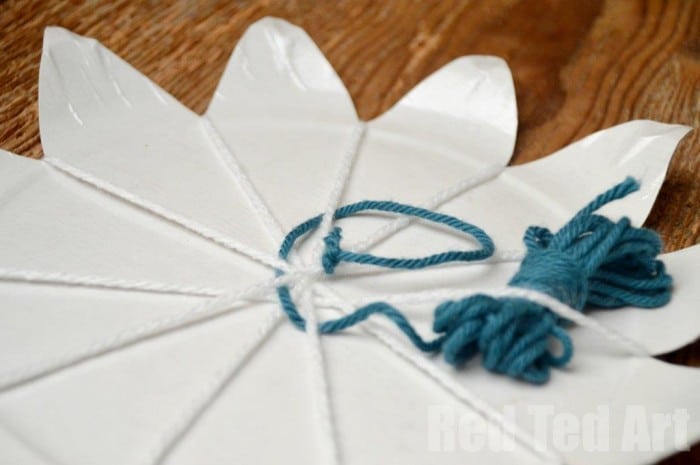
Step 3: Make the Loom
Take a long piece of yarn and tape to the back of the plate. Pop over one petal of the paper plate. Then, loop the yarn around the a paper plate petal roughly opposite.

Now keep going. From one side of the paper plate, to the other. Each time, looping the yarn or wool around a paper plate petal.

Once there is a piece of yarn running across each petal, knot the end of the yarn to back of the paper plate (or tape it down).
Step 4: Weave the Yarn – Circle Weaving Technique
This is a circle weaving technique. Now it’s time to start weaving! Take another piece of yarn, tie it to the centre of the yarn criss cross loom, and start weaving it in and out of the vertical yarn strands. If you want you can use a plastic needle to make it easier for younger kids and toddlers. This is wonderful for fine motor skills and sequencing skills!
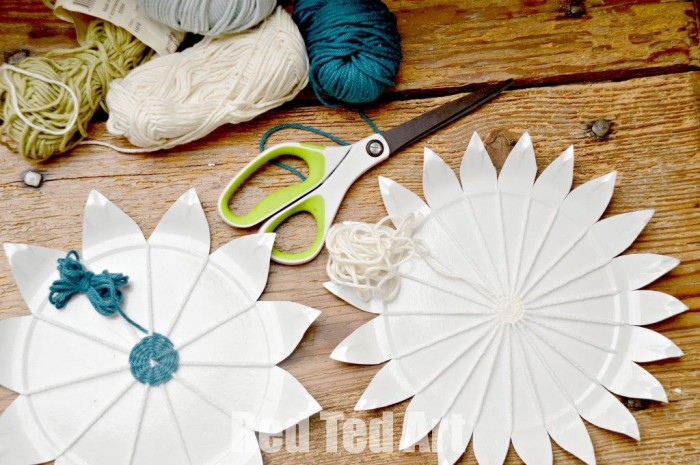
As you weave, push the yarn down towards the center of the plate to make room for more yarn.
Step 5: Change Colors
Once you’ve woven a few rows of yarn, try changing colors! Simply tie the end of one color to the beginning of a new piece of yarn in a different color, and continue weaving. As mentioned this is a great opportunity to use up scrap yarn!
Step 6: Finish the Weaving
Keep weaving until you’ve filled up the entire plate with colorful yarn. Then, tie off the last piece of yarn and trim any excess.
Step 7: Display Your Masterpiece
Your paper plate weaving is complete! You can use tape or glue to attach a loop of yarn to the back of the plate, and hang it on the wall for all to see.

You can explore different colours for different flowers
See how to make the sunflower version here.
We hope you have fun making your paper plate weavings! This is a great project to do with kids of all ages, and it’s a wonderful way to encourage creativity and exploration. Happy crafting from Red Ted Art!
More Paper Plate Craft ideas here: