
Tinkerbell Clothes Pin Doll
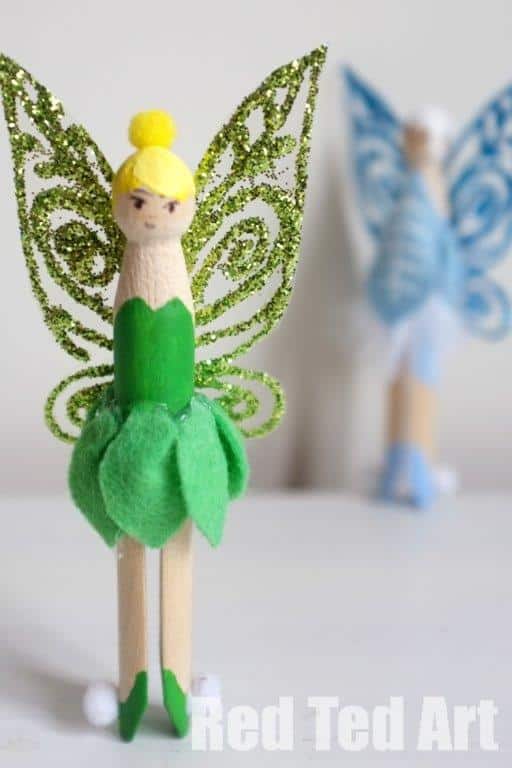 A few months ago we saw Tinkerbell – The Secret of The Wings and thoroughly enjoyed. It was a sweet and magical movie – what isn’t there to love about fairies – especially Tinkerbell?! So I knew, I would have to do a Tinkerbell craft at some point soon. And finally I made a Tinkerbell peg doll and Tinkerbell’s sister Periwinkle doll for the kids.
CLEARLY I made these peg dolls for the kids – but they inspired a whole set of fairies made by the kids – which I shared over at Teach Preschool. So please be inspired to make your own too with or without the kids!
Making a Tinkerbell Fairy
To start off with I looked at some Tinkerbell Pictures – to see what Tinkerbell’s key characteristics were. Clearly she needed a green dress made from leaves, some pom poms on her shoes, a “bun” hairstyle and of course some WINGS.
I went to work and had a look what I had in my craft box!
Tinkerbell Fairy Materials
Materials: a dolly peg, green & yellow acrylic paint (if you making with kids, you can substitute this for felt tip pens), green felt, mini pompoms (but you could paint the pompoms on the show), a yellow mini pompom (you could also use a pony bead or some wool tightly wrapped into a small ball), acetate (I had some for overhead projectors, but you get a plastic acetate on some toy packaging or you can use a clear subject divider from a ring binder), PVA glue with a thin nozzle to dispense, glitter, hot glue gun (optional)
I also made a Periwinkle Fairy and needed some blue acrylic paint, blue felt and a white feather
Few.. that sounds like a lot, but really – there is “commentary in the above” and do check what you have “lying around at home”
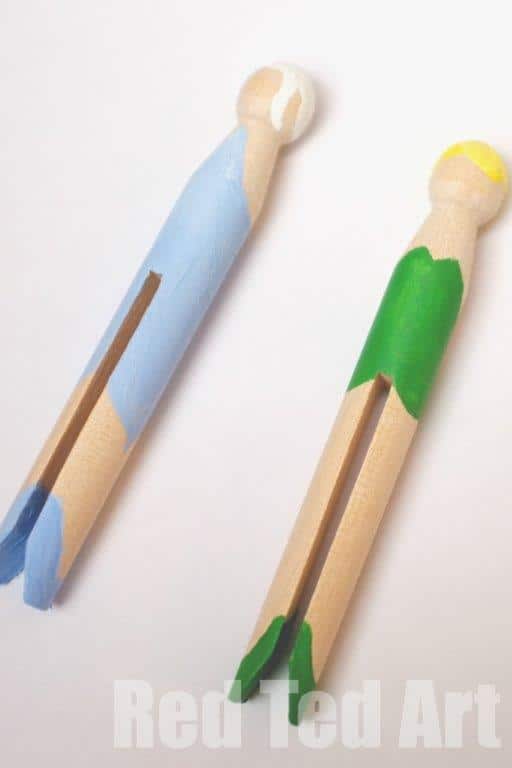
1) Paint Tinker Bell’s and Periwinkle’s basic dress, shoes and hair. I used acrylics. When the kids do theirs, they use felt tip pens, much easier and they are surprisingly good at managing the pens and the pegs.

2) Glue on Tinker Bell’s show pom poms and the yellow pom pom as a hair bun
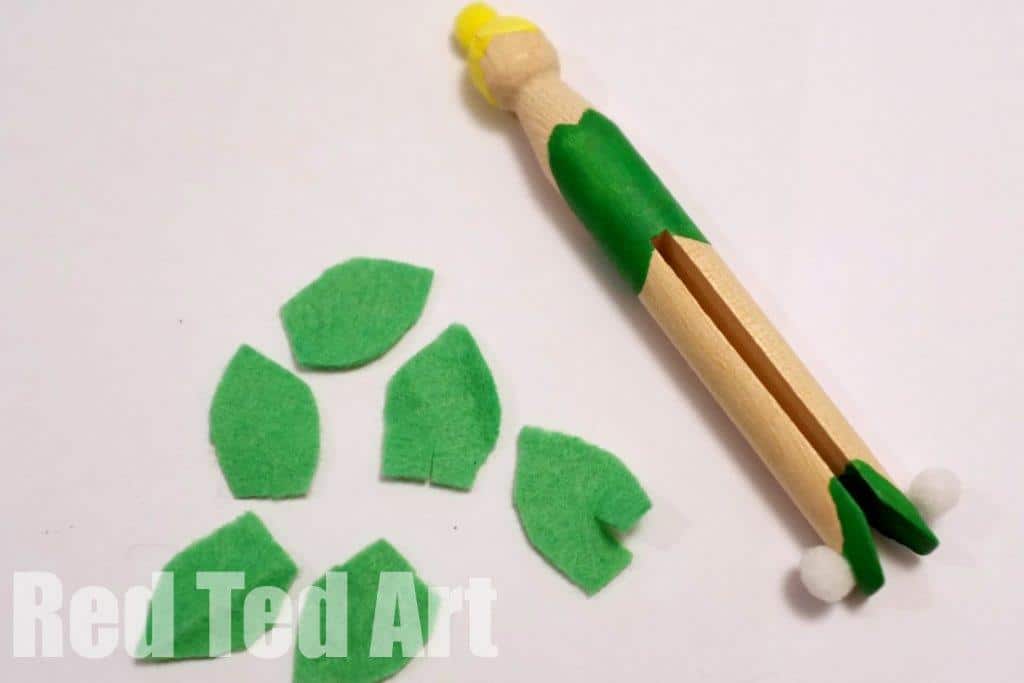
3) For the skirt I cut out 6 (and then needed 7) small leaves. I snipped them and folded the snipped bit over to give the leaf some “body”. If making this with kids, I would keep it simple and glue the leaves on “flat”. I used a hot glue gun at this point to speed up the process. But you should be able to do this with a good PVA or fabric glue. On Red Ted’s and Pip Squeak’s fairies (that will be on Teach Preschool soon), we left the skirt out all together.
4) Once dry, glue onto your doll. Again, I used the hot glue gun, but have done similar projects in the past with PVA only.

5) Now to Tinkerbell’s wings. This was my most favourite part of the whole craft. I designed a wing on paper – using Tinkerbell’s picture online as a guide. Then I placed the acetate on top and “traced” the Tinkerbell’s wings with glue. Add some glitter. Shook the excess glitter off (and popped it back in the bag) and let it dry. SOOOOO pretty. The kids were delighted! The glitter we have is super fine and beautiful and I got my lot from Zing Zing Tree.
On the kid’s version – there is “no pattern”, just lots of glue and glitter – Pip Squeak also added some little paper hearts. They are equally adorable and on Teach Preschool!
And I can tell you… you will be saying MANY MORE wings like this on Red Ted Art.. the opportunities are endless.
6) Once dry glue to the back of your Tinkerbell fairy. Again, I used the hot glue gun, but a good strong PVA will do the trick!
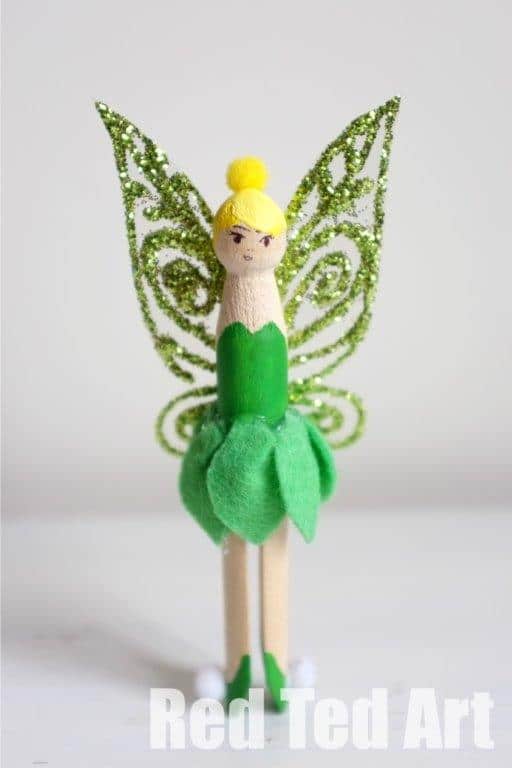
And you Tinkerbell Peg Doll is FINISHED!! Yay.
I did make a Periwinkle Fairy too, but I wasn’t as pleased with her – Pip Squeak likes them equally though.
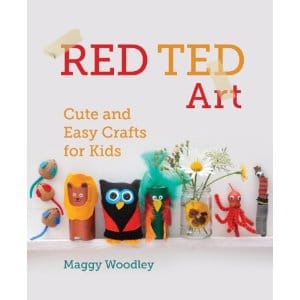 They then went off to join some other peg dolls that I have made in the past and that I have instructions for in my new book Red Ted Art, Cute and Easy Crafts for Kids. The book isn’t about perfect but inspiration and shows you a number of Peg Doll creations that my children made based on the pirates and ballerinas and clothes pins mermaids I did for them (click on the links to see how my kids were inspired). So either make these FOR them, or be INSPIRED and make your own version of these with the kids. My kids love both THEIR dolls as much as mine and they are played with equally.

(oh and Red Ted has now put an “order in” for Batman and Robin clothes pins.. based on his Batman Easter Egg).
 Join the Kids Get Crafty linky party! Come and share your crafts with or for Kids.. we would love to see what you have been up to!
Have you made any Tinkerbell crafts recently? Or any fairies? We LOVE fairies here!