Washi Tape DIY Stickers
Washi Tape DIY Stickers
I am so excited to be part of the 31 Days of Love Series on Red Ted Art. And can’t wait to share this Valentines Card DIY Idea with you. Thank you Maggy for including me. My name is Jacinta and I am an Australian based Scientist and Mama of three, hoping to inspire creative kids and fun mums, families and educators. I post easy, simple and fun projects on my Instagram page @cintaandco (my family and friends call me Cinta – short for Jacinta, and my kids are my co. – you will often see their little hands hard at work in the photos that I post). Today I want to share some adorable little Washi Tape DIY Stickers. They are SO easy to make and lots of fun to use!
We LOVE washi tape in our house. It is super easy for children to use as it can be simply torn rather than requiring scissors to cut, and is quite forgiving if you make an error as it can generally be easily separated from paper without tearing. We use washi tape in all sorts of craft activities. Most recently, my eight year old son even decorated his cricket bat with lines of colourful tape! Today, we made some really fabulous heart shaped washi tape stickers. These stickers are bright and colourful, and could be used for many purposes including the decoration of handmade cards and personalising gift wrapping.
Washi Tape DIY Sticker Supplies
- Washi tape
- Baking paper
- Heart shape stencil
- Grey lead pencil
- Scissors
How to make washi tape DIY stickers
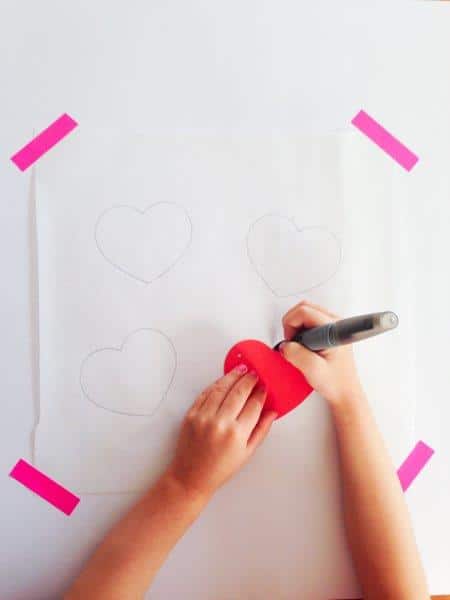
Tear a piece of baking paper and tape it to a flat surface. Trace around your stencil with grey lead pencil. We found that the pencil marks the paper easily and doesn’t smudge. We used a heart shaped stencil for this step. You are not limited to heart shapes though, you could use any shape that you like.
Once you have marked out your shapes, start sticking your washi tape over the shape outline. Start at the top of your shape, and ensure that each new line of tape over laps the previous line by approximately 2-3mm.
Once you have completely covered your stencilled shape, turn the baking paper over and cut along your stencilled line. You will now be able to peel back the washi tape layer, separating it from the baking paper, and will have a beautiful handmade sticker that you can use to decorate cards, wrapping paper, letters – anything at all.
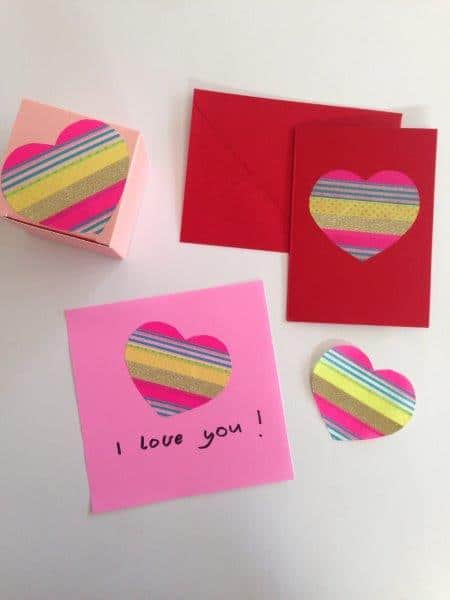
Here are some examples of how we used our stickers. We pasted them onto coloured paper and made cute letters, we decorated gift boxes and made some lovely cards. The use of the stickers and the actual stickers that you can now make is limitless!
Do you want more fun and easy activities for children? Jacinta is VERY active on Instagram and shares lots of WONDERFUL ideas over there, so why not hop over, follow and check these ideas out
https://www.instagram.com/p/BAOW-BBMZop/?taken-by=cintaandco
https://www.instagram.com/p/BARl03xMZjr/?taken-by=cintaandco
https://www.instagram.com/p/BAGuHSBsZtA/?taken-by=cintaandco
More great Handmade Valentines Cards to make here:


