
Kids Crafts: How to Make a Pinwheel

 Welcome back to Kids Get Crafty! With the “Weather Get Crafty” carnival almost upon us, I thought it was a good time to have a “how to make a pinwheel” post. It has been on my “to do” list for ages, as it is of those “key childhood crafts” that every child should have a go at one point! They are super duper easy and quick to make!
The other reason we made them, is that we have a windmill near our house and Red Ted LOVES the windmill. So they idea *was* to make a windmill pinwheel…. I totally failed at the windmill house (it was going to be a washing up bottle filled with coloured water). I had a vision of 3 differently sized bottles in different colours. It was going to be a mini fairy village. But we failed. The wheel just kept falling off… so an “ordinary” wheel on a stick it is! Red Ted still adored it though!
The Book
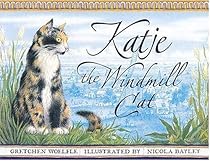 Katje the Windmill Cat, by Gretchen Woelfle
I recently went on a short break to Holland, by myself… and Red Ted was told that I was visiting friends and that I would see lots of windmills… whilst I was there, he went to see the local windmill too.. so a lovely windmill book from Holland was all we needed to tie it all together.
This is indeed a lovely little book about a heroic cat, that is first cast aside by his newly married owner, but then comes to the rescue a bad storm and… saves the baby! A happy ending all round – amazingly this is based on a true story. The book is wonderfully illustrated by Nicola Bayley – really bringing the story to life and there are wonderful “delft” like decoration on every page. I love books that tell you stories but also give you a little feel about the country it is set in.. so hopefully Red Ted got a taste of Holland (without worrying too much about storms and floods of course).
I think I maybe enjoyed reading it more than Red Ted and I think it is suitable for slightly older age range – maybe 4-5yrs+or maybe we just need to try again in 2-3months time! He does love cats though and that certainly provided a talking point!
The Craft
We decided to make our pinwheels out of plastic sheets – salvaged from the office, they were being thrown out. But of course you can make it out of anything. What I like about the plastic sheets, is that they are a little more “weather proof”. Also Red Ted REALLY enjoyed using coloured markers on them.
Materials: Plastic sheet & permanent marker pens (or coloured paper), a pin (preferrably with a big head, I added a little bead to the end to keep it in place) – or an earring stud with back piece or try a thumbtack, a stick/ dowel.
Here is a clever way of securing the pinwheel from Skip To My Lou – use a pencil rubber! OR try this wire and bead method from Craft Ideas.
To make your pinwheel:

1) Cut out a square, I usually do this by folding a corner of paper over and cutting along the edges, this gives you a perfect square.

2) Crease both diagonals, you will be cutting 2/3s along these later

3) Colour in your square – we chose to colour in triangles – which reflect the final pinwheel shape, but have a play and see what you like! (See below, I did the yellow, Red Ted did the red)

4) As mention in 2) cut along the diagonals approx 2/3s of the way


5) Take your pin and prick it through one corner. Take the “next corner” and prick a hole. Keep going round until you have done all 4, then pin it through the middle. The above shows a pinwheel template – cut along the solid lines and pin through the little holes.


6) Pin through a stick – you may want to secure the back with a small cork. We didn’t, but it does mean they sometimes fly off and I have to retrieve them. A cork also protects your children from any point bits, ours are just decorative in the garden, so it doesn’t matter. The alternative, is not push the pin right through, but only a little way, or use a thumbtack, as they are not as long. I also like the idea to use an earring stud – no pointy bits and you can use the back of the earring to help secure the stud to a stick.

ENJOY!
We had a go of doing these with a wire instead of a pin first. It didn’t work very well, as it was too stiff to go round… but the reason I mention it, is that Red Ted said the most adorable thing: “mummy, don’t worry… we wait until the rain comes and then it will push through and make it turn“. Oh my,you really are my clever little boy. Proud Mama Moment indeed. When I replace the wire with a pin and it started spinning in the wind Red Ted was simply too excited and he kept running in and out of the house to report on progress!
For more Kid’s Craft ideas, click here for a full list.
If you have been crafty with your kid’s be it at home, in the kitchen or outdoors, I would love for you to link up: