Home » House Proud Innovator, How To's, Sewing

How to… make a Pillow Case Dress for Beginners

24 June 2011 34 Comments

How to Make a Pillow Case Dress for Beginners, is part of the Make It Easy Series. Visit Hello Beautiful for the intro post or read below for more info.

how to make a pillow case dress

This week’s How To is a little “Pillow Case” dress for beginners. It is the second one I have made and I class myself a sewing beginner. It is amazing how quickly you forget things and I had to keep going back to my first dress and check out what I did – but it was still “surprisingly easy”. Luckily for me, I have a lovely sewing friend – Ruth from Summerland Creative – who not only sent me lots of sewing tips (i.e. how to sew hems neatly), but also some fabric for my borders and ribbons and buttons. How nice is Ruth?!

So.. I want to share with you my Pillow Case Dress for beginners: I have written a detailed step by step guide and added lots of photos – but only to help you – it does make it all look a little more complicated than it is.. but believe me it is not! You are simply cutting out a basic shape dress and hemming it! I have also given you a basic pattern. The pillow case dress is VERY forgiving.. so if you cut it a little bigger or smaller, you will be fine!
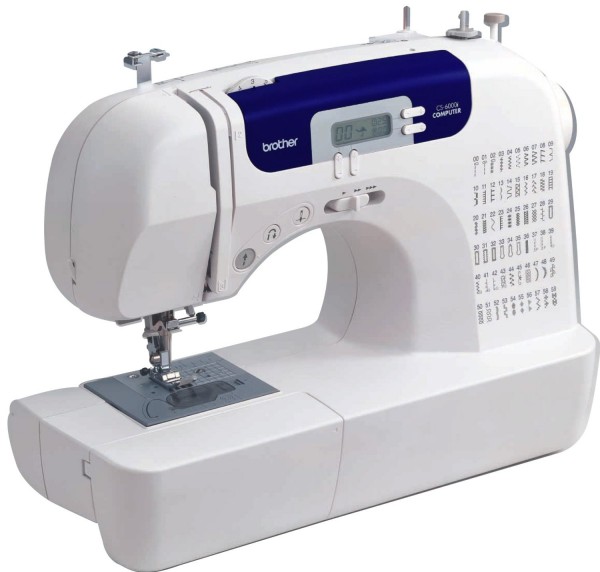
I decided to add a “contrasting border” at the bottom of the dress – if you want life simple – don’t make the border. But I do think it is lovely and worth doing! You can simply skip Step 2 – the French seam!

My little girl is a big 18mth old, so this is probably for a 2yrs old (she is 85cm, approx 33″). Or you could use one of your child’s existing dresses as a template. If you make your own pattern add 2″ seam allowance length wise (you loose more seem allowance fabric due to the ribbon piece at the top) and 0.5″-1″ seam allowance width wise.

Materials: Fabric approx 20″ x 21″ if using one piece (or 17″ x 19.5″ main fabric, 4″ x 22″ border fabric), thread, ribbon, scissors, pins, iron, ironing board & sewing machine

I am not much of an ironer, but when it comes to sewing, the iron is your *friend* and it is well worth doing!***

Here is my pattern – this will result in a dress approx 18″ in length and 20″ wide. With border or without!

Pillow Case Dress Pattern

Step 1: Cut your fabric.

You may find it easier to cut “the pattern” out of a piece of baking paper – that way you can make sure you don’t cut anything wrong and that you align the pattern nicely.This also gives you practice working with commercial patterns another time!

I find it helpful to fold your fabric in half to ensure you cut it evenly. You will need 2 pieces of the main and 2 of the border fabric. If you are making your own pattern – use your ruler to align your main and border fabric on the diagonal (see image).

Pillow Case Dress - Cutting Fabric

Step 2: Joining Main & Border Fabric with a French Seam (Optional)

Attach border with a French seam. Now a French seam sounds complicated, but it isn’t. And it looks lovely and will give your dress that special “professional” finish. You can of course just do an ordinary seam. So if you find this step “confusing”, just sew your two pieces together normally – you may have to trim a bit of the border though, as there are extra French seam allowances!

So go on, I dare you to have a go:

(i) Put our border and main together – right side facing OUT and sew as close to the edges as possible.

French Seam

(ii) “Open” the two piece. Press the seam with an iron, so it opens up (just makes it all neater). I also trimmed a little of the seam.

(iii) Folder over, so you now have the right side of the fabrics facing IN, press and sew.

sewing a french seam

(iv) “Open” the 2 pieces. Press with iron and hey presto you have a French seam! Lovely.

finished french seam

(v) Now trim the border against the main fabric so you have “one continuous line”.

Step 3: Arms

(i) Cut a “semi tear” shape into the arm – 6″ down – 2″ across. You can cut a diagonal if you like – this is easier to sew. But the “tear” is prettier. Your choice!

Pillow Case Dress Arms

(ii) Fold over raw edge and iron a very small seam. Then fold over again and iron/ pin in place. This gives you a nice neat seam with no fraying edges. It is as if you are “tucking in the raw edge”. It IS fiddly, especially around the curve and my seem gets very narrow there. Just take your time and gently fold the fabric round. Use the iron to help keep in place. Check both front and back align.

pillow case dress 1 pillow case dress arm seam

pillow case dress arm seamx

(iii) Sew.

Step 4: The Halter/ Ribbon Thread

(i) Fold over a raw edge of the fabric, iron in place.

(ii) Fold fabric again – approx 1″. Match up your front and back and make sure they are aligned.

(iii) Sew as close to the edge of the seam as possible – making sure you sew on both folds.

You will find the beginning and the end of this seam a little harder to do – as the sewing machine has to sew across so many folds of fabric. It doesn’t matter if it isn’t “too neat” – no one will notice the odd bit of bumpy sewing. It is a little fiddley. Don’t fret. Just take your time.

Step 5: Sew both pieces of fabric together

(i) Pin in place. Make sure you align the border/ main” fabric seams – if these don’t align, it will be most noticeable “discrepancy” on the dress. You can adjust any border unalignment in the next step.

(ii) Sew.

Step 6: Sew Hem.

This is your chance to tidy up your hem and make sure both sides are neatly the same length etc. You can shortened it too if you fancy or if you didn’t do a French seam (see step 2).

(i) Fold raw edge and iron. Then turn the fabric again iron and pin in place. Tuck this  in again and hide away any raw edges of the fabric to give you a nice neat finish.

how to sew a neat hem

Step 7: Add the ribbon as a halterneck.

(i) Thread in the ribbon (attach a safety pin to make it easy).

(ii) I placed a couple of stitches in the centre to hold the ribbon in place.. else you may find you are constantly pulling it out.

Pillow Case Dress Tutorial Craft

And here is one I made earlier (slightly longer)

how to make a pillow case dress

ENJOY and basque in your sewing glory!

*** Now to my three little stars… you know how I said at the beginning, that your iron is your friend? Well, indeed it is! And it is particularly friendly when it is a fabulously fab iron – as part of my House Proud Innovator conversion by Morphy Richards, they sent me a fabulous iron and shirtmaster ironing board. Now I already mentioned that I think the ironing board is fabulous for crafters – all that extra space to lay your craft out – and in this case, take some better craft shots – as I have a lovely backdrop for the dresses (yes, the red and white polka dot is the shirt master board!). The Comfy Grip Iron did well and I managed to make the dress a little speedier and more effectively thanks to nicely ironed down seams. I tell you: iron. It is good and makes your craft better! Yay.

This post is also part of Make it Easy


Make It Easy is a series of 11 crafting tutorials hosted by talented, artistic and enthusiastic women. You will be shown how to create 11 unique and beautiful items ~ there will be one tutorial every day for the next 11 days ~ and we really hope you will find some inspiration to get your craft on!

There will be one tutorial a day, posted on the blogs below.

make it easy

Hollybobb red ted little green bums fuego hello beautiful carla sonheim stacey winters sara nicole btrt honey's quilling flex family

At the end of the series we will have a wonderful ebook available for a small fee of $1.99. All the tutorials will be in this one convenient download that you will be able to print off and read over and over (before you get started on making). The money will go to the person whose blog you download it from and by doing so, you will be showing your support for the hard work of this crafting community. Thank you!

1 Star2 Stars3 Stars4 Stars5 Stars (2 votes, average: 5.00 out of 5)
Loading ... Loading ...

34 Comments »

  • Jacke said:

    Those are so fun to make! My sister and I made like 90 of them all with scrap fabric from her basement, my basement, and my mom’s basement. We had thought about selling them online but then we got kind of bored with the selling part, lol. I use them for gifts all the time, though. They all turn out so differently and it’s fun to see what they are going to look like! Great tutorial.

  • Red Ted Art (author) said:

    Wow! 90 of them!! I am impressed! Definitely a great way for using up odds and ends of fabric! And GREAT gifts!

  • emma said:

    I love how these are so simple yet you can make them so unique by changing the fabrics or adding ric rac and maybe pockets. Lovely tutorial Maggy!

  • Wendy said:

    Love these! THey’re just the thing for long summer days…
    Wendy

  • Lisa said:

    Great tutorial Maggy, definitely one to add to my list once I am returned to my beloved sewing machine next week!

  • se7en said:

    Oh thank-you a million times over!!! My daughter loves sewing, but her looooong legs have outstripped her pillowcase dresses, why didn’t I think of adding a little more fabric to the hem… Here’s our se7en things to do with a pillow case post: http://www.se7en.org.za/2010/08/21/se7en-things-to-do-with-a-pillow-case Have a great weekend!!!

  • Carla Sonheim said:

    So cute! Thank you for the clear instructions and great project!

  • Colleen - Sunrise Learning Lab said:

    So cute!

    My grandma used to make something like these for my sis and me when we were little.
    Hope you are having fun at #cybermummy11 Was so funny as I happened to be going back and forth reading your posts and Imagination Tree’s and then, I saw the comment that you are both there at cybermummy11.
    Hope that you have a great time! it is a little after 5 am here…I am just up because we have company coming so I wanted to get a jump start on things today.
    Have a happy weekend!

    Colleen
    Sunrise Learning Lab blog

    (@F5th on Twitter)

  • Noemi said:

    Now, really, I DO need to get a sewing machine!!
    I have two little girls and this tutorial is giving me very good ideas.
    Thanks for sharing!

  • lynne@lynnesgiftsfromtheheart said:

    Great tutorial.. this is just as cute as it can be.. hugs ~lynne~

  • northernmum said:

    but, but, what do you put on your pillows now?

  • Red Ted Art (author) said:

    You make me chuckle!

  • Fran said:

    I love making these for the twins! They are super easy and if you make enough width will be wearable for a few years with leggings or shorts too. Great for the beach as they fold so small and can be pretty enough for a day out too. Definately a wardrobe staple in this house, great tutorial btw :)

  • Red Ted Art (author) said:

    Aaah thanks Fran – means a lot to me when a “Pillow case maker expert” says the tutorial is good! *phew*… afterall, I AM a novice!

  • Miriam Faulkner said:

    Wow! These are SO pretty and it looks straightforward enough! One day…if I have time…I will def give them a go! :o )

  • Make It Easy: 11 Tutorials for You « Carla Sonheim: Snowball Journals said:

    [...] Watercolor Birds (me!) Thursday, June 23rd: Happy Birthday Bunting (Hollybobb) Friday, June 24th: Pillow Case Dress for Beginners (Red Ted Art’s Blog) Saturday, June 25th: Make Envelopes Using Magazines! (Life of Sara [...]

  • Chelsea said:

    I’ve been wanting to learn how to make one of these! Thanks for the tutorial…not sure I’m quite brave enough yet, but good to know it’s here! ;) hehe.

    I have a guest blogging idea I’d like to run past you, I’d love to have your write a post for me. If interested please let me know and I’ll send you all the details! :) Thanks!!

  • Red Ted Art (author) said:

    Always up for idea :-) will drop you a line…

  • mummiafelice said:

    I love this (but you know that already!) Thank you for linking up!

  • Debbie said:

    The simplicity is what gits-’er-done!

    Very clever!!

  • Amanda @gidders1 said:

    Love this idea! So pleased I’ve now got a machine so I can give it a go. I do not have such pretty vintage looking pillow cases though :(

  • Red Ted Art (author) said:

    You can use any fabric… ;-)

  • Carolyn said:

    A great place to start on kids clothing. Very simple and looks good.

  • Judy said:

    So cute…I just need a little girl to make one of these for!

  • Andrea @ Keepin it Thrifty said:

    This is awesome…im coming from the CSI project! I just started sewing…i just made my first handbag…i linked it up…I have been wanting to try a dress like this out!!! perfect….im pinning this on my Pinterest board now! thank you !

    XOXO Andrea

  • Red Ted Art (author) said:

    Oooh good luck with learning to sew – I am too! And am a total convert :-) and thank you for pinning!! Much appreciated!

  • Erin of HomeSavvyAtoZ.com said:

    These dresses are so cute! I found your site through a blog party and have been exploring. I love it and am a new follower! I would love for you to link up at my Savvy HomeMade blog party at http://www.homesavvyatoz.com/2011/08/14/blog-party-3/

    I look forward to blogging with you!

  • Red Ted Art (author) said:

    Thank you for the party invite! Have joined in!!

  • Erin of HomeSavvyAtoZ.com said:

    Your tutorials are SO thorough! Thank you so much for sharing this at Savvy HomeMade Monday. I hope you will party again tomorrow!

  • Red Ted Art (author) said:

    You are lovely! Thank you :-) and popping by again now!

  • Pink Pillowcase dresses | Domestic Goddesque said:

    [...] my RSS feed. Thanks for visiting!I have been meaning to make pillowcase dresses since I saw them on Red Ted’s blog, but our last minute holiday this week provided the ideal opportunity. I have been collecting [...]

  • The Mummy Diary said:

    Having just learnt to use a sewing machine I think I might just be able to have a go at one of these! Am off to some charity shops now so might keep an eye out for some fabrics :) As always a brilliant blog post!

  • lisa said:

    I learned how to make these once about a year ago..simplel..and today at church, a little girl had one on, and the front had a bunny applicated on..the material on the dress was very fine, which made the dress even more \”easter-ey\”, i gues u could say,,i like your instructions better, the arm holes look better, and neater..the one i made before was just a straight up and down cut, with the ribbon at the top, and between yours and the first one i did, yours is soooo much prettier, and fitted, like the little girls dress i saw today..so, even though i don\’t have time between work, family, etc.,,i went to my sewing room i have tons of fabric that hasnt been used,,im makeing my daughter a \” fun, vey springy\” looking dress for easter sunday..so, here i sit on the computer, at 2in the morning, typeing, searching..with 9 or 10 patterns of material siting at my feet~thanks for the detailed instructions!, can\’t wait to see how it turns out~

  • Red Ted Art (author) said:

    :-) have fun!!!! And hope yours turns out lovely too!

Leave your response!

Add your comment below, or trackback from your own site. You can also subscribe to these comments via RSS.

Be nice. Keep it clean. Stay on topic. No spam.

You can use these tags:
<a href="" title=""> <abbr title=""> <acronym title=""> <b> <blockquote cite=""> <cite> <code> <del datetime=""> <em> <i> <q cite=""> <strike> <strong>

This is a Gravatar-enabled weblog. To get your own globally-recognized-avatar, please register at Gravatar.