
Painting a Fairy Garden
Today, one of the 20Moms, Tiffany Dahle from Peanut Blossom, is here to share her adorable painted fairy houses project. I’m over at Teach Preschool today, I’d love if you’d come over and say hi. Keep following the trail of 20Moms as we circle around to all of our readers today!
___________________________________________________________
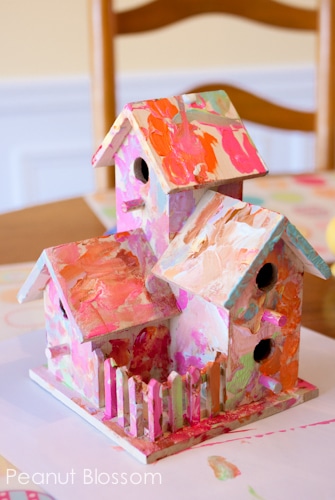
 We’re planting a fairy garden this summer and our fairies needed proper houses to tempt them into our yard. As a special spring vacation activity, I sat down with my 2 & 6 year olds to paint up these sweet little abodes.
The Easter Bunny brought $3 wooden birdhouses & a bundle of acrylic paints for the girls to share. Doing a craft like this with two such distinct ages was a bit of a challenge but with just a little planning we all had a wonderful time.

1. Separate but equal!: Sharing paints (and not having the colors mix too much) is an impossibility for this age split. I solved the challenge by giving each girl her own painter’s palette of colors. I squirted a small dollop of each color of paint onto a waxy coated disposable plate. It worked perfectly for blending and mixing (as much or as little as each one desired.)

2. The best “smock”: Sometimes the best outfit for art is no outfit at all. With a 2 year old in the mix, I knew paint would quickly get everywhere. By the time she was done with her work she had paint on her tummy, arms, face, hands, and even some in her lap. The small splotches wiped off super easily with a wet cloth and we were done.
3. Respect the process: I spent a bit of one-on-one time with each girl helping her with her house. That meant different things for each age:
The 2 year old simply wanted me to assist with wiping her brush when it got too heavy with too many colors of paint and turning her house when she was ready to tackle an additional side.

The 6 year old took her time and very very carefully painted her house “just so.” Poor girl has a broken right arm that is in a cast under the table out of sight in this photo. She was working with her weaker side and wanted my help painting elaborate little details like polka dots, garlands, and wreaths for the doors.

We turned it into a Mommy & Daughter project and she dictated just where she wanted each color to go and we chatted about the fun little decorations that would make her house special. I asked permission before adding anything so she felt she still had total ownership of the project.

4. Glitter makes everything better: The 6 year old squealed with joy when I brought out the Mod Podge & glitter tubes. We added sparkly welcome rug runners on the steps and coated some of the roof tops with glitz. The 2 year old had already moved on to other activities by this stage, so my older daughter appreciated the little bit of extra time I took with her to add those special elements.
5. Final coats: Now that the houses are good and dry I will be adding a top coat of clear protective paint so that they can withstand the outdoor elements in the garden. This will be a mommy task (as soon as I get to the hardware store!)
If you’d like to read my review of the products we used in this project or if you’d like to learn more about what we plan to do with our little houses, be sure to stop by and visit at Peanut Blossom.

 Tiffany Dahle is the hostess behind Peanut Blossom where she shares her belief that strong families start with strong and happy mothers. She encourages you to develop everyday possibilities for stretching your creativity while doing what you do to keep that household running! You can find Tiffany on Facebook,Twitter, and Pinterest