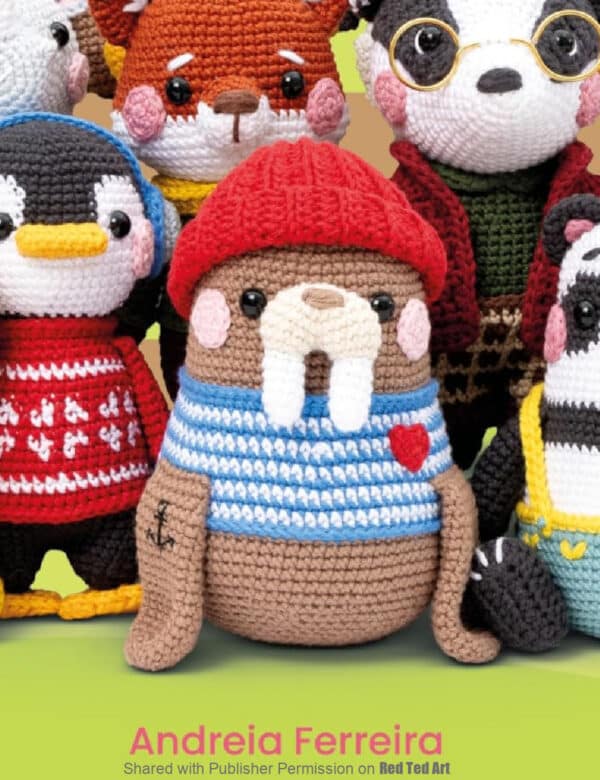
Cute Walrus Crochet Pattern – A Year of Amigurumi Friends
There is nothing quite like a gorgeous Amigurumi Crochet Project to try out! Today I have the pleasure of sharing this wonderful Walrus Crochet Pattern from the A Year of Amigurumi Friends by Andreia Ferreira today! This is an intermediate project, for crocheters looking for that next challenge and to really hone their crochet skills!
Please note: this project has been reproduce with permission from the publisher and is not allowed to be republished in any way, without their constent. It is for personal use only.
Also note: affiliate links have been added to these post – should you choose to purchase via these, I will earn a small commission that goes towards the upkeep of this site!
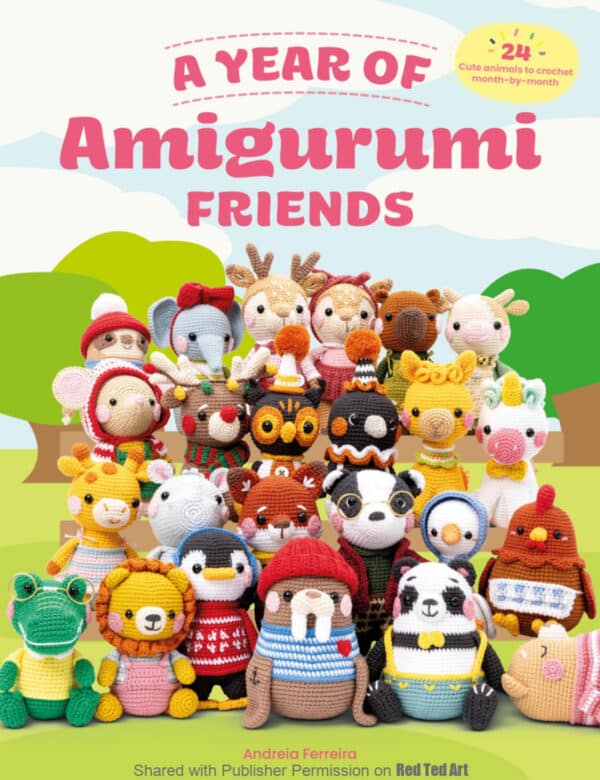
A Year of Amigurumi Friends by Andreia Ferreira
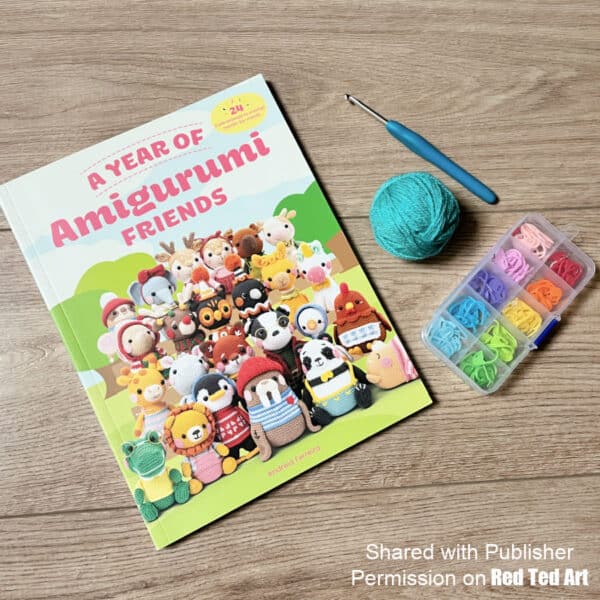

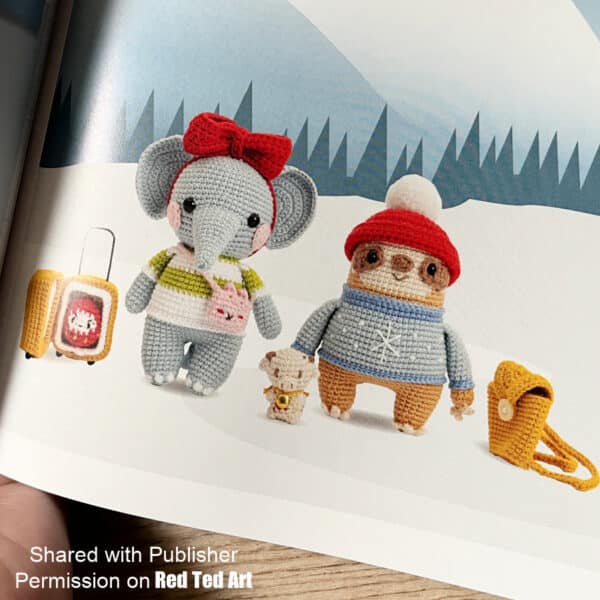
I love the concept of this book 24 amigurumi friends to make throughout the year… ie you get two wonderful crochet projects that fit the month to get stuck into. Probably just the right amount of time to crochet all year round. Each month’s amigurumi cutie, as something relating to the month – e.g. the Penguin’s Christmas jumper or Alligator has an apple or pencil for Back to School. Or how you get to make lots of extra minis, like the Suitcase, Backback and “Gifts from the amigurumi’s June travel adventures” (Swiss Cow and Daruma Doll).
You may know Andreia Ferreira as Lemon Yarn Creations on Instagram or Lemon Yarn Creations on Etsy. If you love her patterns, you will LOVE this beautifully produced and well thought out book published by David & Charles. A great way to explore Andreia’s patterns in one handy format.
What do I think of the patterns. Well for starters, you can take a look at the Walrus Pattern below – it will give you a very good idea of how the projects are written. I love that there is extra support material as the invisible fasten off and a straight stripe color change. This shows that this book really is designed to up your skills and teach you new tricks to really make your amigurumi perfect. Though it is assumed that you know how to basic stitches (e.g. a magic circle) already.
I do love the level of detail that this book goes into, and all the little accessories that go with each month are simply adorable. These amigurumis are not just fun to make, but would make great gifts, that encourage hours of playful fun too!
Get your copy on Amazon or all good book sellers!
Abbreviations
US terminology is used through out this book and pattern (though it does a have a handy conversion table to UK stitches)
- BLO – back loop only
- ch – chain
- cont – continu(e)ing
- dc – double crochet
- dec – work 2 single crochet stitches together (decrease 1 st)
- sc3tog – work 3 single crochet stitches together (decrease 2 sts)
- FLO – front loop only
- hdc – half double crochet
- inc – work 2 single crochet stitches in the next stitch (increase 1 st)
- PM – place marker
- rep – repeat
- rnd(s) – round(s)
- RS – right side
- sc – single crochet
- slst – slip stitch
- sp(s) – space(s)
- st(s) – stitch(es)
Pattern difficulty level – Level XX
The patterns in this book are rated as Easy (X), Intermediate (X X), or Advanced (X X X). The rating system is based on how the characters work as a collection and may differ from the standard crochet rating system.
- Easy: A project of this level will have simple shapes and basic stitches and may include one special stitch explained in the Techniques section. These projects require less time to complete.
- Intermediate: A project of this level will have a balance of simple and intricate shaping and may include multiple color changes and special stitches.
- Advanced: A project of this level will have multiple color changes, a fair amount of pieces to assemble, and intricate shaping either in the character or accessories. These projects require the most time to complete.
The Walrus is an intermediate project!
Tools & Materials
Yarn
I used Hobbii* Friends Cotton 8/4, a fingering (4-ply) yarn, for all the projects in this book. I prefer working with cotton because of the stitch definition it creates, and how sturdy the fabric is for amigurumi.
*please note Hobbii have recently announced that they will be using Ai in their product design going forward. Ai is a HUGE killer in the creative space and the crochet community have suffered especially. I encourage you to boycott Hobbii and use other cotton yarns instead. We for example LOVE Ricorumi Cotton yarns!
For each project, a list of the shades used is provided but not the exact yarn quantities. You will
only need small amounts, or at most one ball of yarn for each color will be enough. Using a different fiber or even a different yarn weight is possible, but then the proportions of your amigurumi won’t be the same as the dimensions listed.
Crochet hook
The size of the crochet hook you will use may vary depending on your preference and gauge/tension (how tight your stitches are). My favorite crochet hooks are from Tulip, especially the Etimo Red and Etimo Rose. I used a 2.20mm crochet hook, which doesn’t have a direct correspondence to US sizing — the closest one being the 2.25mm (US/B1) crochet hook.
Other tools and materials
Besides the yarn and crochet hook, other things may be useful for amigurumi making.
- TOY SAFETY EYES: I used plain black safety eyes in different sizes — or, in some cases, I embroidered the eyes — but there are many different types that you could use to give different personalities to the characters. Just remember: if gifting these toys to small children embroidery is more suitable for safety concerns.
- TOY STUFFING: Amigurumi need to be stuffed, and polyester fiberfill will do the job. Make sure to stuff your amigurumi firmly so they can hold their shape. You can even use a wooden skewer to help you compact the stuffing and reach small spaces when needed.
- STITCH MARKERS: Stitch markers are very useful to keep track of your rounds, but also help identify other important stitches throughout. You can use any type of removable stitch marker or even a scrap of contrasting yarn.
- SEWING MATERIALS: You will need a yarn needle for sewing the different pieces together, preferably with a blunt tip and wide eye that fits the yarn. Sewing pins are also very important because they will help you place the pieces in the correct position before sewing to avoid doing the work twice. A sewing needle and thread is used to sew on small details in a few projects.
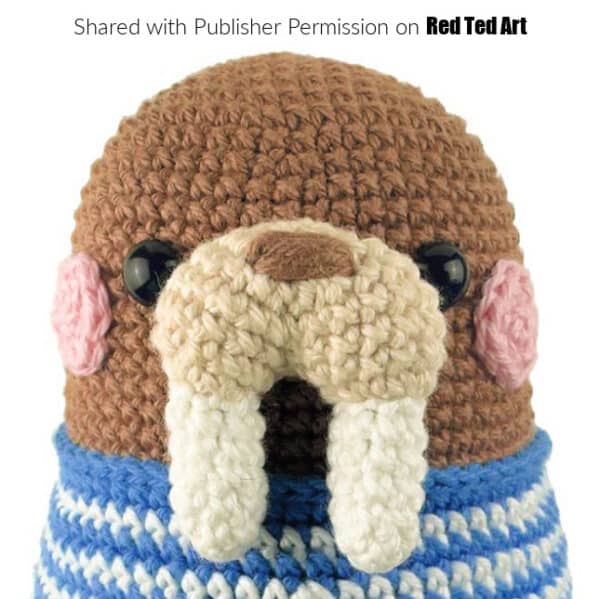
Wilbur the Walrus Crochet Pattern
Pattern by and copyright of Andreia Ferreira
Head and body
Rnd 1: using Brown, sc 6 in a magic ring. (6 sts)
Rnd 2: inc 6 times. (12 sts)
Rnd 3: [sc 1, inc] 6 times. (18 sts)
Rnd 4: [sc 2, inc] 6 times. (24 sts)
Rnd 5: [sc 3, inc] 6 times. (30 sts)
Rnd 6: [sc 4, inc] 6 times. (36 sts)
Rnd 7: [sc 5, inc] 6 times. (42 sts)
Rnd 8: [sc 6, inc] 6 times. (48 sts)
Rnd 9: [sc 15, inc] 3 times. (51 sts)
Rnd 10: [sc 8, inc, sc 8] 3 times.(54 sts)
Rnds 11–18 (8 rnds): sc 1 in each st.
Rnd 19: [sc 17, inc] 3 times. (57 sts)
Rnds 20 and 21 (2 rnds): sc 1 in each st.
Rnd 22: [sc 9, inc, sc 9] 3 times. (60 sts)
Rnd 23: change to Deep Blue, slst 1 in each st loosely.
Rnd 24: working in BLO of Rnd 23 and both loops of Rnd 22 (see Techniques: Straight Stripe Color Change), sc 1 in each st.
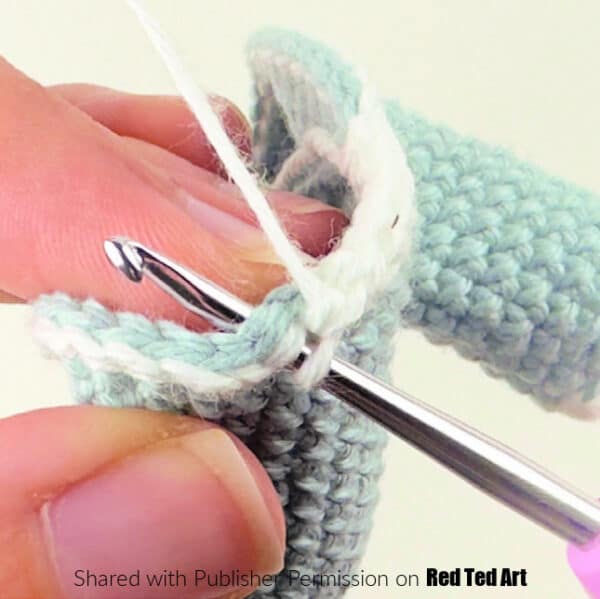
STRAIGHT STRIPE COLOR CHANGE: To highlight garments this technique creates a straight edge when changing color from one round to next. 1. Following instruction in pattern, work a round of slsts with new color, then in 2nd round insert hook through back loops of slip stitches and both loops of last round of previous color. 2. This creates a neat edge of unworked loops to be used later for hems and cuffs.
Rnd 25: change to White, [sc 19, inc] 3 times. (63 sts)
Rnd 26: change to Deep Blue, sc 1 in each st.
Rnd 27: change to White, [sc 10, inc, sc 10] 3 times. (66 sts)
Rnd 28: change to Deep Blue, sc 1 in each st.
Rnd 29: change to White, [sc 21, inc] 3 times. (69 sts)
Rnd 30: change to Deep Blue, [sc 11, inc, sc 11] 3 times. (72 sts)
Rnd 31: change to White, sc 1 in each st.
Rnd 32: change to Deep Blue, sc 12, inc, sc 45, inc, sc 12, inc. (75 sts)
Rnd 33: change to White, sc 1 in each st.
Rnd 34: change to Deep Blue, sc 12, inc, sc 48, inc, sc 12, inc. (78 sts)
Rnd 35: change to Brown, work in BLO, sc 1 in each st.
Rnd 36: sc 12, inc, sc 51, inc, sc 12, inc. (81 sts)
Place safety eyes between Rnds 14 and 15, 10 sts apart Make sure eyes are opposite increases on back of body.
Start stuffing, cont as you work.
Rnds 37–40 (4 rnds): sc 1 in each st.
Rnd 41: [sc 7, dec] 9 times. (72 sts)
Rnd 42: [sc 10, dec] 6 times. (66 sts)
Rnd 43: [sc 9, dec] 6 times. (60 sts)
Rnd 44: [sc 8, dec] 6 times. (54 sts)
Rnd 45: [sc 7, dec] 6 times. (48 sts)
Rnd 46: [sc 6, dec] 6 times. (42 sts)
Rnd 47: [sc 5, dec] 6 times. (36 sts)
Rnd 48: [sc 4, dec] 6 times. (30 sts)
Stuff body firmly until this point only to create a flat bottom.
Rnd 49: [sc 3, dec] 6 times. (24 sts)
Rnd 50: [sc 2, dec] 6 times. (18 sts)
Rnd 51: [sc 1, dec] 6 times. (12 sts)
Rnd 52: dec 6 times. (6 sts)
Fasten off, sew hole closed by pulling yarn tail through front loops of remaining sts.
SHIRT COLLAR DETAIL
Hold body up and join Deep Blue (see Techniques: Joining Yarn to Add a Detail) to first unworked loop of Rnd 23 with slst 1 (counts as first st of next rnd).
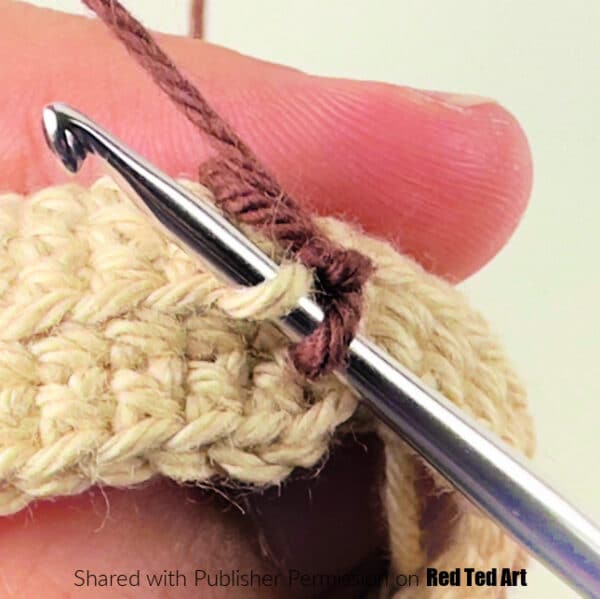
JOINING YARN TO ADD A DETAIL: Some details are worked directly onto another piece using unworked loops (or stitches) strategically placed. Hold the piece as mentioned (varies depending on pattern), and with a slip knot on your hook insert the hook in the loop/stitch mentioned to join and then work the sequence of stitches in thepattern.
Rnd 1: slst 1 in each st. (60 sts) Fasten off invisibly and weave in yarn ends (see Techniques: Invisible Fasten Off).

INVISIBLE FASTEN OFF: This is used to avoid the “step” at the end of working in a continuous
spiral. It will be mentioned when working flat pieces (such as cheeks) but can also be applied
to any open piece. 1. Complete last st of round, cut yarn and pull loop on hook out. Thread yarn tail into a tapestry needle, insert needle underneath top “V” of 2nd st, from front to back (D). 2. Insert needle through center of top “V” of last st of round and pull yarn through (E). 3. This creates a false st to mimic the one underneath, correcting the “step” (F).
SHIRT HEM DETAIL
Hold body upside down and join Deep Blue to first unworked loop of Rnd 34 with slst 1 (counts as first st of next rnd).
Rnd 1: slst 1 in each st. (78 sts)
Fasten off invisibly and weave in yarn ends.
Tusks (make 2)
Rnd 1: using White, sc 6 in a magic ring. (6 sts)
Rnd 2: [sc 2, inc] twice. (8 sts)
Rnds 3–6 (4 rnds): sc 1 in each st.
Fasten off, leaving long tail for sewing.
Stuff firmly.
Snout
Start by making the bumps.
BUMPS (MAKE 2)
Rnd 1: using Cream, sc 6 in a magic ring. (6 sts)
Rnd 2: inc 6 times. (12 sts)
Rnd 3: sc 1 in each st.
Fasten off first bump leaving long tail for sewing. Do not fasten off 2nd bump.
JOINING THE BUMPS
Rnd 4: still with 2nd bump on hook, sc 1 in first st of first bump to join, PM here for new beg of rnd, sc 1 in each st of first bump, sc 1 in each st of 2nd bump. (24 sts)
Use yarn tail of first bump to sew gap between bumps.
Rnd 5: sc 1 in each st.
Rnd 6: [sc 2, dec] 6 times. (18 sts)
Rnd 7: [sc 1, dec] 6 times. (12 sts)
Stuff firmly.
Rnd 8: dec 6 times. (6 sts)
Fasten off, leaving long tail for sewing, sew hole closed by pulling yarn tail through front loops of remaining sts. Using Brown, embroider nose on snout using straight stitch (see
Techniques: Straight Stitch). Make 6 horizontal lines between Rnds 6 and 7 that are 3 sts wide, centered with gap between bumps.
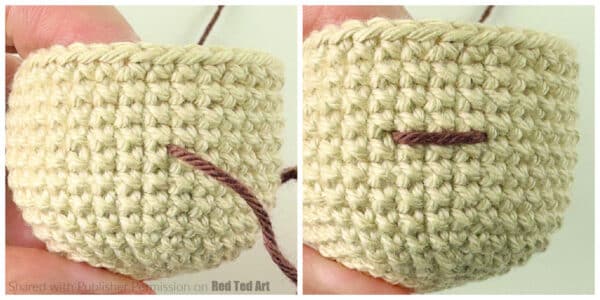
STRAIGHT STITCH: 1. Thread yarn (or embroidery floss) into yarn needle, insert needle from back to front where you want straight stitch to begin. 2. Insert needle back through fabric where you want straight stitch to end. 3. Rep Steps 1 and 2 as many times as required. Straight stitches
can be worked in any direction, not just in a straight line.
Sew tusks to bottom of each bump of snout. Sew the snout centered with eyes between Rnds 14 and 17.
Cheeks (make 2)
Rnd 1: using Pale Pink, sc 6 in a magic ring. (6 sts)
Rnd 2: inc 6 times. (12 sts)
Fasten off invisibly, leaving long tail for sewing.
Sew cheeks next to eyes between rnds 15 and 18.
Tail
Start by making hind flippers.
HIND FLIPPERS (MAKE 2)
Rnd 1: using Brown, sc 6 in a magic ring. (6 sts)
Rnd 2: [sc 1, inc] 3 times. (9 sts)
Rnd 3: sc 1 in each st.
Rnd 4: sc 3, inc twice, sc 4. (11 sts)
Rnd 5: sc 1 in each st.
Rnd 6: sc 4, inc twice, sc 5. (13 sts)
Rnd 7: sc 1 in each st.
Rnd 8: sc 5, inc twice, sc 6. (15 sts)
Rnd 9: sc 1 in each st.
Rnd 10: sc 5, dec twice, sc 4, dec. (12 sts)
Fasten off first hind flipper, leaving long tail for sewing. Do not fasten off 2nd hind flipper.
Do not stuff.
JOINING THE HIND FLIPPERS
Rnd 11: sc 7, end rnd here. (7 sts)
Rnd 12: still with 2nd hind flipper on hook, sc 1 in 7th st of first hind flipper to join, PM here for new beg of rnd, sc 1 in each st of first hind flipper, sc 1 in each st of 2nd hind flipper. (24 sts)
Use yarn tail of first hind flipper to sew gap between hind flippers.
Rnd 13: sc 6, [sc 1, inc] 3 times, [inc, sc 1] 3 times, sc 6. (30 sts)
Rnds 14 and 15 (2 rnds): sc 1 in each st.
Rnd 16: sc 6, [sc 1, inc, sc 1] 6 times, sc 6. (36 sts)
Rnds 17 and 18 (2 rnds): sc 1 in each st.
Rnd 19: sc 6, [sc 1, inc, sc 2] 3 times, [sc 2, inc, sc 1] 3 times, sc 6. (42 sts)
Rnd 20: sc 1 in each st.
Fasten off, leaving long tail for sewing.
Stuff firmly. Sew tail to back of body between Rnds 37 and 46.
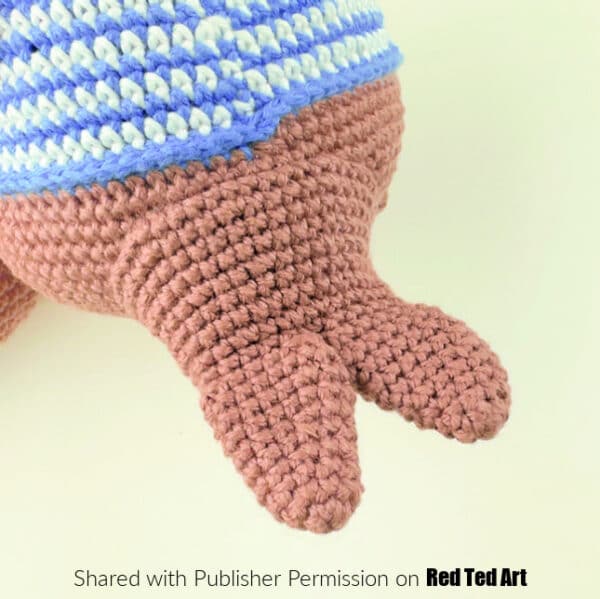
Bottom of tail should lay flat on surface (see image above).
Front flippers (make 2)
Rnd 1: using Brown, sc 6 in a magic ring. (6 sts)
Rnd 2: inc 6 times. (12 sts)
Rnd 3: [sc 1, inc] 6 times. (18 sts)
Rnd 4: [sc 5, inc] 3 times. (21 sts)
Rnds 5–10 (6 rnds): sc 1 in each st.
Rnd 11: [sc 5, dec] 3 times. (18 sts)
Rnds 12–17 (6 rnds): sc 1 in each st.
Rnd 18: [sc 4, dec] 3 times. (15 sts)
Rnd 19: sc 1 in each st.
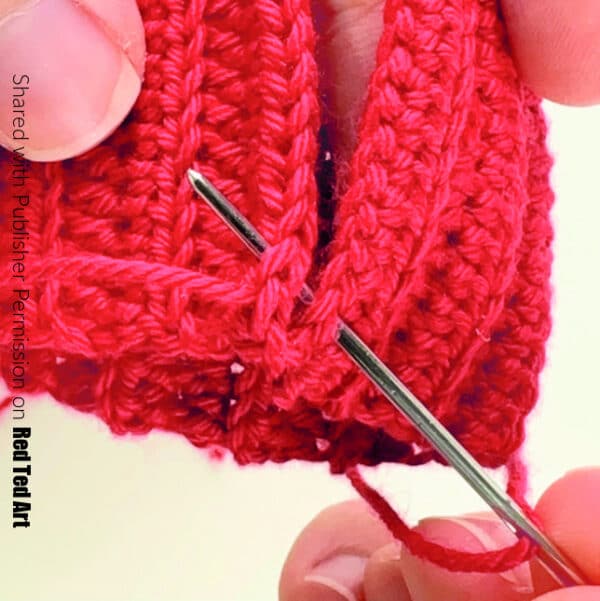
Do not stuff. Flatten opening and work next row through both layers to close (see Techniques: Closing with Single Crochet).
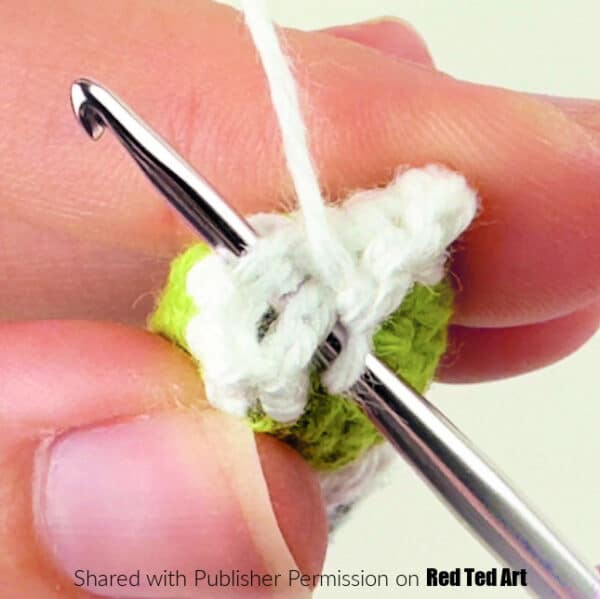
CLOSING WITH SINGLE CROCHET: Some pieces, such as arms, are closed by working single crochet stitches (or other stitches when mentioned) through both layers. 1. Flatten last round of piece so sts on both sides are aligned, insert hook through first pair of sts (st facing you and st facing away) (see image above), work st through both. 2. Work all pairs of sts until piece is closed. If an odd number of sts, last st of round before closing will be left unworked.
Row 20: sc 7, leave 1 st unworked. (7 sts)
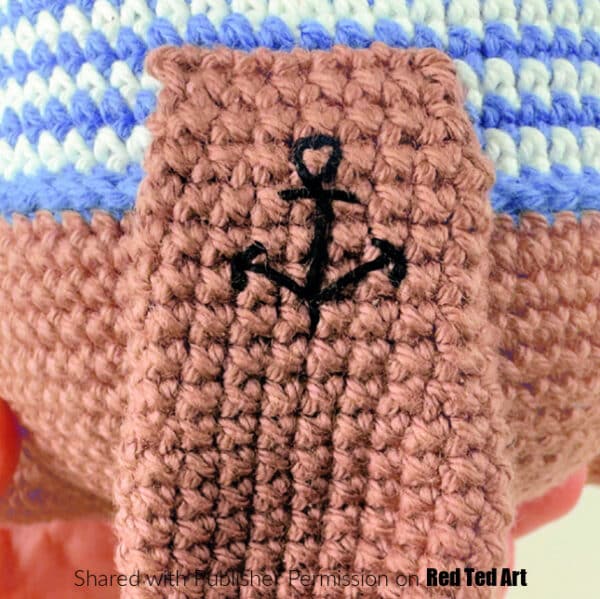
Fasten off, leaving long tail for sewing. Using black embroidery floss, embroider an anchor on one front flipper (see image above).
Sew front flippers on sides of body between Rnds 30 and 31, 20 sts apart at front. Tattooed front
flipper should be on right. Secure middle of front flippers to body with a few sewn stitches.
Heart patch
Rnd 1: using Red, working in magic ring, ch 1, hdc 2, sc 1, ch 2, sc 1, hdc
2, ch 1, slst 1. (7 sts + 4 chs)
Fasten off, leaving long tail for sewing. Sew heart patch to front of sweater on left side.
Beanie Hat for Walrus
Row 1: using Red, ch 22, start in 2nd ch from hook, sc 7, hdc 14, turn. (21 sts)
Row 2: ch 2, work in BLO, hdc 14, sc 7, turn.
Row 3: ch 1, work in BLO, sc 7, hdc 14, turn.
Rows 4–33 (30 rows): rep Rows 2 and 3 fifteen more times.
If necessary adjust the total number of rows so the beani fits the head of Wilbur the Walrus!
Fasten off, leaving long tail for sewing.
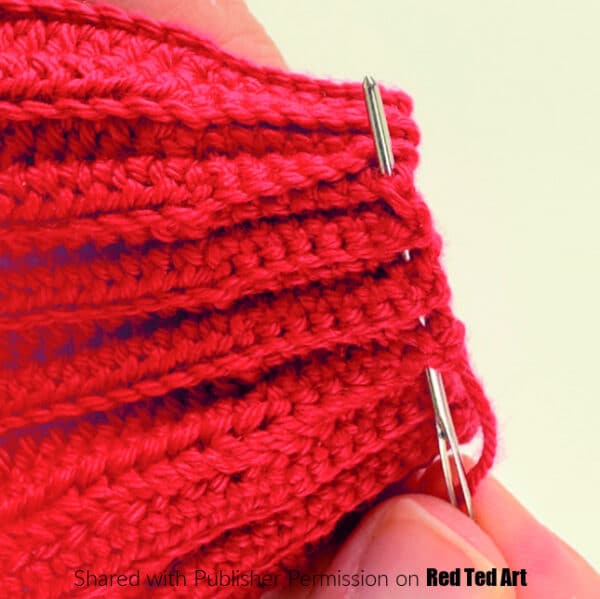
Sew last row of beanie to foundation chain to make a tube (see Photo on left). Then, sew
top opening closed by threading needle up and down edge of top (see Photo on right). Pull yarn tail tightly to close opening and add a few extra sewn stitches if necessary.
Fold bottom of beanie up to make a brim. Place beanie on Wilbur the Walrus’ head.
Crochet Fish snack
Rnd 1: using Light Blue, sc 5 in a magic ring. (5 sts)
Rnd 2: inc 5 times. (10 sts)
Rnd 3: sc 1 in each st.
Rnd 4: [sc 1, inc] 5 times. (15 sts)
Rnds 5–12 (8 rnds): sc 1 in each st.
Rnd 13: [sc 3, dec] 3 times. (12 sts)
Rnd 14: sc 1 in each st.
Rnd 15: [sc 2, dec] 3 times. (9 sts)
Do not stuff. Flatten opening and work next row through both layers to close.
Row 16: sc 4, turn, leaving 1 st unworked. (4 sts)
Row 17: [ch 5, start in 2nd ch from hook, slst 1, sc 1, hdc 1, sc 1, cont working on Row 16, skip 1 st, slst 1] twice. (2 fins)
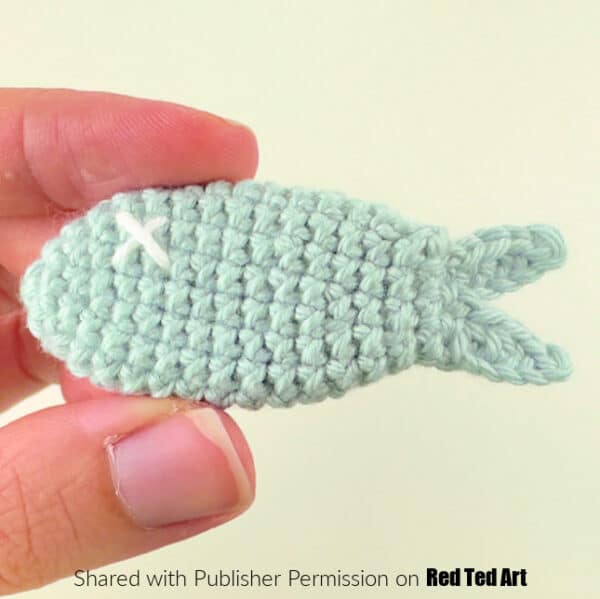
Fasten off and weave in yarn ends. Using White, embroider an “X” for eye on each side of fish snack.
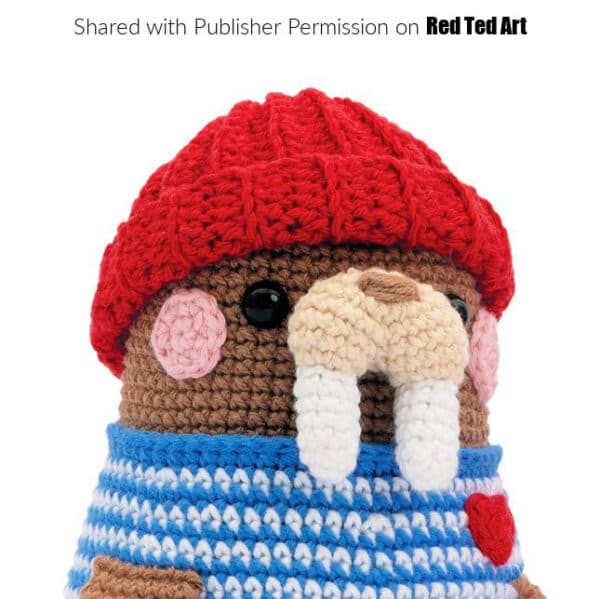
And finished! You have your very own Amigurumi Walrus!! I hope that you enjoyed making your very own amigurumi! Now, you have had a taste for this wonderful pattern by Andreia Ferreira, why not grab yourself a copy of the book? For A Year of of Amigurumi Friends?
Get your copy on Amazon or all good book sellers!
So cute!
More fabulous Crochet Patterns to explore here: