DIY Roman Shield KS2
Aaah it is a long time since we last made a shield.. last time it was an adorable Cardboard Knight’s Shield.. and as Red Ted grows up, we move from Cartoon Knights to Roman Shields! I thought I would share my son’s Roman Legionaire Shield DIY. Well.. he and The Englishman made it recently for a KS2 Project covering the Romans at school. I love that it is made from recycled materials and that my son is so very proud ot it.
If anyone is learning about the Romans at the moment, they will probably recognise this Roman shield as a Legionaire’s shield, to be used in battle. MOST Roman Legionaire’s shields are in fact red.. though there are some variations, including this blue one. My son picked this one as his DIY, as it was different and because he loves blue (well good enough reasons don’t you think?!)
This Primary Homework Help website shows you many different Roman Legionaire’s shields with different colours and designs, including the one that inspired our make today. I hope you find it informative!!

This Shield DIY was never intended as “Red Ted Art” blogpost, but because my son was so very proud of it (and maybe I was a little bit too, we thought we would share the images with you.. as well as provide a little information!
To make this blue Roman Legionaire’s Shield, you will need:
- A large piece of card (we happened to have some delivered that day in a nice big box)
- Some white paper and yellow paper
- Tin foil
- A plastic pot (I think ours is a humous pot, washed and dried)
- Blue acrylic paint
- Glue
How to make youe legionaire’s shield:
Well.. some of the detail will indeed be lacking.. but in essence, The Englishman and Red Ted started by sketching out the Roman Shield and identifying what details they wanted to feature.
Then they cut out and painted a large piece of cardboard blue.

Whilst that was drying, they hunted around for a suitable “nobbly bit for the centre of the shield”. They found a humous pot, washed and dried it and got it read to go on later.
Next they got out yellow paper and cut it into shapes. for the arrows and the Legionaire’s regimental numbers. Again, they put these aside for later,
Finally they created the “wing details” out of white paper and pen. To get all the wings evenly, they used the first one to trace ourt the remaining 3 and then flipped the pages accordingly.
On some of the details, they did need to cut things out 2-3 times to get proportions and feel of things right.
Once all the pieces were ready, they placed them on the blue cardboard and positioned them accurately and glued them in place.
Well done Red Ted and the Englishman!! We love it!
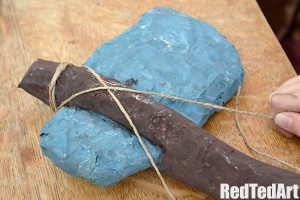
You may also like: our Papier Mache Stone Age Axe:
Another great KS2 Project for those covering the Stone Age..
And we also have a fantastic errupting volcanoe for KS1:


