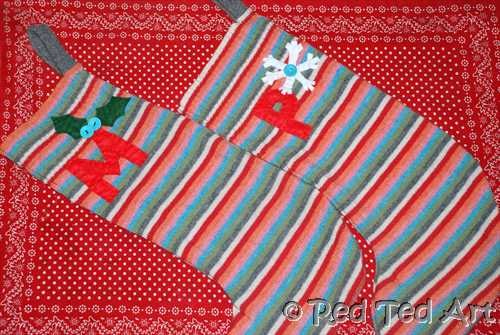
How to… make a No Knit Knitted Christmas Stocking
Hello! Welcome back to this week’s “How To”… today, I show you an oh so simple “no knit” Knitted Christmas Stocking. This forms part of the “Christmas in July” season. Which is designed to give you plenty of time to hunt around for any materials and get your crafts made!
I saw this idea on this & that round about the 23rd Dec 2010…. and made some there and then. Such a fab and simple idea..
So, without further ado:
Materials: an old jumper (if you are lucky it will be enough for 2 stockings), thread & needle, felt for decorating
In December last year I was still a disliker of sewing machines. Now I am a sewing convert… so, you can hand stitch this or use a sewing machine! Your choice!
1. I used a much loved moth eaten jumper of mine. And was so pleased to be able to recycle it. I was rather pleased with myself when I also “recycled” the little turquoise buttons it came with! Later I bought an additional jumper in the charity shop and made one of The Englishman. I need to make another for myself this summer… Lay your jumper out neatly and look at where your largest surface area is. I think it is nice to use the original’s jumper’s ribbing as the top part of your stocking. This gives it a nice neat edge. I was lucky that when I cut off the arms and opened them up, there was enough surface for a 2nd stocking. My charity shop jumper had tighter arms, so wasn’t big enough for two.
2. Make a stocking shape with pins and sew all along them. You can of course cut a stocking shape first – just trace it on newspaper first. I tried to make sure that my stripes aligned! But I am sure no one will mind if yours don’t!
3. Cut & make a little loop with any remaining ribbing.
4. Use some felt scraps to add initials and Christmas details.
Done! Aren’t these “No Knit Knitted Christmas Stockings” just simply adorable? I did have to darn some moth holes.. but thought that for stockings you can get away with it… opposed to wearing a moth eaten jumper!


