How to make a Willow Wreath (Easy)
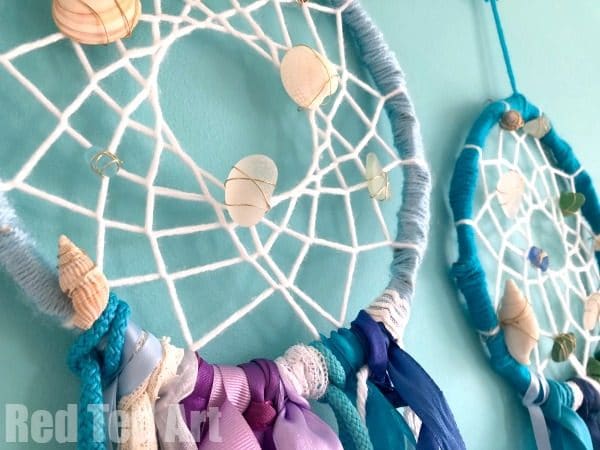
Today, learn how to make a Willow Wreath. Whether you are making a willow hoop for crafts such as DIY Mermaid Dreamcatchers or a willow wreath as Autumn or Christmas Wreath decorations, this method remains the same (and really is super easy!!). My daughter decided to give one our Willow wreathes to the gerbils.. who LOVED it. Ha. Well if you have spare, why not!! In the meantime, we turned our DIY Willow Hoops in Dreamcatcher DIY videos.
You can substitue the willow with dogwood and make Dogwood Wreaths too (we have super cute and simple Heart Dogwood decorations too!!).

DIY Willow Wreathes – Materials
To make OUR dreamcatcher hoops, we used
- 4 pieces of 1m willow – if you have longer pieces, you can make bigger hoops. These 1m ones where great for a hoop the size of a dinner plate
- Willow “thread”- this is optional, I happened to have some from anoyther project, and I thought it looked pretty! But you really don’t have to use this!
(You can learn how to grow your own Willow here or you can buy willow for crafting here US/ UK (affiliate links)).
How to make willow wreaths
Do watch our how to make willow wreaths youtube video.. or follow the step by step instructions below!
How to make a willow wreath step by step instructions
If you have FRESH Willow, you can get making straight away. I used dried willow, so I soaked it in the bath for a few hours first (probably 8hrs, but I think 2-3 hours would have worked too).
Once your willow branches are flexible enough for bending, take your first willow piece. Cuver it around and twist the end around the beginning. At first it MAY not hold and it MAY also look a little egg shaped.. but fear not.. once you have added 2 more pieces, it will start to hold in place. The egg shape can be adjusted at the end.
Take your second piece – this time start opposite to the first piece and twist the willow around the existing hoop.
Your third piece should go between the first two – so you have the thicker end pieces of your willow branches equally spaced out.
Keep going until you have a desired thickness. I used four pieces of willow in total. It really is that easy.
As I had some long thing pieces (a bit like string), I decided to twist those around too. They made a pretty contrasting pattern and allowes for firming up the wring.
Once finished.. you can give the final Willow Wreath a good “wiggle” to get it into a nice circular shape.
Once tried.. you can trim off any edges on your Willow Wreath that you are not happy with.
That is how quick and easy it is to make a wreath from Willow. Enjoy!
Learn how to turn your DIY Willow Wreath into a DIY Mermaid Dreamcatcher: