Kids’ Valentine’s Glasses Craft
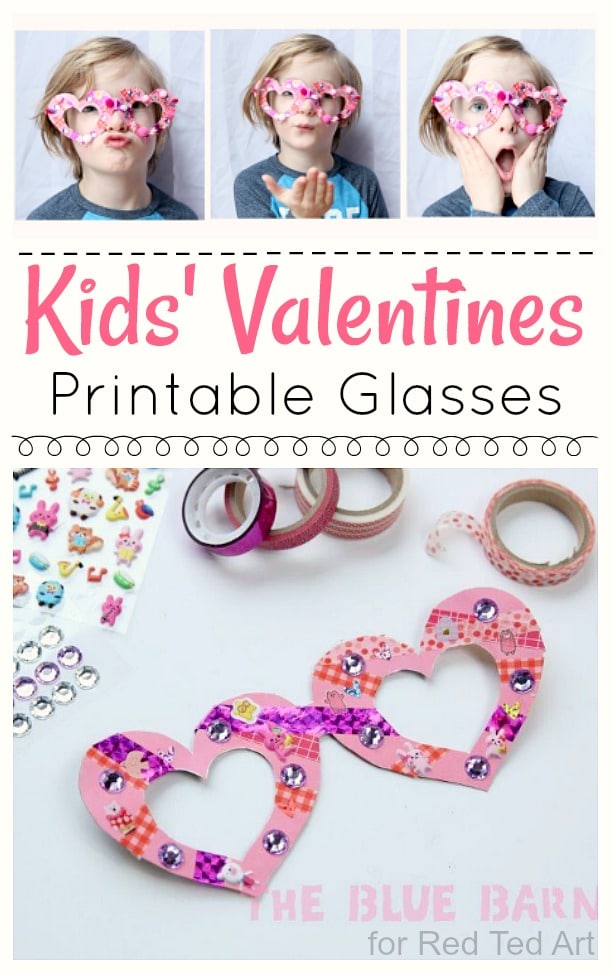
Looking for a fun Kids’ Valentine’s Craft? Look no further, this Kids’ Valentine’s Glasses Craft is super cute and super fun and comes complete with Free Valentines Printable. And a brilliant Valentine’s Day Craft for both the home and classroom! It is a great guest post by Joanna from the Blue Barn!!! Read on and be inspired!
Kids’ Valentine’s Glasses Craft
Firstly, thanks Maggy for having me as part of your 31 days of love series I’ve so enjoyed seeing all the crafty Valentine goodness that has already been shared and am super excited to be here today to share mine. So my name is Joanna and I am the founder and creator behind The Blue Barn. I spend my days chasing my 4 kiddos around the place, teaching preschool art classes and once warmer weather hits getting creative outside in our old Blue Barn. When I’m not doing all of the above I am looking after our dog Molly, goats, rabbits and chickens – yes its quite literally like living in a zoo around here most days.
When it comes to my kids and Valentines I like easy, fun and not too expensive to replicate for their 20 classmates, this project checked all the boxes, and seriously who wouldn’t look super cool in these fab Valentines shades? Ok so on with the making.
Kids’ Valentine’s Glasses Craft – you will need
- Thin cardboard – a cereal box works great
- Print our Sunglasses PDF here (enter $0 at check out for this freebie)
- Glue
- Pipe cleaners
- Anything you have to decorate with, stickers, pens, wash tape, gems, buttons, pom poms or glitter to give you a few examples.
Enter $0 at checkout for this cute freebie for Valentine’s Day!
How to make your Kids’ Valentine’s Glasses Craft
Step 1 Print the free printable and stick on to recycled card
Cut up the side of a cereal packet. Print out the PDF printable and glue to the inside of the cereal box. Set aside to dry (Its much easier to cut out once the glue is dry).
Step 2 Cut out the Valentines Glasses
Taking scissors or an exacto knife cut around the edge of the pink glasses, cut the white centers out too – kids will probably need a grown up to do this step.
At this point its a good idea to also make a hole at the edge of each eye this will be used to thread the pipe cleaners through at the end.
Step 3 Decorate Your Valentines Glasses
Once your glasses are cut out you can leave your kiddos a selection of Valentine colored decorations to decorate with. Depending on how much mess you want to clean up you can leave out anything from stickers to paint and glitter. We like the Kwik Stix for their creamy pain texture without having to wait for them to dry and they are super easy even for little hands to use.
If you use pom poms you will have to leave the glasses flat to dry before you pick them up to add the arms.
Step 4 Add the arms to your Valentines Glasses
To add the arms we used two pipe cleaners. Take two (different colors is fun) and twist them together as shown in the picture below. Then once your done twisting take some scissors and cut the length of the twisted pipe cleaners in half. Curl one end in a large loop and the other in a small loop – you are going to hook the small loop through the hole in glasses frame and the larger loop will hook over your child’s ears.
And thats it, your Valentine is ready just pop them on and give them a kiss!
If you’d like to see more Valentine ideas from the Blue Barn you might like:
- this Playdoh love bug invitation,
- our heart wreath or
- try our sewing project great for little hands with this Valentine Flower.
More wonderful Kids Valentines Day Ideas here:
We also have more free Valentine’s Printables here:


