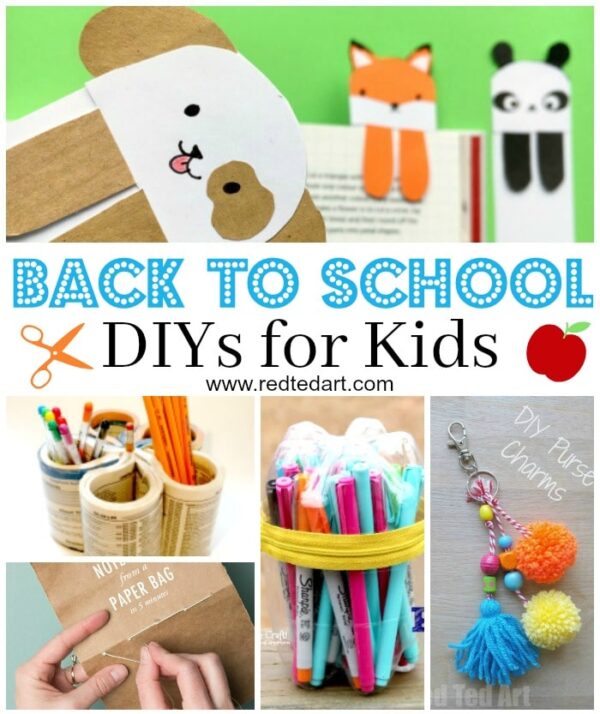
Mini Notebook with Locks
Oh yes! We do love a Mini Notebook craft nothing quite like some fun Back To School Craft ideas… today’s Mini Notebook made from one sheet of paper comes complete with locks!
This is a slightly easier version that one last mini notebook, but it does need a ribbon or paper lock to help “bind it”. But as before NO GLUE is needed.
These make great mini books for story writing in the classroom (use A3 or A2 paper for larger versions).

To make your Mini Notebooks with locks, you will need:
- A4 sheet of paper (or larger if you want to do more writing practice)
- Scrap paper for the locks (or ribbons would work very nicely too)
- Scissors
- Pens for decorating
- NO GLUE. NO STAPLES. NO TAPE!! Hooray
How to make a Mini Notebook with locks – Easy version
The neater you work, the neater you final mini book will be!!!
Begin by creating “guide lines” for cutting and folding
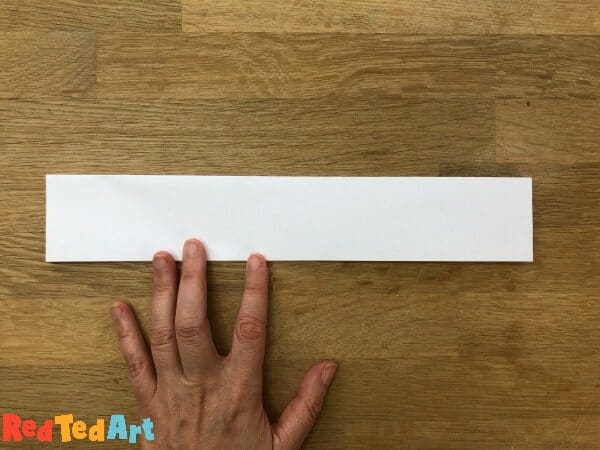
Take the paper length wise and fold in half. Fold down in half again and make a super neat crease.
Open up.
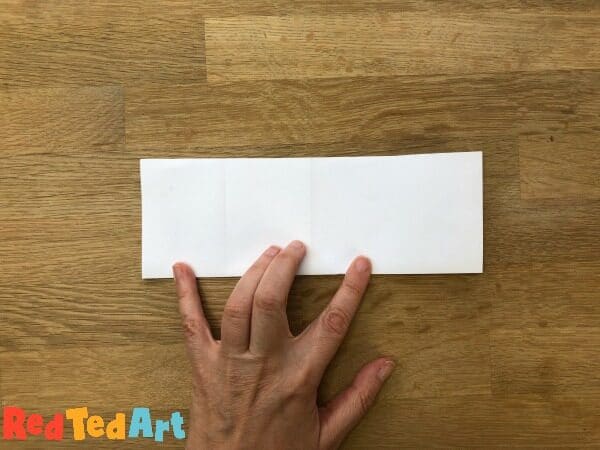
Take the paper width wise and repeat – fold in half and then half again.
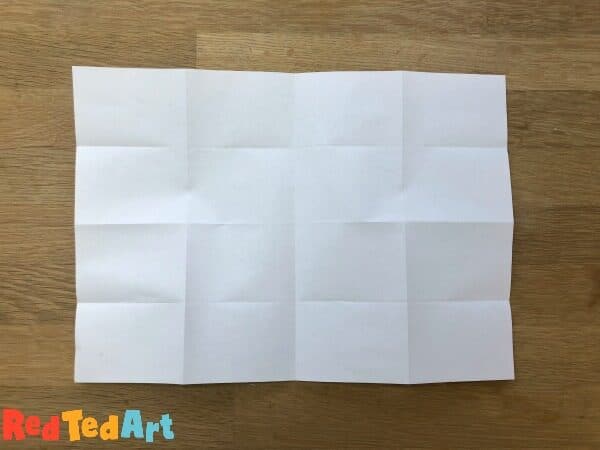
Open up your paper – you should now have 16 equal rectangles.
Cutting your paper book
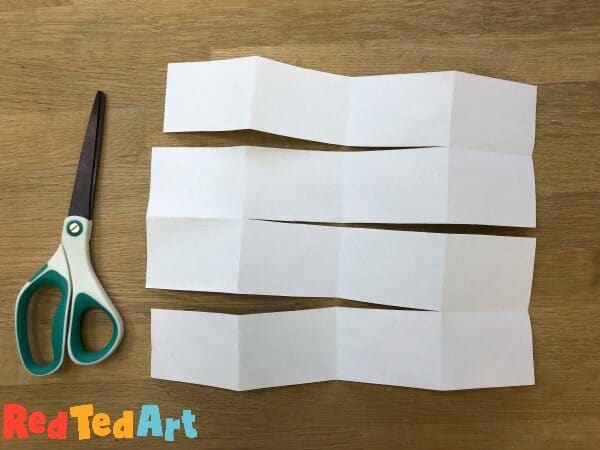
We made our book landscape, but you can make it portrait too. Choose which way up you wish your book to open.
Cut across the top three lines (NOT the 4th). From left to right.
Cut across the middle three lines (NOT the 4th) from right to left.
Cut across the bottom three lines from left to write.
You should have a “zig zag” or “side ways M” resembling piece of paper!
Assembling the mini paper book
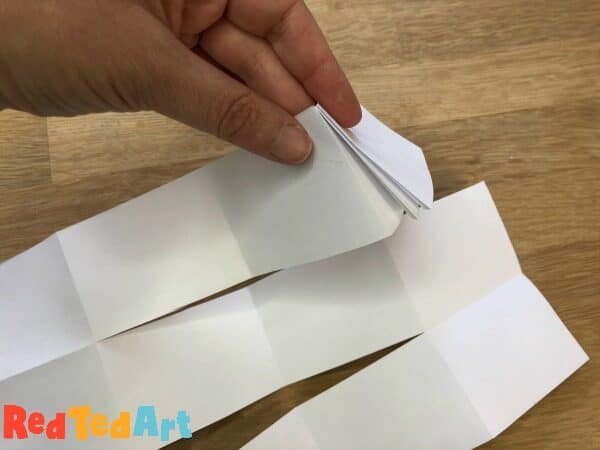
Now concertina up the book pages, following your folds! Your basic mini paper book is finished.
You will notice that the spine is “loose”. So now we need to make the looks and binding.
Your mini book binding and lock
![Making the lock and spine for your no glue minin otebook craft]](https://www.redtedart.com/wp-content/uploads/2019/06/Notebook-lock-1-600x450.jpg)
As mentioned you can use a broad ribbon for this, which you tie with a bow. But we will make a paper binding that you can decorate.
Cut a strip of paper twice the width of the book + 1-2cm. And about 4cm high.

Fold the top part of the strip down and the bottom part up. You should now have a strip about 1-1.5cm high. You need the folds, as these will form part of the lock later.
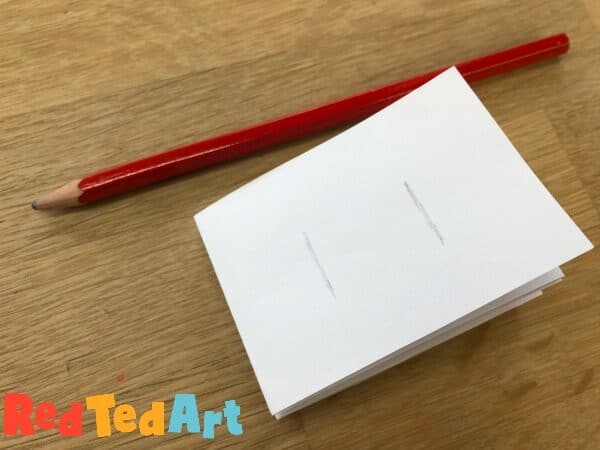
Now take your front cover of the book and the back cover.

Draw 2 vertical lines 1.5cm wide on both sides and cut.
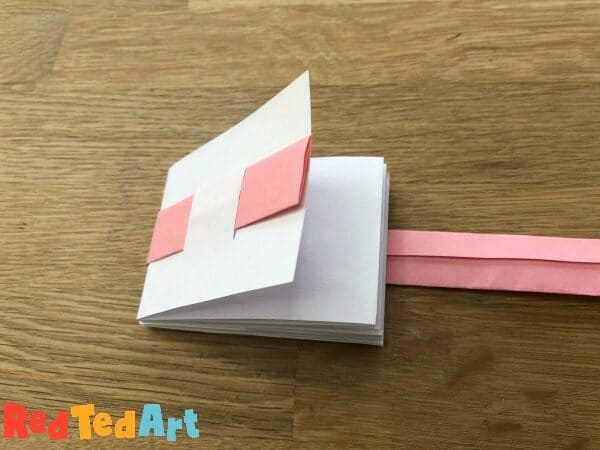
Weave your paper strip through both.
The end of the paper will fit into the beginning to lock.
Decorate! And finished!!
If you find a step by step video tutorial helpful, check out this:
Check more of our fun Back to School Stationery ideas: