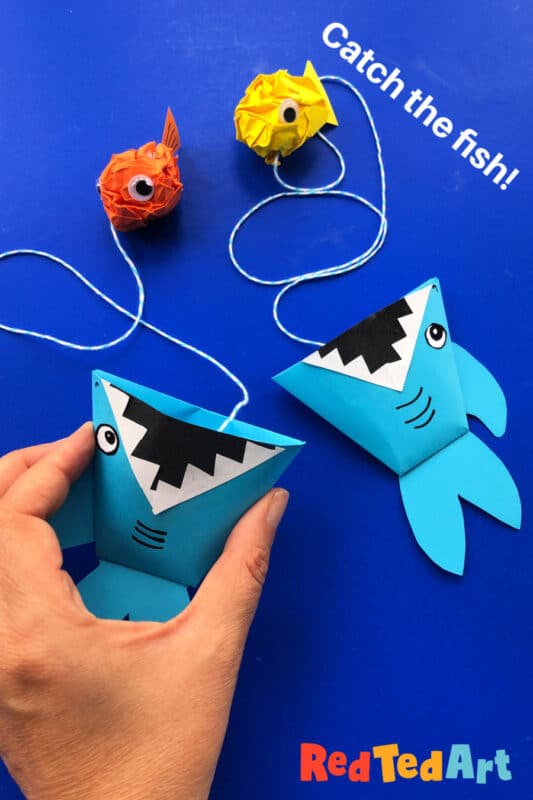
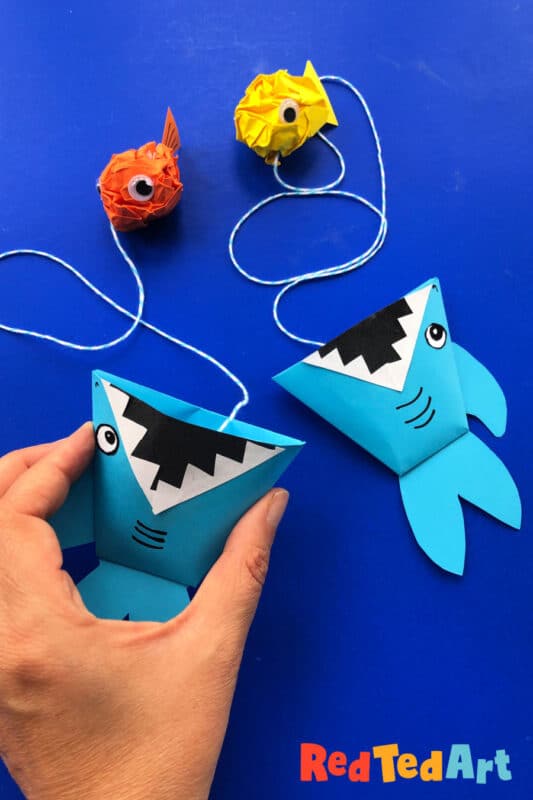
Easy Origami Shark Toy For Kids
Let’s have some fun with PAPER! We love making paper toys and also love all things Origami! I used to think origami is “too difficult” or “too precise”.. but actually, given the right project origami is super fun and super easy for kids to have a go at. Today, we make a super cute “ball and cup” game with the classic origami cup – turning it into a hungry shark paper toy. Come and make this fun Origami Shark Toy for kids with us today!

This origami shark paper craft, was first shared with Sky Kids Uk viewers back in 2020 for the Best Makes Ever show that Arty Crafty Kids and I created for them. And now, we get to (slowly) share all the makes with you here on Red Ted Art and Arty Crafty Kids!
Supplies needed to make your Origami Shark Paper Toy:
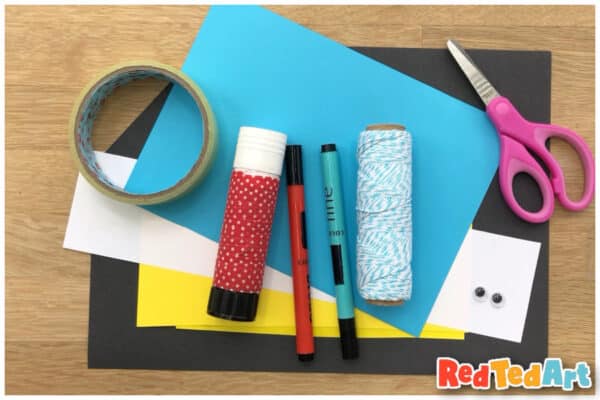
- colorful paper – though you could use white printer paper and color it in yourself
- scissors
- glue stick
- string or baker’s twine
- black pens
- googly eyes (optional)
How to make an Origami Paper Shark Toy
This paper shark is made based on the classic origami paper cup! (A paper cup that you can actually drink from!). So this project comes in two parts, how to make an origami cup and then how to turn this paper cup into a shark AND a ball and cup game!
Begin by making your classic origami paper cup
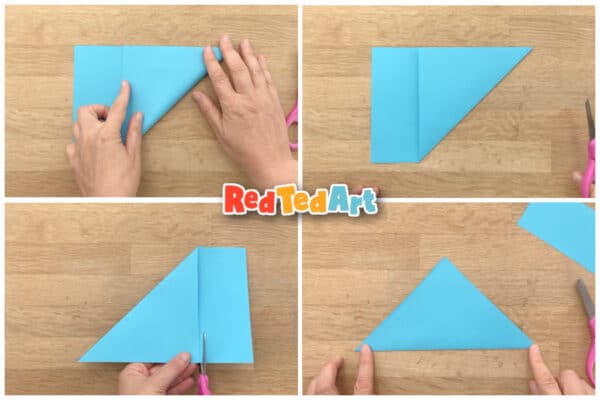
Begin by turning your rectangular paper into a square piece of paper. Fold up one corner to meet the edge.
Make a neat crease.
Cut along the edge (keep this piece of paper you will need it later).
Keep the paper folded, so you have a square piece of paper folded into a triangle!
Neaten the creases and rotate so the long edge runs along the bottom.
Take the far right corner and bring it over to touch the side on the left. As you fold, it should create a PARALLEL line with the bottom edge.
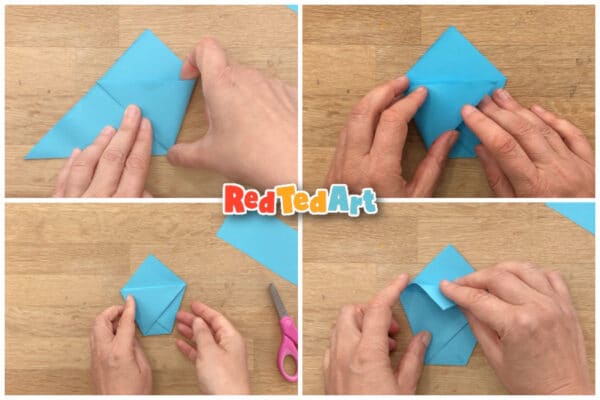
Neaten down the folds!
Repeat with the left side – again make sure you have a pararrel line.
Neaten down the folds.
Take on of the top flaps and fold down.
Flip over the origami and fold down the bag side. Make a neat crease.
Fold it back up and then turn inside the paper cup.
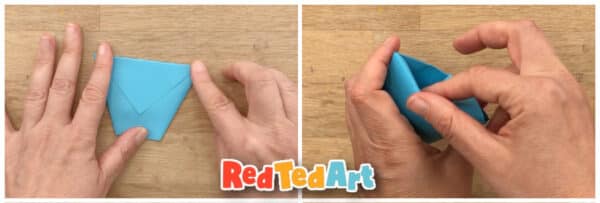
Finished! Your easy origami paper cup is finished!
Decorate into a shark
As with our Halloween Frankenstein Cup & Ball game, we now take this paper basic cup and decorate it for the shark paper toy!
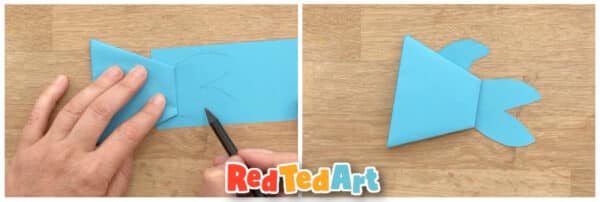
Begin by making the sharks fins. Use the cup for sqize and sketch out the tail fins to fit. Cut out.
Draw a shark fin and cut out.
Glue both in place.

Now you need to make the shark’s big teeth and mouth. Cut out TWO white zig zag lines (top left).
Cut out a triangle piece of black.
Glue the white teeth along the edge.
Stick on to the shark and then trim the edge off!
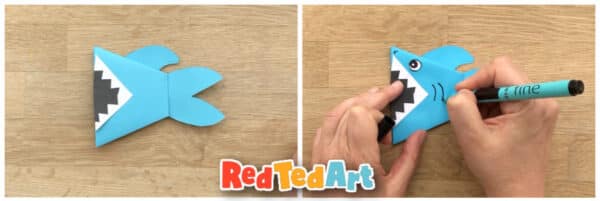
Using a pen add the final features: sharks eyes (you can cut a white circle out for this) a shark’s nostril and the famous shark’s gills.
Make a simple paper fish to catch
Now we need to make the “ball” part of the ball and cup game. A paper fish!
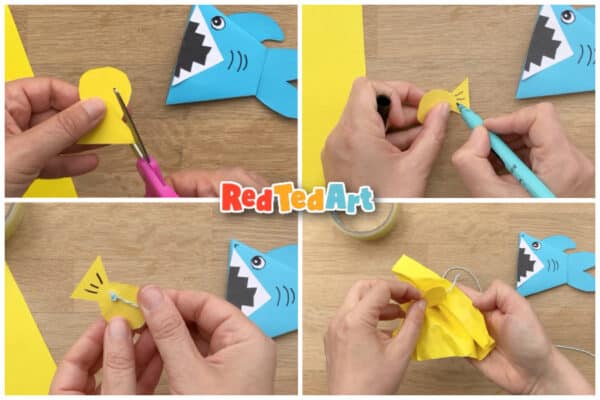
Draw a simple fish shape: Think a ball with a big fin. And cut out. Draw some little fin details on the back.
Tape or glue some string to the main body of the fish.
Take some scrap paper in the same colour, carefully wrap around the fish – but with the fin AND the string, “hanging out”,
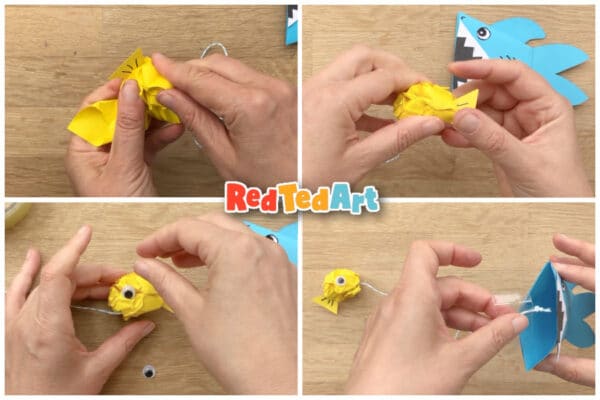
Scrunch up the paper round the fin and the string. Don’t scrunch the fin.
Make the scrunchie as neat as possible.
Glue on some paper or googly eyes.
Tape the other end of the string inside the shark’s mouth.
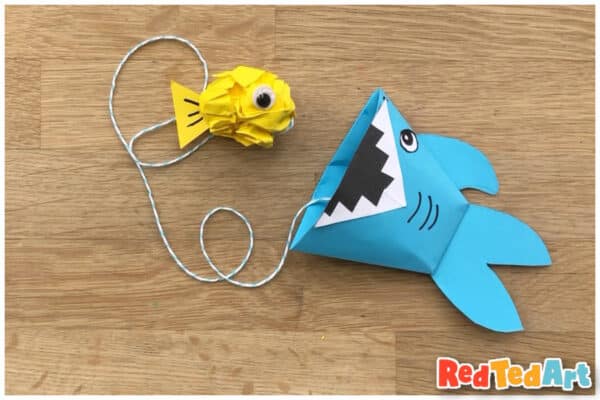
Your fish ball and cup game is FINISHED! How fun is this?
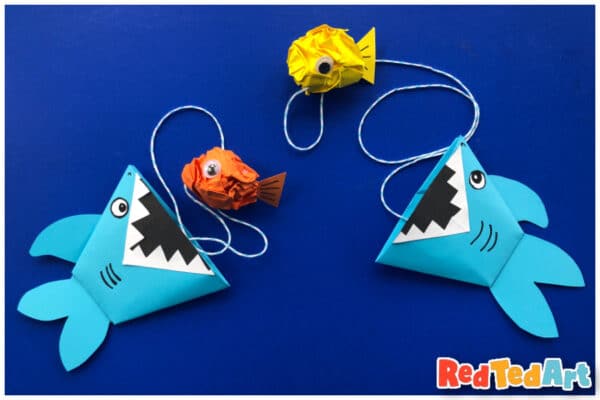
Make more sharks with paper fish to catch. SO CUTE!
More Paper Toys for you here! Lots of paper toy fun for summer, to get crafty AND play!

More from the Best Makes Ever series (we will be slowly adding to this category of time, but for now we have the Salt Dough Clouds and the Pirate Finger Puppets: