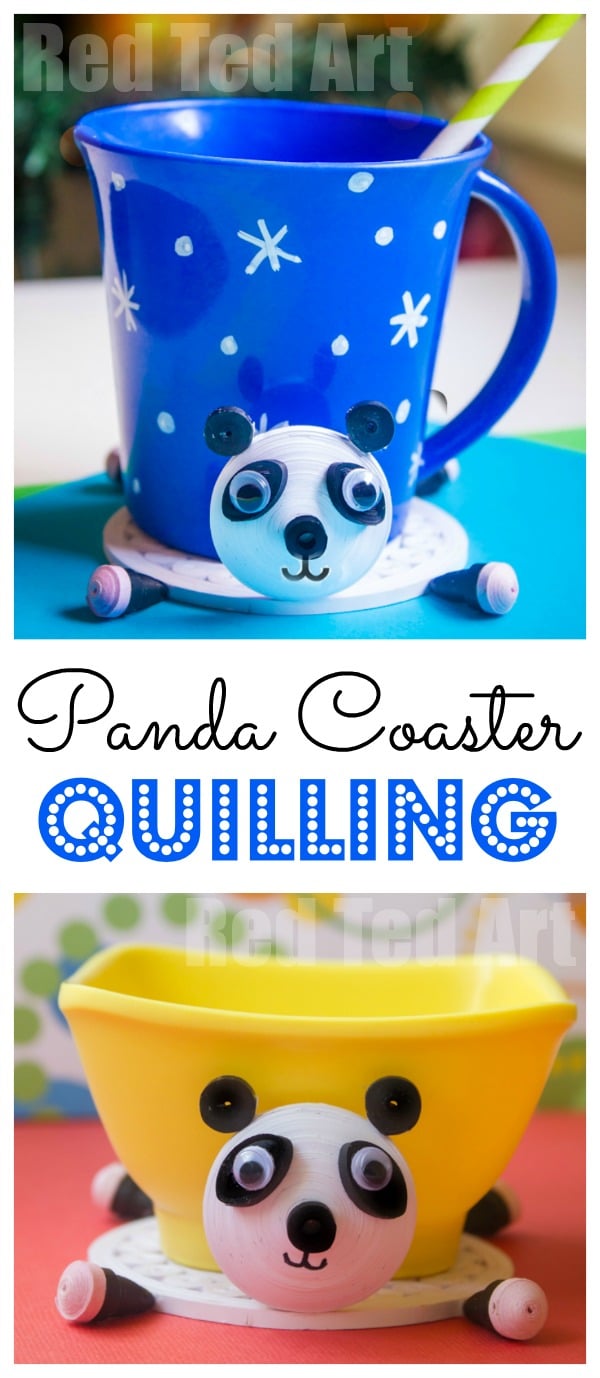
Panda Quilling Project to Make a Coaster
We are back with our Quilling Projects.. with a super adorable and new Panda quilling project to make a coaster! Yep. Not only is this Quilling Project **cute** it is also PRACTICAL. You can make it and use it as a little coaster.. I am sure you can think of a whole set of other coaster designs to come up with! We were tremendously inspired by these wonderful Quilled Coasters (so many fabulous designs) and our guest writer Ritu, created this new Panda Quilled Coaster based on those.
Panda quilling project – Materials
- Quilling strips of 5mm in white and black colour. (White US/ UK. Black US/ UK)
- Slotted quilling tool or toothpick (US/ UK).
- PVA glue
- Ruler
- Quilling mould board (optional) (US/ UK)
- Googly eyes (US/ UK)
(affiliate links added for convenience)
Panda quilling project – How T0
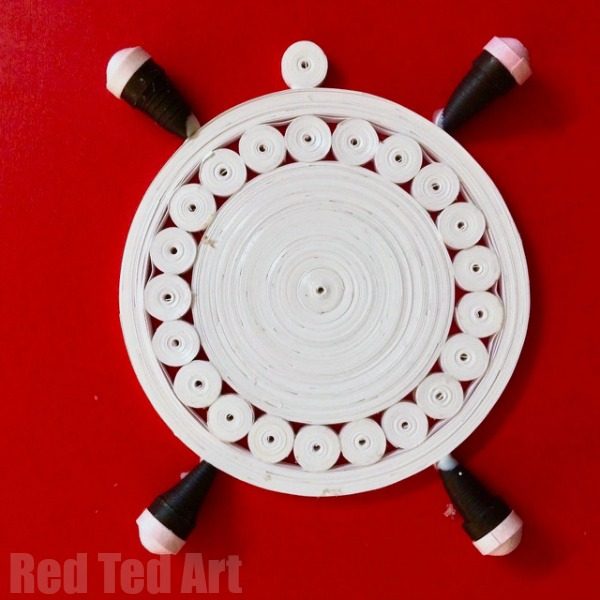
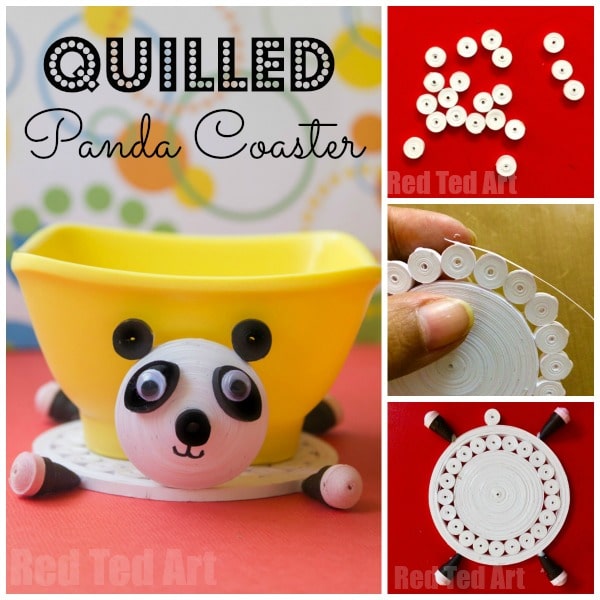
How to make your quilled coaster base

* Make a tight coil using the white quilling strips. The diameter of the tight coil should be 7 cm. To make this, twenty-five to thirty strips will be required.
* After this, make thirty tight coils each from a single white strip (the number may vary slightly.. but should be around this figure and should fit neatly around the outside of your white centre coil).
* Stick these thirty tight coils around the big tight coil made in the beginning. Once dried, wrap the entire structure with white strips on the edges. For this use at least eight to nine strips.
* Next give a coat of PVA glue on the back side of the structure to make it sturdy.
* Once dried, your base for the mat is ready!
How to make your quilled panda face, eyes & nose
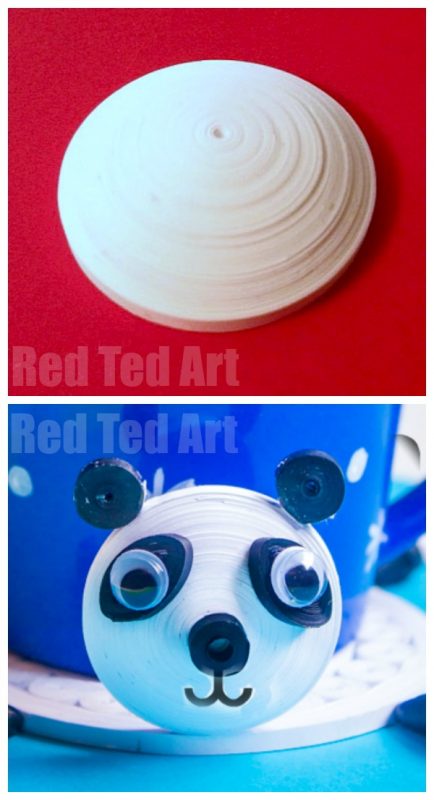
* Make a tight coil using eight white quilling strips.
* Using your fingers make a dome shaped structure from the tight coil. To maintain the shape, apply a layer of glue on the inner side of the dome.
* Then make an open coil using a single strip for the eyes, give it an oval shape using your fingers. Add some googly eyes.
* For the panda ears: Make two tight coil each using a single black quilling strip.
* For the panda nose: Make a tight coil using a single black strip and stick in the centre.
Now to make your Panda Quilling Project Tail
* Make a tight coil using a single white colour strip.
And finally…
The Quilled Panda Legs

* Make four tight coils using a black coloured full quilling strip.
* In the centre of the coil, place a sharp pencil and push outwards. Once it acquires a cone-like shape, take it off from the pencil. Apply glue inside the cone to help maintain the shape.
Make four tight coils using a pink coloured full quilling strip. Using a mound board, give it a dome shape.
On the inner surface of the dome, apply glue and let it dry. Once both the pieces are dry, stick them together.
* Stick all the parts using the image. Once done, stick googly eyes and your quilled panda place mat is ready!
This guest post was written by Ritu Gera!
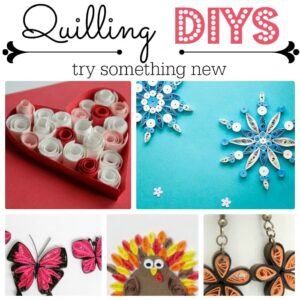
More easy quilling patterns and designs for you here: