DIY Sunflower Clay Bowls
Finally, we have finished our Sunflower Bowls – we actually started them a few months ago, when we made some super simple Poppy Bowls, which in turn inspired by our love for the oh so popular Autumn Leaf Bowls (which really are FABULOUS!)… but I digress. We decided to have a go at this DIY Sunflower Clay Bowl, because we thought it would make a lovely Gift Kids Can Make too!

If you are looking for guidance on skill levels – I would say the simple Poppy Bowls are great for younger children and I would make the sunflower bowls with slightly older ones (8-9yrs+). The sunflower bowl is not difficult, but it does take a little more concentration and they DO take longer to make!
DIY Sunflower Clay Bowl – Materials:
- Air drying clay (we have grey, but you can get brown or white too) – (we buy air drying clay in bulk online – US/ UK (affiliate links))
- Acrylic paints in brown and yellow
- A bowl (we used a deep set bowl, but in retrospect, I think a flatter one would be nicer)
- Cling film
(read how to soften hardened air dry clay here).
DIY Sunflower Clay Bowl – How To:
TROUBLE SHOOTING: please note – the tips of the bowl can be fragile, so don’t make them too thin and also don’t make them too LONG, LONGER petals are easier to accidentally break!!
Yes.. we have done another video which you can watch on auto play. It is a quick sub 3 minute video showing you myself and my son at work! My son, 8yrs at the time helped make this Sunflower Bowl, my daughter, then 6, made the Poppy Bowls). Check out the clay bowl step by step instructions with photos below.
This is one of those projects that we “made up” as we went along. Which is why in retrospect, I do think a flatter clay bowl would look nicer.. but I don’t think it matters and depends on how you will use your sunflower bowl.
How to make a sunflower clay bowl – step by step instructions
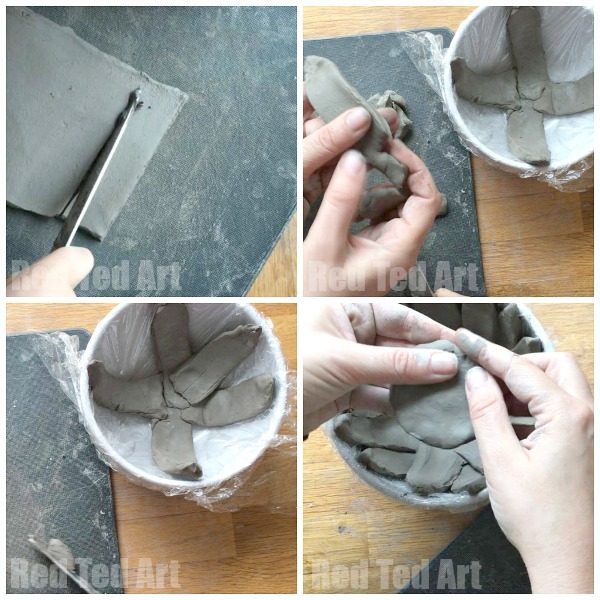
- Roll out your clay, I think ours was about 1/2 cm thick.
- We cut rectangular, roughly finger length pieces of clay.
- Shape one end of the rectangle into a point bit – either cut it into that shape or just use your fingers.
- Place into the bowl. We started off by placing 4 pieces in a North-East-South-West type pattern. We then repeated it with 4 pieces between each of those so NE-SE-SW-NW. Smooth it down a little. MAKE YOUR FINGER wet and smooth down, this will also help seal them a little and keep them together afterwards. IT WILL LOOK MESSY AT FIRST.. but bear with us!
- Then repeat the hold process as a second layer of petals on “top” of the first layer. If you want to make sure the bottom petals and top petals are extra secure, you can cross hatch the the back of the second layer and top of the first layer a little.
- Once all petals are laid. Smooth down the centre a little. Make a small ball out of clay and flatten it into a circle.

- Using a tooth pick at “seed details”.

- Let dry fully. I actually think it looks really pretty unpainted too!
- Paint with acrylic paints. We found our yellow acrylic paint was not very opaque, so the grey shined through, so also added a little of a yellow enamel paint I have!
- If you want you can paint the outside of your DIY Sunflower clay bowl too. But I don’t think you have to…

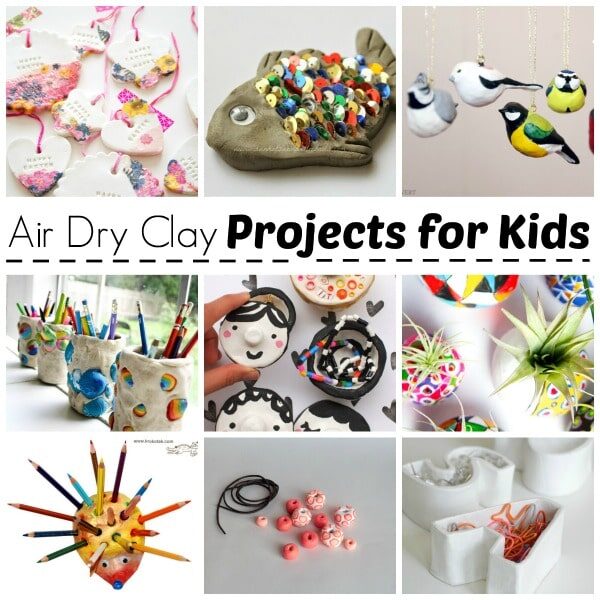
More Air Drying Clay Craft Ideas
Hope you enjoyed this Clay Project! We have tons more Air Drying Clay projects for you to explore!
Check out all our fantastic Clay Projects for Kids: