
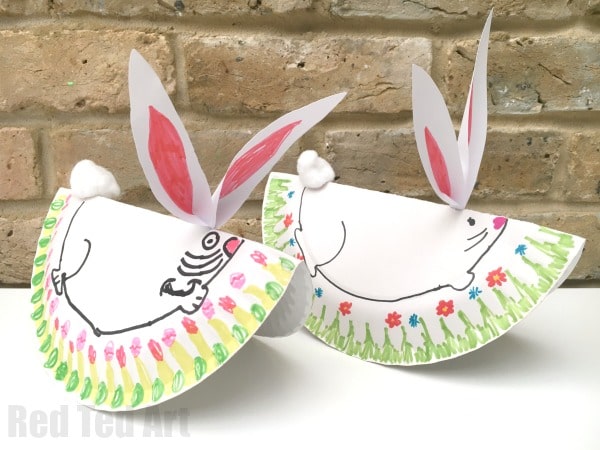
Easy Rocking Paper Plate Bunny Rabbit
Oh my! I have something super duper cute for you again today! If you love Spring Crafts.. and are looking for ***adorable** Spring Crafts for Preschool as well as some fabulously easy Easter Crafts for Preschool. Now, take a look at these oh so lovely ROCKING Paper Plate Bunny Rabbits!!! Based on some “Rocking Paper Plate Lambs” from a couple of years, ago, we got crafty again and made these lovely lovely rocking paper plate bunnies. I was surprised, that my kids now 2yrs older, still REALLY enjoy this lovely little Spring or Easter craft for kids!! Such cute Paper Plate Crafts for Easter indeed!

Excuse the somewhat shady photos – we took them, not only AFTER school, but after school AND after a visit to the local tennis court and AFTER a snack and AFTER dinner.. ha. But I thought you would enjoy seeing them anyway!
Paper Plate Bunny – Materials:

- one paper plate per bunny (stock up on Paper Plates here – US/ UK (aff links))
- extra paper or light card stock
- cotton wool
- pens (or paints, if you prefer)
- optional – stickers – we used stickers on the Rocking Paper Plate Sheep and they looked very cute!
- glue
- scissors (for ears)
Paper Plate Bunny – How To:
My daughter had a go at making a “how to video” for you! I think it is adorable (but then I am bias) – step by step photos below the video!
If you enjoyed her video, do give her a massive virtual thumbs up by subscribing to her YouTube channel here.
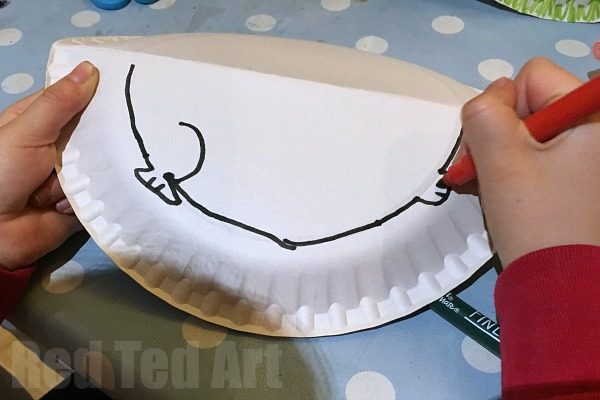
- Fold your paper plate in half – you CAN decorate both sides if you wish, we were, ahem, lazy and just did the one side.
- Once folded – add an outline for your bunny – you don’t HAVE to add legs… just a round tummy, an eye and a nose + whiskers will do!
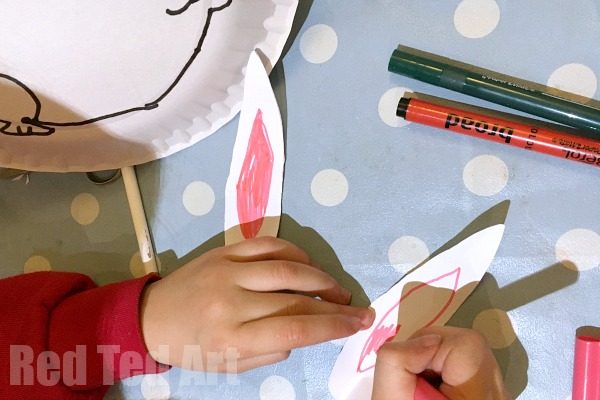
- We then cut out two long ears for your paper plate bunny rabbit – for the kids it was easier, to draw a pencil outline first and then cut out two at the same time – to make sure they are the same size ish.
- Colour your bunny’s ears in pink!
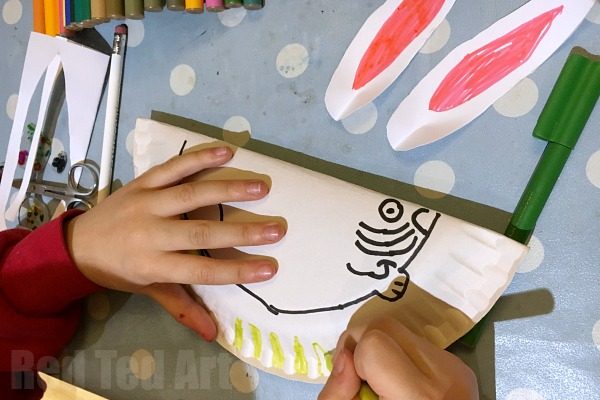
- Next, you need to decorate your paper plate bunny’s lawn – the girls drew some grass and flowers. They had fun using the paper plate’s ridged edges to define the grass. I think it would also make a great fence that the bunny is hopping over too!
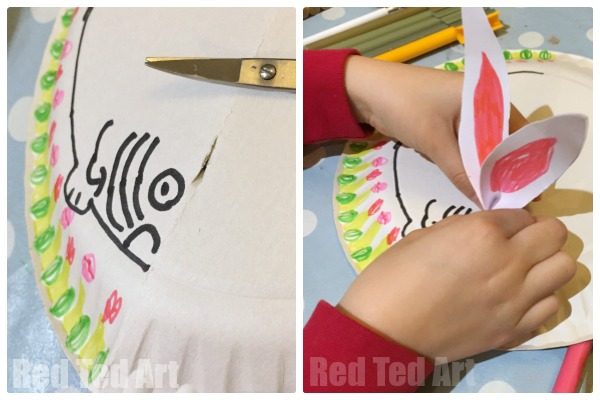
- Pinch the bottom of your bunny ears to make a fold.
- Cut a slit just above the paper plate bunny’s eye.
- Insert the bottom of your bunny ears into the slit.
- If you wish, you can secure them from below with a little tape.
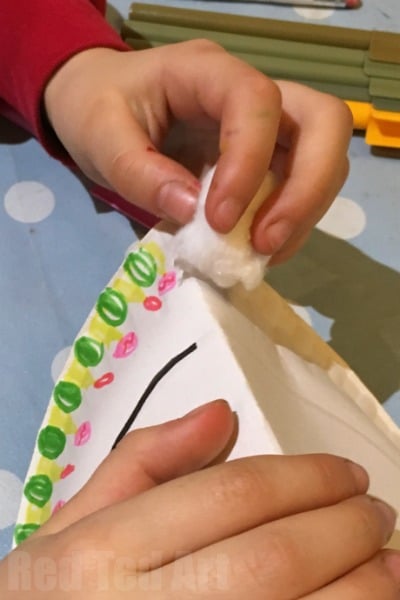
- Finally, take a little glue and glue on your bunny’s cotton wool tail!!! And your easy rocking paper plate bunny rabbit is FINISHED!!
- Top Tip: if you find that the plate “flattens” when rocking, either make the crease “sharper” or add a little tape, to keep the sides together!

Don’t forget to take a look at our Paper Plate Sheep too! So cute. We made a cotton wool version and then went to my daughter’s school and made some fabulous thrifty “shredded paper sheep” versions too!
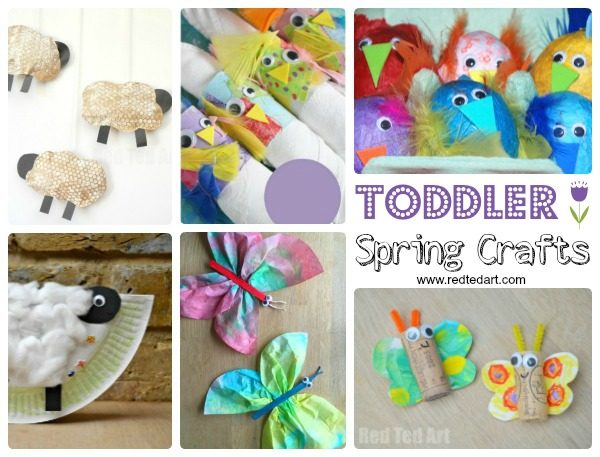
We have lots more Spring Crafts for Toddlers & Preschool here:
As well as more ADORABLE Bunny Crafts you simply must see!
