Paper Santa Squishy DIY
Time to make another DIY Paper Squishy!! We learnt how to make a squishy from paper a few months ago, when we first made our super fun and easy Emoji Squishy DIY!! I thought it was time for some more DIY squishies… and this time some Christmas Squishies!! I love these paper squishies, as they are easy to make, use every day materials and the kids can design them whichever way they want. Today’s Paper Santa Squishy DIY comes with a free printable IF you wish to use it, but of course you can draw and make it from scratch too. The design is based on the popular Christmas Squishies trio that the kids have been pestering me for – the ball Santa squishy, penguin and snowman! I designed to make the Santa one with/ for the kids! So fun.
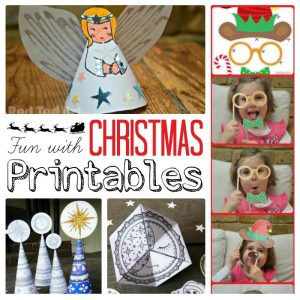
Check out what other fabulous Free Christmas Printables we have for you!

DIY Paper Santa Squishy – Materials

- Your free printable (click on the red button below)
- Red paper for your back (optional, you can use the printable for both sides or have a plain white back)
- Coloring pens
- Tape
- Scissors
- Stuffing – we used an old pillow for stuffing, but cotton wool works too (thanks Lucy!) or old plastic bags

How to make a Sanat Squishy from Paper
These are the best DIY Squishies that do not use memory foam or paint!
Your Paper Squishy’s details
Paper Squishies are really easy and fun to make. From experience, we find the bigger the squishy the better! You can either draw your own Santa Squishy or use our free Santa Squishy printable here.
To draw your own Santa Squishy – start by folding an A4 sheet of paper in half (so you have enough paper for the front and back).
Find a small plate or bowl that fits this half sheet (or A5) and trace.
Next, cut out two circles.
Now use this basic circle to draw a Santa! Watch our “How to draw Santa” video for inspiration!
You can use inspiration online or create your own. What other Christmas Squishies designs can you come up with?
Taping up you Paper Squishy – side one

Once your basic santa squshie’s parts are done, you are ready to tape it all together! Follow the steps below or watch our Paper Santa Squishy DIY video here:
Take one circle.
And start covering the WHOLE paper with tape – and taping it over the edges.
Cover the whole santa – leaving a gap at he top.
Top tip: if you use a plastic folder divider, you can stick it down on that and carefully peel it off for the next step.
Taping up you Paper Squishy – side two
Now bring align the second santa circle onto the back of circle one – with the design facing outwards.
Carefully tape the edges around the second sheet.
Add more tape to the back to completely seal it.
BUT: leave a gap at the top for filling!
Filling your Paper Squishy
Time to fill your DIY Paper Squishy. We used an old pillow stuffing. But toy stuffing works too .. and it also works with shredded plastic bags.
Fill – but not TOO tightly.. else it won’t squish as much.
Tape up the top of your Santa Squishy.
FINISHED!! You can start squishing.
You will notice that the “slow rising” effect comes from little air gaps here and there. If your taping skills are superior and there are NO gaps anywhere, you can make some pin pricks to encourage the escaping and refilling of your slow rising paper squishy’s air!!!

ENJOY!
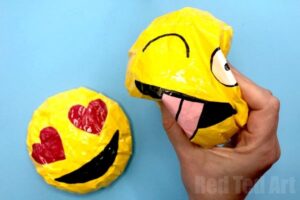
Check out our emoji Paper Squishy here:
Find more Christmas Printables here: