
Photo Salt Dough Heart Ornaments
We love making keepsake photo ornaments. They are so sweet and so precious! Today, we share some candy cane heart photo ornaments. They are adorable. Salt Dough Hearts are easy and fun to make… and of course you can make them as Valentine’s Photo Hearts or even for Mother’s Day too. You can make these salt dough heart ornaments any size – so as cute Christmas Tree Photo Ornaments or as smaller heart photo fridge magnets!

As mentioned, we modelled the salt dough hearts on candy canes – it is a great way to figure out how to shape salt dough into hearts. And you can either stick with the candy cane them and let them dry as is, or carefully mould the ends of the cane shapes together to complete the salt dough hearts!
Supplies to make Salt Dough Heart Ornaments

The supplies for salt dough hearts really are simple:
- 2 (small) cups Regular flour
- 1 (small) cup Salt
- upto 1 (small) cup Water
- Paints of choice to decorate the salt dough hearts
- A photo
- Ribbon for hanging or magnet for fridget magnets!
How to make Salt Dough
I have an extensive article for how to make salt dough and all the best tips and tricks over on my basic salt dough recipe post. But here are the basics (including a simple video for you)!
Salt dough step by step instructions:
Take your flour and put it in a mixing bowl.
Add the salt and mix.
Add half the water and stir.
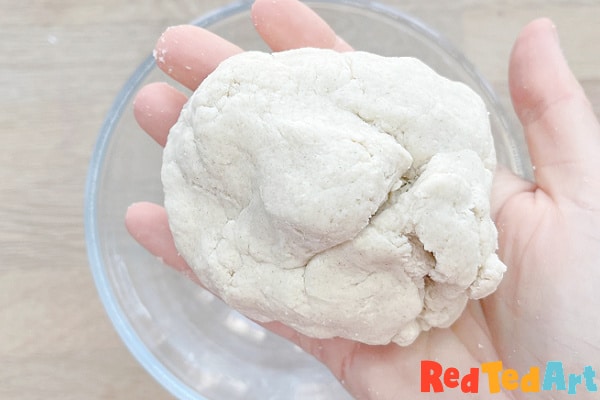
Gradually add as much of the remaining water needed to make a smooth do – keep mixing and stirring until you have a smooth dough. If you have a sticky dough, simply add a little flour to help dry it out!

If too dry: add more water.
If too wet: add more flour.
Start making your salt dough creations!
How to make Salt Dough Heart Ornaments – Photo Frames
Time to make our little salt dough heart photo frames! Watch the video on auto play or follow the step instructions below!
Let’s take a look at the step photos!
Mould the salt dough into candy cane hearts for your photos

It is useful to reference your photo for size!


Make two equally sized balls from your salt dough. Roll them in your hands to make sure they are nice and smooth and have no cracks!
Take one of the balls and shape into a “sausage”. Make a second sausage, the same length and width. Make sure they match as much as possible.
TOP TIP: if you have your photo printed out already… you may wish to size your “candy cane salt dough shapes” to fit around your photo. That avoids any “faffing” with printer sizes!


Fold over the top of your sausages to make that classic candy cane “hook”.
Fit the two candy cane salt dough creations together and check that they make a nice heart heart shape.
OPTIONS: you can now let them dry “as is” (as two separate pieces) OR you can gentlye squeeze and mould the connecting parts of the candy canes together to make one smooth heart shape!
Try your salt dough
There are different methods for trying salt dough:
Salt Dough Oven Method:
For winter crafts, this is my preferred method. Put the salt dough creations on a baking tray (or rack, though a rack will leave some lines on the back, this doesn’t really matter, but it is a personal choice). Place in the oven at 100-120C or 200 – 250F for 2-3hours. I like to turn my salt dough as it dries to help get an even dryness.
Salt dough radiator method:
You can also place your salt dough on or near radiator to dry. This can take a couple of days to fully dry! And you have to be careful not to accidentally knock it! But it is eco friendly!
Air Drying Salt Dough in the Summer Sun:
If crafting in the middle of the summer – a hot sunny afternoon can be enough to get your salt dough dry!
If you live in a humid climate – the salt dough will take longer to dry as there is a lot of moisture in the air already and you may wish to use the oven method or you may wish to use air dry clay instead!
Paint your Salt Dough Heart Ornaments

Now it is time to have fun with your paints!! You can paint your salt dough heart ornaments whichever way and in whatever colours you want! We decided to go for the candy cane look as these were Christmas Tree Photo Ornaments. However, if you are making these for Valentine’s Day or Mother’s Day, then I would probably paint these in pinks, reds and purples! But it really is up to you!


Once your salt dough candy canes are painted, glue them together to make your heart frame! Storng PVA glue is good, or a hot glue gun.
Add the photo to your Salt Dough Photo Ornaments

Cut out your photo and stick to the back your heart photo frame.
TOP TIP: you can stick the photo onto some colorful card – so that you have a nice backing to your ornament. Also add a ribbon for hanging at the same time as you stick the photo to your salt dough.

How sweet is this? Wouldn’t these photo hearts make great grandparent gifts?

I really think these DIY Heart Photo Frames make great grandparent gifts too! Especially at Christmas or Valentine’s Day. Such a sweet homemade gift to make and cherish!
Here are some more fabulous keepsake Salt Dough Hearts to try!


More wonderful Valentine’s Crafts for Preschoolers here:

Works well for all seasons – Valentine’s Day Hearts, Candy Cane Hearts or even as a Mother’s Day Heart Photo Frame

