
Pokemon DIY Eggs
What do you get when you cross a Pokemon Fan with a School Egg Decorating competition? Pok-egg-mon.
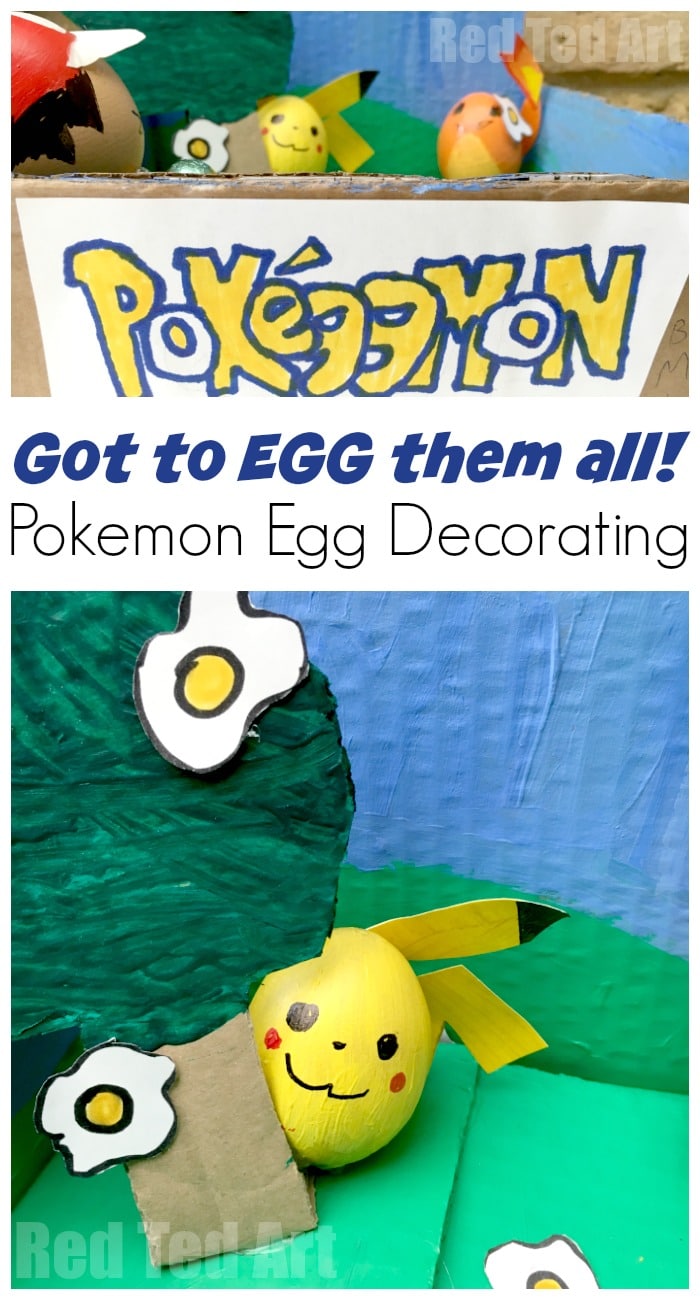
Hahahaha. Ok… maybe not the best pun in the world, but I can tell you Red Ted and I were pretty pleased with it! If you love Pokemon Crafts and enjoy taking part in Egg Decoracting competitions, then be inspired by our Pokemon DIY Eggs – it includes a Pikachu Egg, Charmander Egg and of course an Eggy Ash…
This post is more to serve as inspiration – not a detailed step by step guide to how to make it, but I think you can tell from the pictures!!
To make our Pokemon DIY Egg Diorama we used:
- A box “cut down” with a cardboard backing to create the diorama
- 3 eggs for our main Pokemon Egg Characters
- Acrylic Paints for the eggs and the box
- Paper for egg splats, the Egg-Ball details, egg character details (such as pikachu’s tail)
- A chocolate mini egg for the Egg-Ball
- Sharpies for Facial details
- TP rolls for Ash’s body
Our favourite Pokemon DIY Egg Diorama featrues are:
- The Egg Characters (as mentioned – the Pikachu Egg, Charmander Egg and Ash Egg)
- The puns
- Pok-Egg-Mon
- Gotta EGG them all
- The fact that the pokeball is an Egg-Ball…
- And the Eggy Splats
And here is the Pokemon DIY Egg Decorating Competition Entry Detail
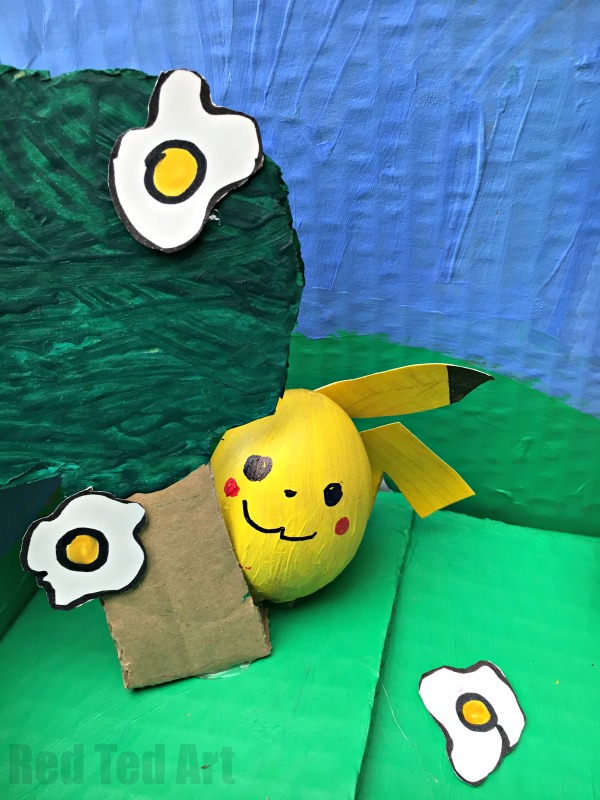
To make our pikachu egg, we painted our egg yellow as well as some paper/ light card. From the card we cut out some ears and a tail (see our Pikachu Bookmarks for the exact shape) and glued those on – don’t forget the black detail on Pikachu’s ears. Next, Red Ted, took a look at Pikachu’s key facial features and drew them on with some marker pens.
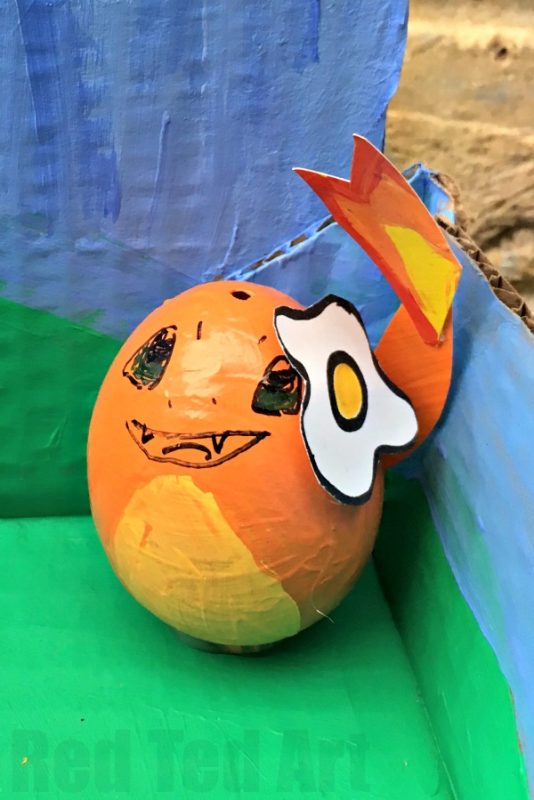
For the Charmander DIY Egg, we painted the egg orange – as well as a little light card. Once these were fully dry, we added some yellow contrastic paint for Charmander’s tummy as well as “fire detail” to the orange card to make Charmander’s Fire Tail. Once fully dry, Red Ted glued on the tail. Again, we took a good look at Charmander’s facial details – practiced drawing them on paper and then added them using a sharpie!
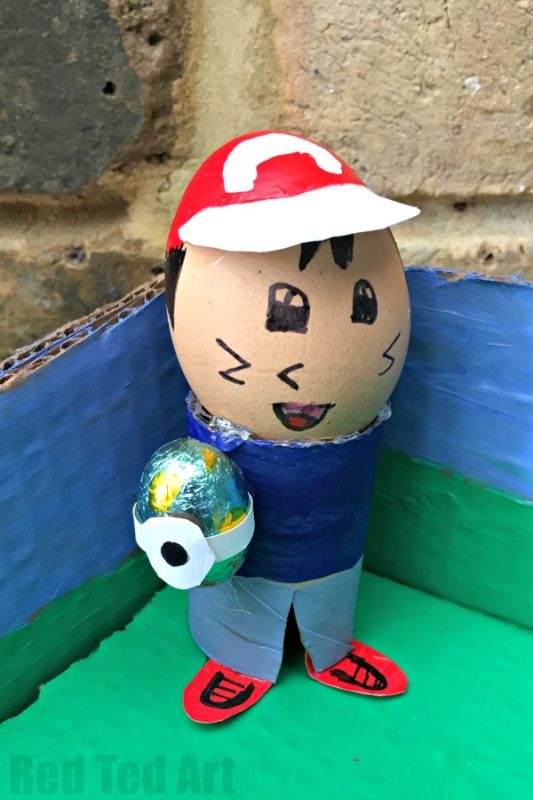
Finally, here is the Ash Egg Decorating idea! For Ash, Red Ted painted a Toilet Paper Roll 2/3 dark blue and 1/3 light blue. Once dry he cut a triangle get a trouser shape. For the face – he painted a little bit of red on the top of the egg.. and with a sharpie added hair detail and facial features. He used the same red paint to add colour to some light card and make the shoes. I helped with Ash’s cap – by cutting out some white paper in a curve and we carefully stuck it on to make a peaked cap. Yes it was a little fiddly.. but we got there. Red Ted then made a poke ball out a chocolate Easter Egg.
Bringing all your Pokemon Diorama details together

Now you need to bring all your Pokemon Eggs together in your dioarama. Red Ted decided to keep it simple.. and decorate some grass and sky, plus add a cardboard tree. The splat eggs were easy to make with white paper and pens. I love the EGG detail on the PokEGGmon writing. Fabulous. We used the hot glue gun to glue Pikachu and Charmander in place!
Watch Red Ted “present” the Pokemon DIY Eggs Diorama…
Apparently this was a hot favourite amongst the students.. but the teachers made the final “winning” call… and it only got second place (boo hoo). We however thought was EGGcellent and still have it displayed in his room. LOVE it!!!
More Egg Decorating Ideas for School Egg Decorating Competitions here:

And if POKEMON is your thing, you simply HAVE to check out these Pokemon Crafts:
