
Tissue Paper Flower Fairy Lights

Materials: LED Fairy Lights (these do not heat up, do NOT use non LED lights), tissue paper, tape, scissors
We love fairy lights at any time of year. These blossom fairy lights are particularly pretty, as they brighten up your fire place or door way during the day, and then again in the evening.
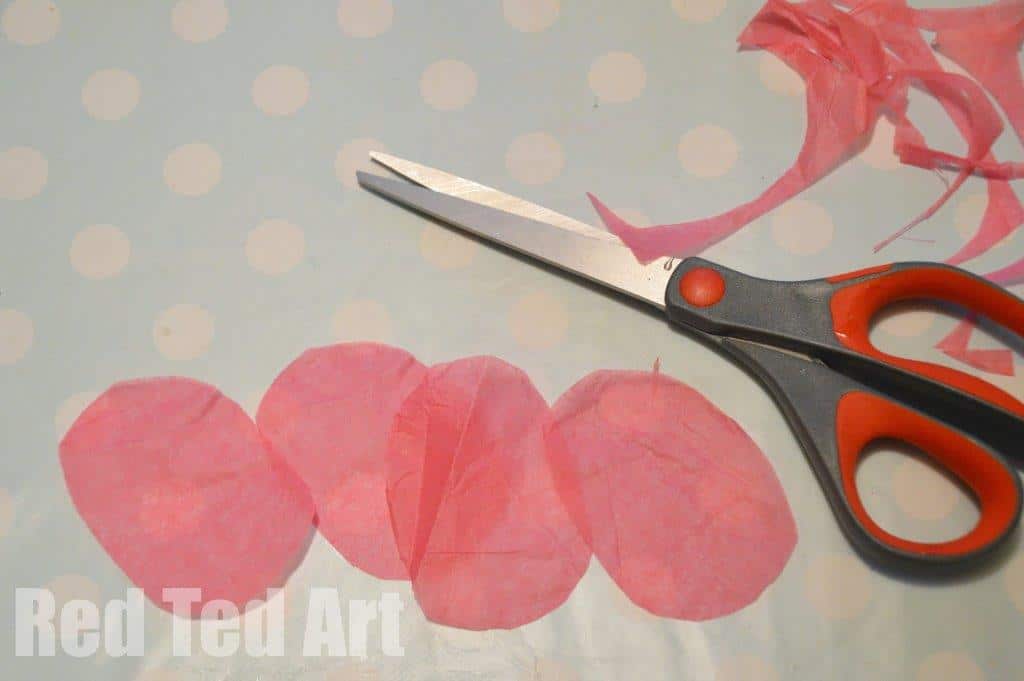
1) Per flower – cut four ovals approximately 15 cm diameter.
2) Lay the four layers on top of each other, making sure that they all point in different directions.
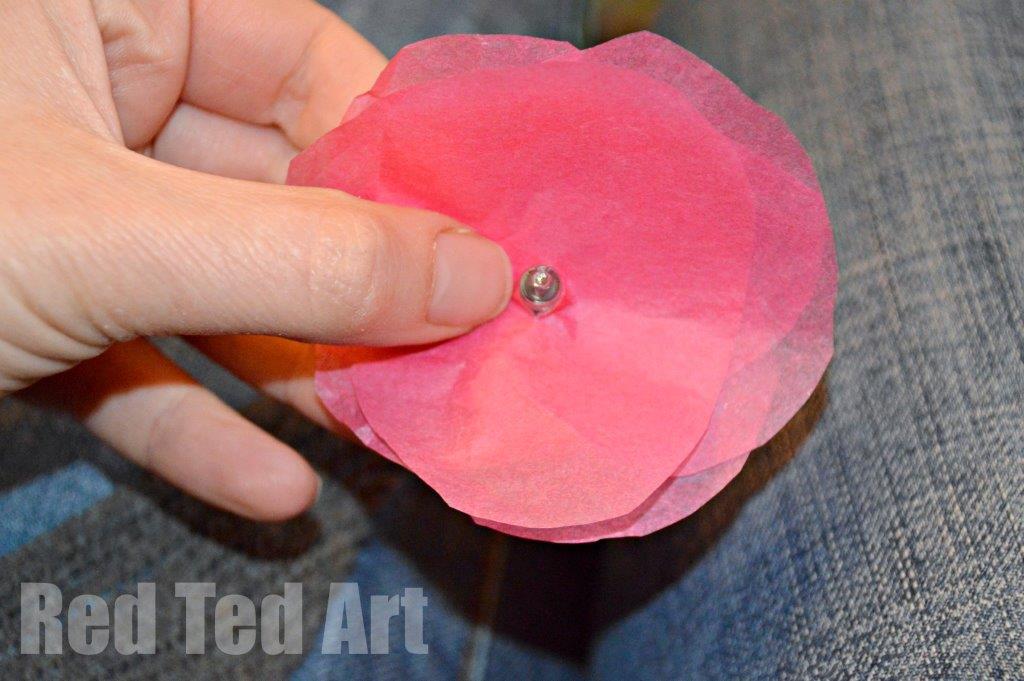
3) Pierce onto the fairy lights, taking care, not to rib the tissue paper, more than is need to fit over the light. If it won’t pierce, snip a little hole.

4) Tape in place at the base – you are actually only taping one piece of tissue paper onto the fairy light, but by scrunching it on, all 4 sheets should sit snuggly.
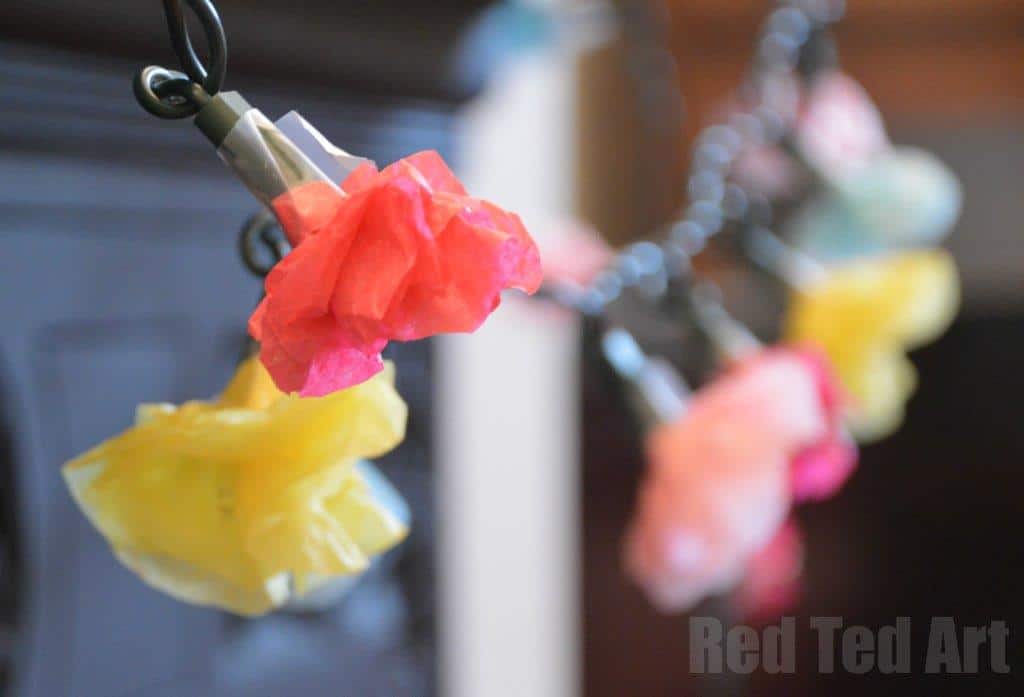
Finish. Don’t they simply look adorably pretty! I love all the different colours shining through! Again, as with the butterflies, you could make extra tissue paper flowers and add them to a Spring Tree!
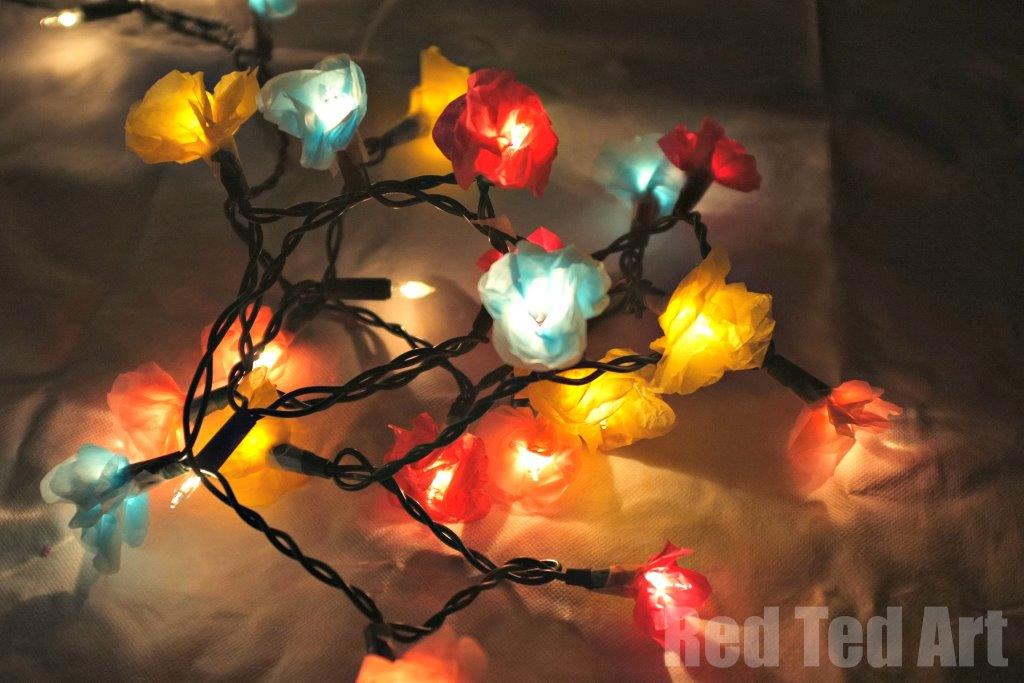
And so pretty in the dark!
I love everything “Flower” and these Flower Fairy Lights really make me happy!
If you like these flower fairy lights, you may also love our Egg Carton Blossom Fairy Lights!