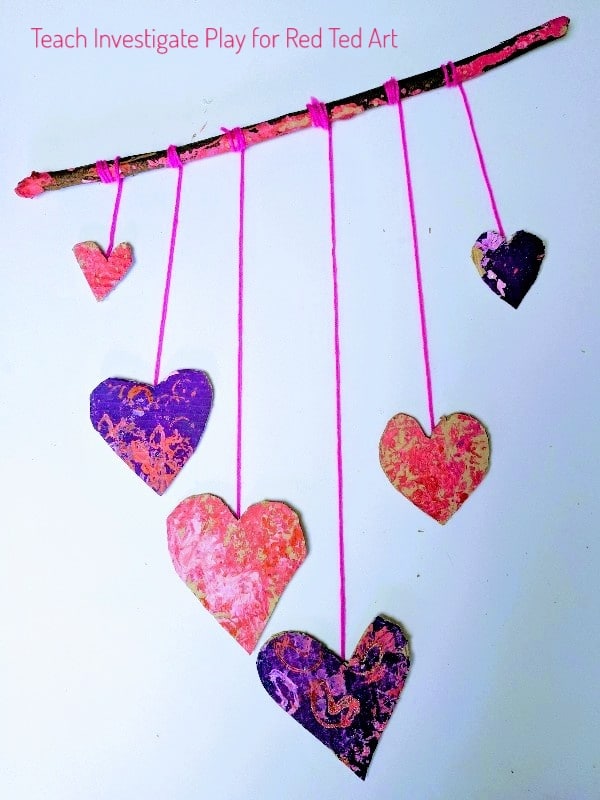
Process Art Valentine’s Wall Hanging
We love this time of year.. as the New Year here on Red Ted Art also means our favourite Guest Post Series: the 31 Days of LOVE!! Today we have a wonderful Process Art Valentine’s Project for Kids – turn your process art in a beautiful Valentine’s Wall Hanging! All Strung Up On love. How we adore a Valentine’s Day Pun! This is a guest post brought to you by the lovely Sian from Teach Investigate Play. There are some great project of hers linked at the end of the article, please do check them out too! This is a fantastic addition to our collection of Valentine’s Art Projects for Kids.
We have many more fabulous Valentine’s Day Crafts for Preschoolers, as well as Valentine’s Day Decor for you to check out, browse and be inspired by. Do get lost in the world of LOVE CRAFTS!!
Strung Up On Love
A Process Art Wall Hanging
Hey guys! Sian here from Teach Investigate Play. If you already follow me on social media, you’ll know that I’m a huge fan of messy art projects with my two-year-old daughter, Zoey. Most days we are found painting up a storm and so we’ve decided to show you how to turn those cute, messy projects into a lasting piece of wall art. We’re passionate about recycling materials and reusing items wherever we can – hopefully you’ll be able to recreate this project at home without the need of buying new items!
Process Art Valentines Wall Hanging – SUPPLIES NEEDED
- Cardboard (we used a box leftover from Christmas) or card.
- Non-toxic acrylic paints if you have them.
- Paint tray
- Large tray or sheet to catch any paint drips
- TP roll x2-3
- Sponges
- Glitter (optional)
- Low temperature glue gun and glue refills (approx..1- 2)
- Yarn or string
- Stick
- Craft knife or sharp scissors
How to make your Process Art Valentines Wall Decoration
If you already have heaps of your child’s artwork stored, then here’s your opportunity to repurpose it! If you haven’t here’s something for you to try…
1.Place a large piece of cardboard onto the floor. As it’s just after Christmas, I’m guessing that you might have a lot of recycling, but if not, some card will do just as well. The idea here is to reuse items wherever possible so raid that recycling stash!
2.Squirt a selection of carefully chosen paints onto a paint tray. The key to avoiding a brown dirge when it comes to process art is the colours you choose. As this is a love themed craft, we decided to opt for pinks, purples, reds and whites.
3.Use a range of resources to apply the paint. For this craft we opted for sponges to create a stippled effect and even our hands and feet! My youngest is very fond of what we’ve dubbed ‘paint skating’
- To break up some of the colour blocks, we also added heart stamps made by squishing a toilet roll tube like this… (Photo)
Stage 2: Heart Wall hanging
If you’ve created some art especially, leave it at least 24 hours to dry out properly before moving on to stage 2.
- Cut card into various sized heart-shaped pieces using a craft knife or sharp scissors. We tend to consider the use of a craft knife an ‘adult task’ so proceed with caution if you have a child helper.
- Use yarn / string of a variety of lengths and attach to the reverse side of the hearts. We used a glue gun, but you could also try tape or even make a hole.
- Wrap the end of the yarn around a stick/ small branch and tie, then trim up any loose ends.
- Finally, loop yarn/ string to either end to hang your craft on the wall!
About Teach Investigate Play
Teach Investigate Play was created by primary teacher-turned blogger, Sian, after finding maternity leave a little isolating. She is passionate about making learning fun through creativity and play, regularly sharing ideas on Instagram , Facebook and her website, Sian lives in Canberra, Australia with her husband and two children.
If you enjoyed our ‘Strung Up on Love’ craft, here are some other ideas that you might like:


