
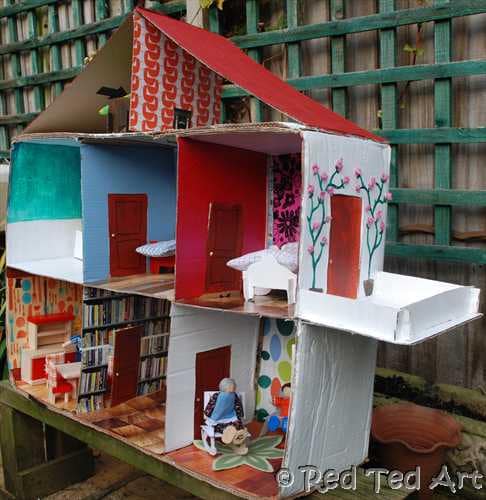
How to… Make A Cardboard Dolls House
This week, I wanted to “show off” our Cardboard Dolls House. There are MANY ways of course of making your own dolls house and this is just how we made it.. A while back, I bought some little wooden dolls for Pip Squeak’s birthday, as well as a random set of kitchen furniture. It was one of those “opportunity” buys and I wasn’t really thinking what we would do with them. As Pip Squeak’s birthday drew nearer, I realised we needed a house! I have always wanted to make a dolls house for my children (see 7 plus 1 things) and here was my opportunity.
Materials: One large box. Lots of smaller boxes (to cut up and build rooms with), glue/ hot glue gun, acrylic paint (as it doesn’t crumble), wrapping paper left overs…
Apart from the acrylic paint, this house was made from things I had around the house, old wrapping paper, old fabric (The Englishman’s shirts made good bedding; my old skirt made a rug etc).
Unfortunately, I didn’t take photos at each step. I was more absorbed with making the house, than the photos. So you will have to hear what I did!
I had one large box… what next.
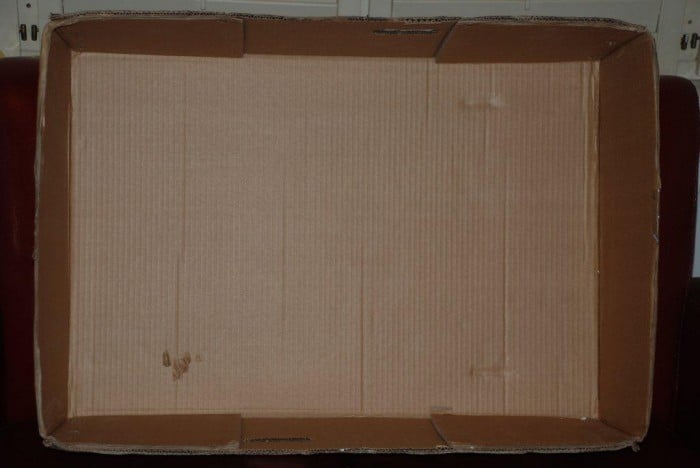
1) I started off by painting it all white – I figured this would give me a “neat” background to work with.
2) We then put in the “6 basic rooms” – using two pieces of card that went from top to bottom. We first marked out the doors and cut them with a scalpel. Cutting 3 sides and the 4th lightly scored so it opens more neatly. We then glued the 2 pieces in place with a small fold at the top and the bottom.

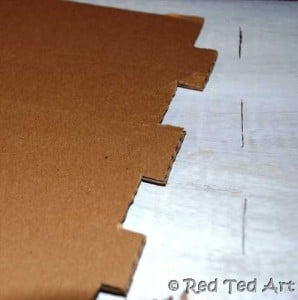
3) Then we had 2 pieces of card going across. The first piece now makes up the “bathroom” and the “map room” floors. We cut half way into the card and half way into the wall with the door and slotted them together. Then glued down the ends against the supporting walls. We repeated that on the other side. Making the “pink bedroom” and balcony floors that way. I am not saying this was the neatest, nor cleverest way to do it. But it work for us. I put in some “supports” at the back the walls and under the balcony to straighten it all up. The supports were just some coffee stirrers secured in place with a hot glue gun. They did wonders!
The basic house is there.
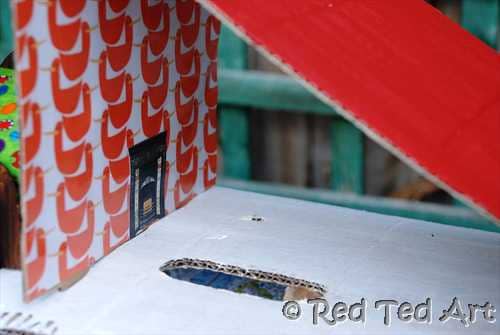
4) For the attic, I cut the centre wall and slotted it to the top (see image, I remembered to take this one) and then with the hot glue gun secured the roof card to the wall and the side of the house.
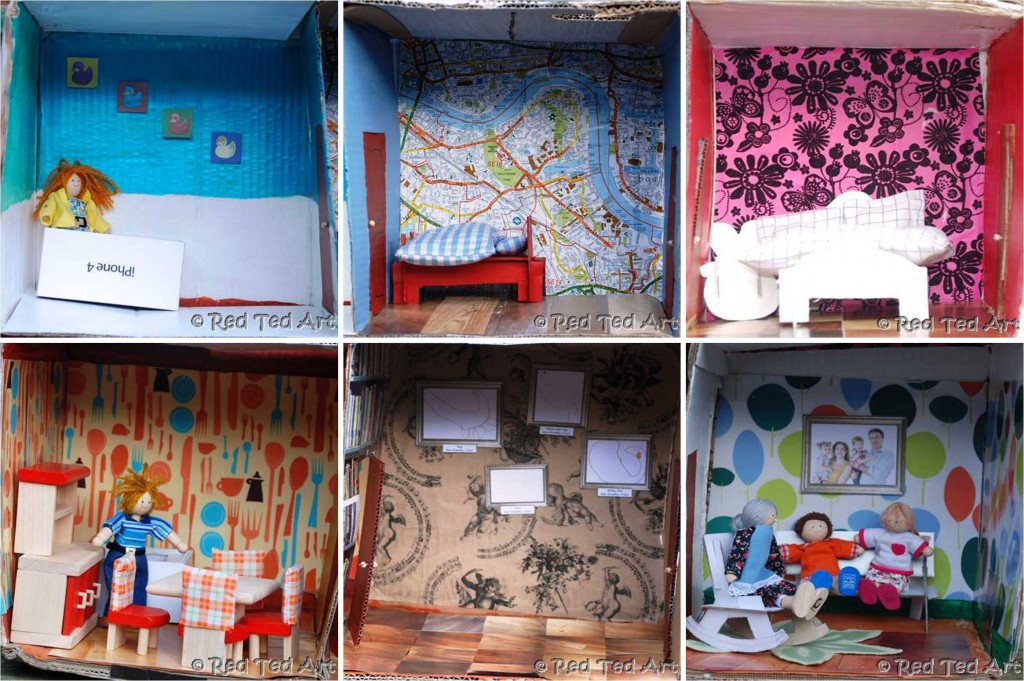
Now the fun bit! Decorating your DIY Cardboard Doll’s House!

5) WALLS: I scoured the house for wrapping paper scraps and old fabrics. I scanned a couple of the fabrics into the printer and printed them out on paper (the kitchen and the living room wall paper). I also printed off some images of books for a book shelf.
6) FLOORS: the lovely Christine Mosler gave me some of her “left over” flooring brochures, so the majority of the dolls house sports a wood floor look – either in one large piece or patchwork floors. I think I rather like the patchwork!
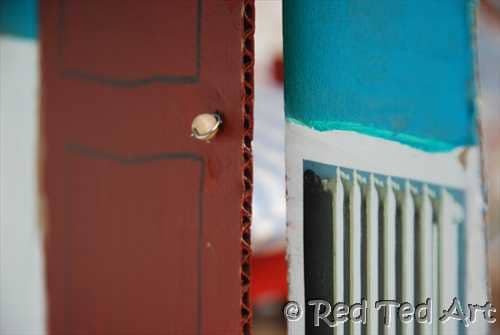
7) DOORS: I painted all the doors brown. Then added a black outline. For the handles I used some wire and two small beads. Wrapping the wire around the beads to secure it place. I love our doors.
8. EXTRAS: The photo above also shows a “radiator” that we cut out of a magazine… it is in the bathroom. I also cut out some fire places out of magazines and a lamp. I will over time probably add more little details like this – a vase here, a pot plant there. I also printed out some “artwork” as per our mini magnets post. I used some of Red Ted’s drawings, as well as a family portrait. I am tempted to take a photo of the “doll family” and adding that too.

9) BALCONY: I am also rather in love with our balcony… I made the “banister” out of 3 pieces of card slotted together and then glued them in place with the hot glue gun. Then all was painted white. Once dry, I added the roses on the wall: painted the pot and stems and added tissue paper roses.
10) FURNITURE: now the “bit by bit” really fun bit – adding furniture. As mentioned, I had already bought a kitchen… but we made a kitchen sink out of an old iphone box. We “made” the bath out of the iphone box lid. And I made some beds and chairs out of cardboard (“tutorial with patterns” to follow). I sewed some pillows and duvets. We still have a long way to go. I think we need a bigger sofa and a sturdier rocking chair. The bathroom certainly needs a toilet (very important feature) and I need to make some towels. I also want to make some crockery for the kitchen and maybe a toy or two and some pot plants. Watch this space!
The Basic DIY Cardboard Dolls House
The Attic Rooms

Get the Bed Making Template here
The Balcony

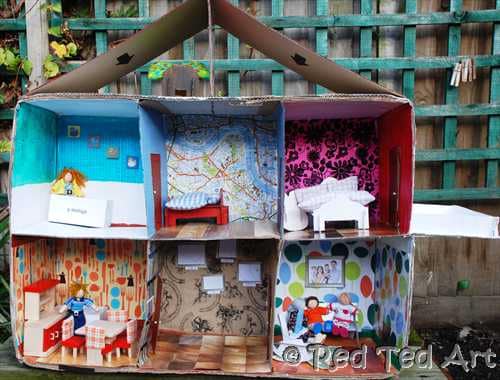
We still have a lot of detail to add, but I think that this is the fun bit. The middle room downstairs (currently the hall way), may become a dining room or a study.. I will see how Pip Squeak decides to play! The attic rooms can do with more details and we could use some wardrobes and cabinets etc… but this is we can do over the months to come. Bit by bit, we build our cardboard dolls house!
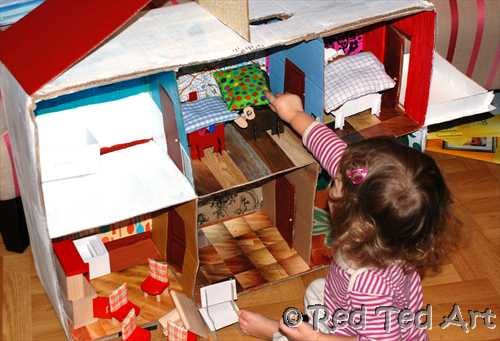
And then we play. Lots.
What will YOUR cardboard box doll house look like?! What will YOU have in it?