
How to Make an Origami Lucky Star
Twinkle Twinkle Litte Star… and now it is time to make some of these adorable little Origami Lucky Stars. I am a bit rubbish at Origami “in general”, as I am too impatient and not neat enough. But there are some great simple little Origami crafts that are great even for the likes of me! I love making Origami Paper Boats and little Paper cups.. and I LOVE how surprisingly easy these little paper Origami Lucky Stars are to make. They look tricky for about 5 seconds.. and then you will be making them over and over and over again!
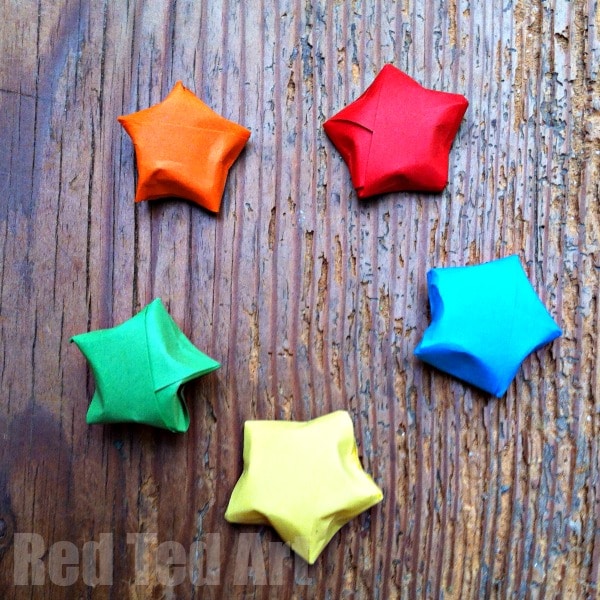
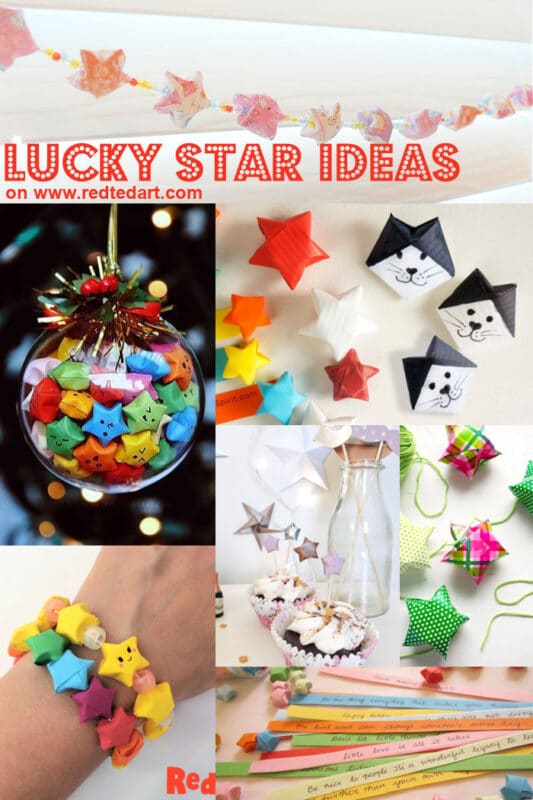
Origami lucky stars can be used in a number of ways – I have lucky star ideas for you here – but in essence… we love them as part of greeting cards, you can make a bracelet or earrings and they look adorable as part of Christmas ornaments too!
Supplies needed to make paper origami stars:
- Long thing strips of paper – e.g. 1cm strips of A4 paper
- A pair of scissors (to cut your strips) or paper cutter
You can make these stars from any paper you wish – simple printer paper, sheet music, magazines – any old paper will do… I find construction paper a little thick, but that still works too!
Origami Star Tutorial VIDEO
As per usual, we have both a origami start video tutorial AND step by step photos, so choose the medium that suits you better. The video is on autoplay for you to watch!
How to make Origami Lucky Stars – step by step instructions:
Origami star paper strips
1) To make your little star, you will need a strip of paper. I cut 1cm strip off a A4 sheet of paper to make our Origami Lucky Star! So approximately 1cm x 30cm strips of paper in lots of colours.
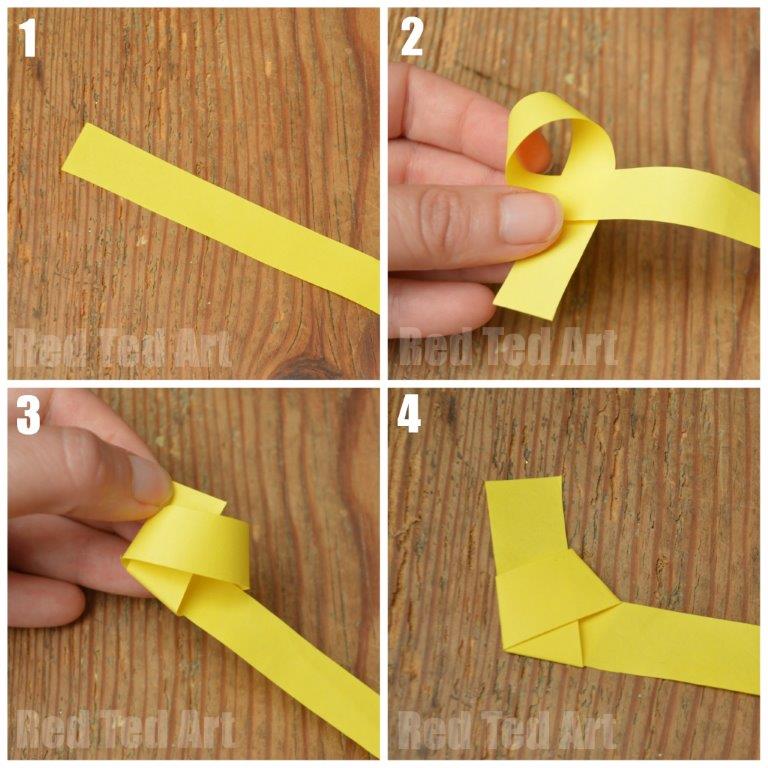
2) You now need to “tie a knot” into your Origami Lucky Star. Create a loop as in the photo, holding it between thumb and index finger.
3) Tuck in the end of the strip of paper.
4) Gently pull tied to secure your Origami Lucky Star.Flaten and make some neat creases.
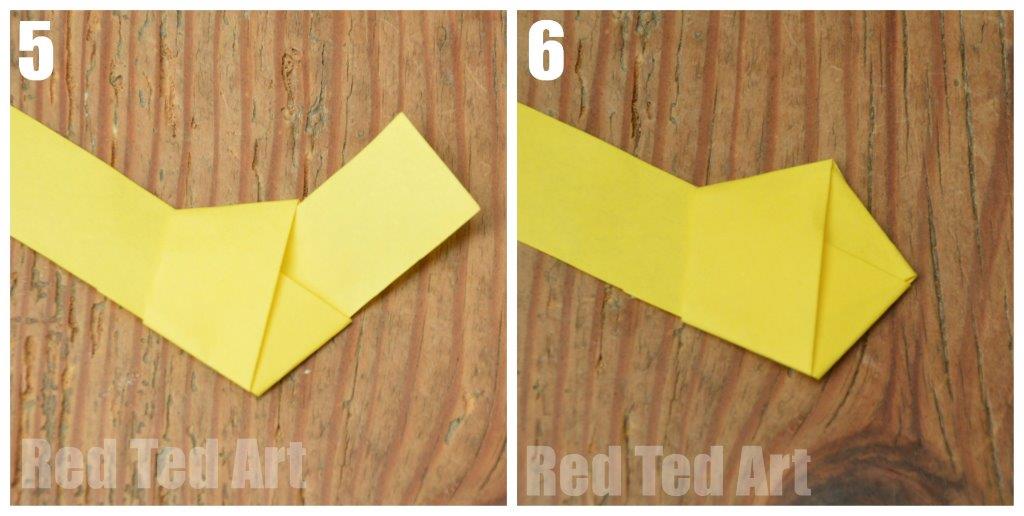
5) Now flip your Origami Lucky Star Over.
6)… and tuck in the short end that is left over. If it is “too long”, tear a little off. You are now ready to start “wrapping your” origami paper star with teh long end of your paper.
Can you see that your basic form you are wrapping is that of a pentagon?
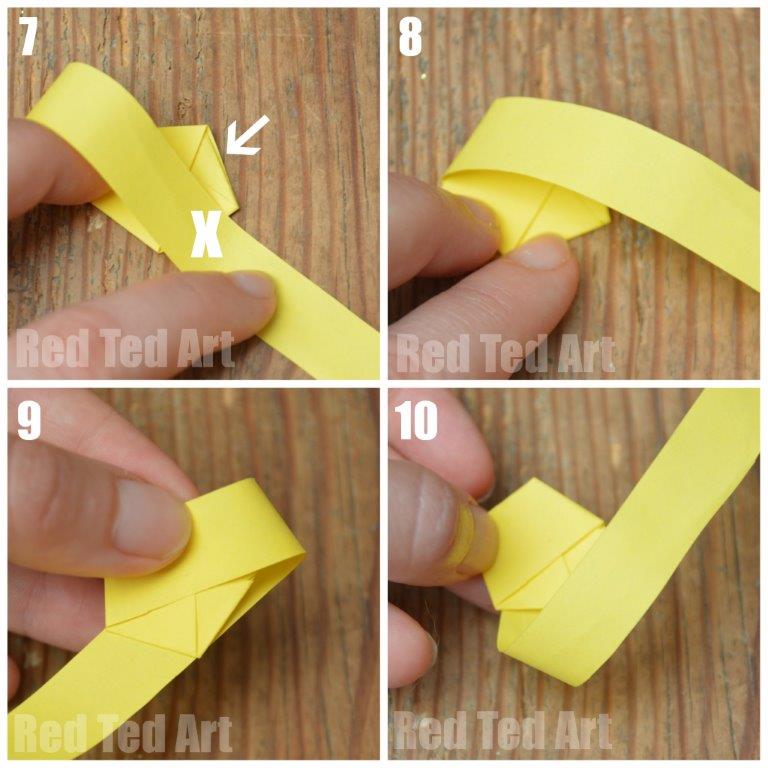
7) & 8 ) This step looks confusing.. at first. But really it is SOOOO easy. You basically start wrapping your paper round and round and round. The picture 7 shows that when you fold it over, there are two places you can fold you paper – one will be a neat clear fold (see the tick). The other won’t be.
9) So fold it across and then tuck it under. Neaten the edge.
10) Then take strip and fold over again.
You repeat this step until you have used up all your paper – I think we did about 4-5 wraps?
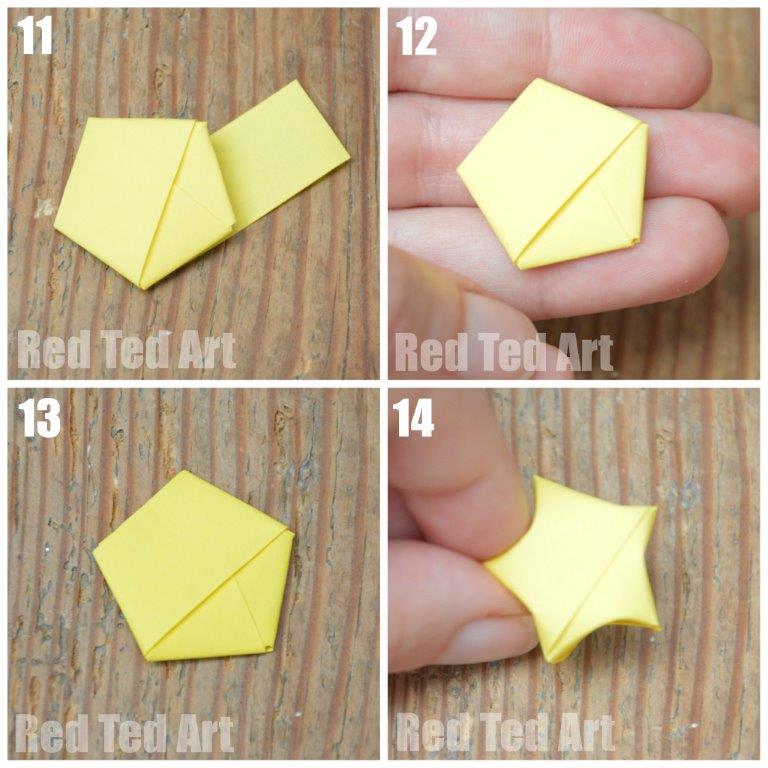
11) Wrap until you are left with one little bit
12) Tuck this piece in. Some people like to use a little glue to secure this last fold and tuck, but you shouldn’t strictly speaking need it!
13) Place your Origami lucky star on the table.
14) Gently pinch the sides of your Origami Lucky Star in. This is in some ways is the hardest part…. but just pinch gently and keep going round and you are done!!
And your Origami Lucky Star is now finished!!!! Enjoy and make 100s of them!
Ideas for using your little Lucky Origami Stars
Did you know that you can wear your lucky stars? Isn’t this lucky star bracelet cute? Featured in my super easy and fun Paper Projects Book! Do grab a copy!

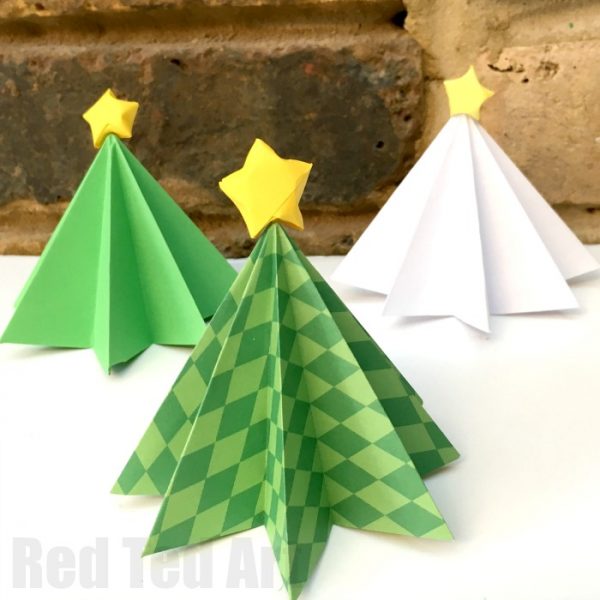
These little paper stars look wonderful on top of this fabulous and easy to learn Origami Christmas Tree.. don’t you think?
They also look great as part of our paper quilled greeting cards:

- Or why not string them up and make a cute mini star garland?
- people also love to fill a jar with these cute little stars and use them as party decorations
- you can make a bracelet from these (as per my Paper Projects book) by using a needle and thread or elastic and threading them together.
Hope you do have a go at these sweet and whimsical mini paper stars. I think they are so cute and so fun to make and a great way to make a three-dimensional star!
Now you have mastered making your Origami Stars.. take a look at these Origami Star Craft Ideas:
And we have LOTS more great Origami for Beginners ideas for you to browse!
Our Origami Lucky Star video is also available on the Red Ted Art YouTube Channel, if you prefer that as a source of viewing!
Don’t forget to subscribe to Red Ted Art on Youtube!