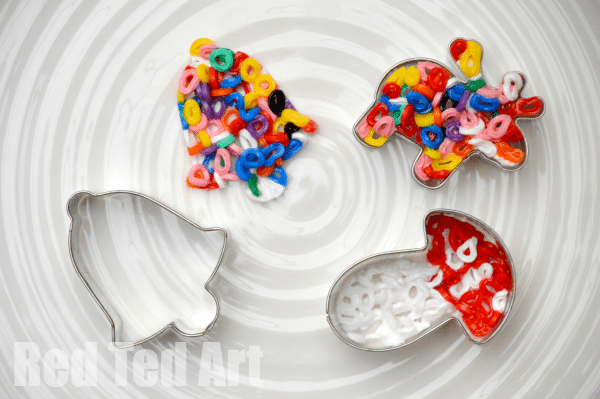
Perler Bead Cookie Cutter Ornaments
Due to popular demand.. this is a translation of the wonderful Wooz.dk instructions. We have had a go and they are great. It is VERY important that you follow the instructions, else your Perler Beads/ Hama Beads will stick to your cookie cutter and ruin it! I do love some DIY Christmas Ornaments!
These ornaments feature in our new Christmas Ornament Book. 30 of our favourite ornaments brought together in one place. Sorted by age. Each craft is shared on one page – making the perfect worksheet print outs. Lovely to have them all in one place too!

Only $7.99
Get yours today and keep it forever!
For your Perler Bead Ornaments, you will need:
- Cookie cutters
- Vegetable oil (VERY important)
- Baking paper
- Perler beads (also known as Hama Beads or Melty Beads)
- And oven
Looking for Cute Cookie Cutters click here:
US Readers (affiliate links)
UK Readers (affiliate links)
Perler Bead Ornaments How To:
1.Pre heat the overn to 200C
2. Get a baking tray with baking paper ready and brush with oil.
3. Now brush the cookie cutter with oil too – it is very important that the inside is covered.
4. The oil is so important as it will stop the perler beads from sticking to your cookie cutter shape. Make sure the oil goes “up the sides” of your cutter, as when the perler beads melt, they have a tendency to “stand up” a little and you don’t want them to stick to the cutter higher up.
5. Now put one layer of beads in the cookie cutter. It is possible to do patterns (see our mushroom ornament above), but to be honest the rainbow coloured ones look best and are fun for kids to make.
6. Place in oven and wait for beads to melt. It will only take a few minutes. Once finished, remove from the oven. I “poked down” a few of the upright standing perler beads with a knife, to give it more of an even surface.
7. Then let it cool enough, for the beads to stick together and placed them into a bowl of lukewarm water. Wait to fully remove until the beads have started to stiffen!
8. Finally, wash in warm soapy water t remove the “grease” from your ornament.
Looking for Cute Cookie Cutters click here:
US Readers (affiliate links)
UK Readers (affiliate links)
Check out 25 more wonderful Cookie Cutter Craft Ideas:
Want more Christmas Ornament Ideas?


