
Free Medium Sized Amigurumi Dragon Crochet Pattern
We have shared a super cute quick and easy Amigurumi Crochet Baby Dragon Pattern before.. now the baby dragon has grown up, and we have this wonderful medium sized Amigurumi Dragon Crochet Pattern for you for you try out! It is a fantastic try before your buy sample project from the adorable Amigurumi Friends Crochet Book by Jade Gauthier-Boutin. Let’s find out more!
Try before you Buy Free Crochet Dragon Pattern
Please note: this project has been reproduce with permission from the publisher and is not allowed to be republished in any way, without their constent. It is for personal use only.
Also note: affiliate links have been added to these post – should you choose to purchase via these, I will earn a small commission that goes towards the upkeep of this site!
Amigurumi Friends Crochet Book
by Jade Gauthier-Boutin (All From Jade)
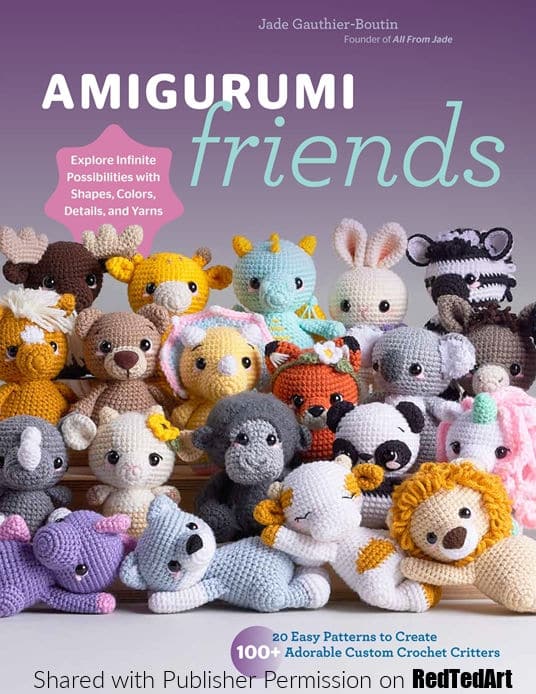
This is a fantastically gorgeous crochet book by Jade Gauthier-Boutin (All From Jade). Jade is a wonderfully experienced crocheter that has a host of beautiful crochet patterns in her Etsy Store and Ravelry accounts. Her experience shines through in all the beautiful designs of these Amigurumi Friends – all of which come with detailed step by step photos. The best bit about this book? Not only do you get 20 adorable crochet animal designs, but you can mix and match these 20 designs with the 5 different body positions to make it “just right” for you! Turning these 20 designs in 100 different crochet options!
The book is packed with extra tips and tricks, such as basic stitchs, how to color change, how to add embroidery to the eyes and do eye indentations.. these are NOT shared in this sample project, but I did want to highlight that the book goes well over and beyond today’s sample crochet amigurumi pattern.
In today’s post, we take a look at Jade’s gorgeous Amigurumi Crochet Dragon Pattern – you get to try it out for FREE here today, but once you see how stinking cute it is and what a great pattern you are getting, I guarantee you, will want to grab yourself a copy of Amigurumi Friends! ENJOY!
Available on Amazon and on the Quarto website!
How to crochet a dragon – Free Amigurumi Dragon Crochet Pattern
Over to Jade!! This pattern is from the “Out of This World” section of the book:
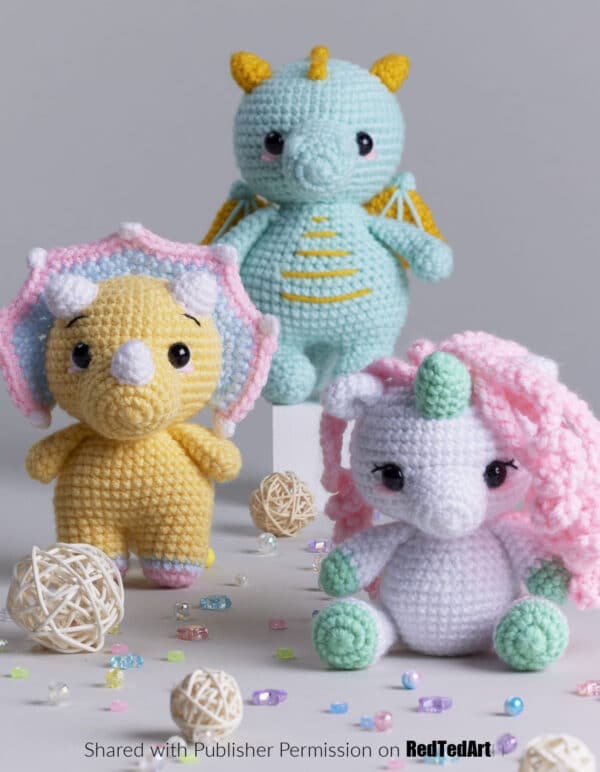
Should fantasy critters be included in a book full of real animals? I definitely think so and hope you agree! Children love everything related to dragons, dinosaurs, and unicorns, so these projects will be favorite gifts for the little ones in your life. Have fun using crazy colors—you can’t go wrong!
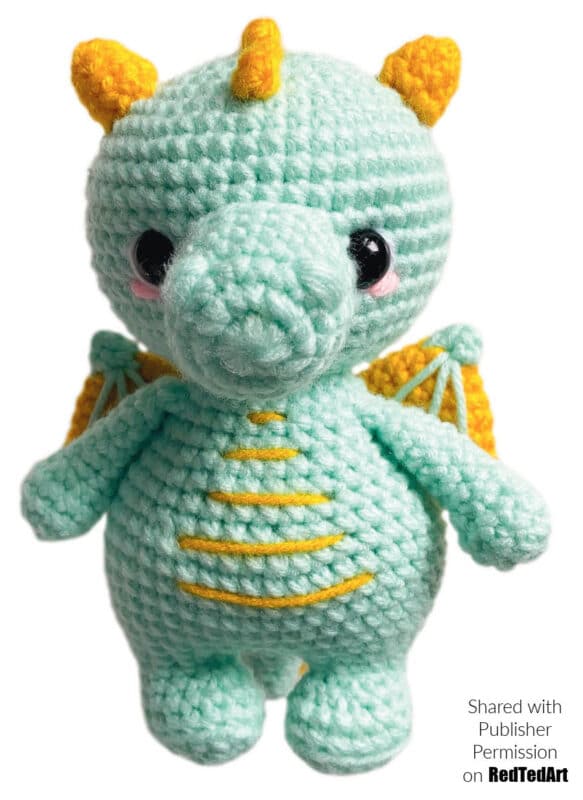
Darius the Dragon – Standing Position
Skill Level 3 (of ratings in the book)
Who said that dragons are scary? This sweet little baby dragon is the perfect advanced project for any crocheter looking for a new challenge. His tiny nostrils and colorful spikes make this critter a unique piece. You will be surprised to see that all his spikes don’t require any sewing—you will crochet them right onto the stitches!
Darius is stitched using the instructions for Body #1. Follow the instructions to make the other body shapes. [Body 1 is shared here today, in a generic brown yarn!]
[NOTE: this is the beauty of this book, it teaches you how to make 5 different super easy body shapes, with detailed working instructions, that you then customise as you go along – giving you lots of options for your crocget projects]
Supplies Needed
- Worsted weight yarn (Loops & Threads’ Impeccable) in skylight and sunny day
- US size D (3 mm) crochet hook
- Two 12 mm safety eyes
- Yarn needle
- Stitch markers
- Sewing pins
- Fiberfill stuffing
Abbreviations Used
U.S. Crochet Terminology is used throughout this book and project!
- BLO – BACK LOOPS ONLY
- ch – CHAIN
- dc – DOUBLE CROCHET STITCH
- dec – INVISIBLE DECREASE
- FLO – FRONT LOOPS ONLY
- hdc – HALF DOUBLE CROCHET
- inc – INCREASE – Crochet two single crochet stitches in the same stitch
- mr – MAGIC RING (also known as Magic Circle)
- revsc – REVERSE SINGLE CROCHET (see here how to make one)
- RND(S) – ROUND(S)
- sc – SINGLE CROCHET
- sl st – SLIP STITCH
- st (s) – STITCH(ES)
- () Repeat the steps inside the parentheses as many times as stated after.
How to read the Patterns
Work in a spiral; do not join rounds or turn your work, unless instructed otherwise.
Use a stitch marker or a piece of yarn to mark the beginning of a round. Move the marker up after completing each round.
At the beginning of each line, you will see “Rnd + a number” to indicate the round number and easily keep track of where you are. If you need to repeat a round, you’ll read “Rnd 3–5,” for example. You then repeat this instruction for rounds 3, 4, and 5.
At the end of each line, you will find the number of stitches you should have in square brackets; for example, [12].
When you read “3 sc,” for example, it means that you have to work one single crochet in each of the next three stitches.
When you read “(1 sc, 1 inc) × 2,” it means that you have to repeat everything that is in the parentheses the number of times indicated. In this example, you would need to work one single crochet, then one increase, then one single crochet, and again one increase.
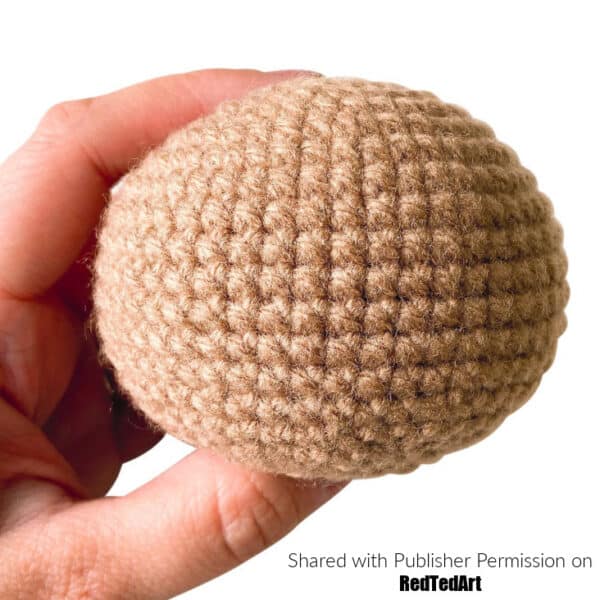
Make Body #1
Begin witn Making the Muzzle in Skylight Yarn
RND 1 > mr of 8 sc [8]
RND 2 > 8 inc [16]
RND 3 > (3 sc, 1 inc) × 4 [20]
RNDS 4–6 (3 RNDS) > sc in all 20 sts [20]
Leave a long yarn tail for sewing and make an invisible fasten-off. Do not stuff for now.
Crochet Head in Skylight Yarn
RND 1 > mr of 8 sc [8]
RND 2 > 8 inc [16]
RND 3 > (1 sc, 1 inc) × 8 [24]
RND 4 > (3 sc, 1 inc) × 6 [30]
RND 5 > 1 sc, 1 inc, (4 sc, 1 inc) × 5, 3 sc [36]
RND 6 > (5 sc, 1 inc) × 6 [42]
RND 7 > 2 sc, 1 inc, (6 sc, 1 inc) × 5, 4 sc [48]
RNDS 8–14 (7 RNDS) > sc in all 48 sts [48]
Add eyes between Rnds 12 and 13 with about 8 sts between (use the muzzle to find the perfect distance).
RND 15 > 2 sc, 1 dec, (6 sc, 1 dec) × 5, 4 sc [42]
RND 16 > (5 sc, 1 dec) × 6 [36]
RND 17 > 1 sc, 1 dec, (4 sc, 1 dec) × 5, 3 sc [30]
RND 18 > (3 sc, 1 dec) × 6 [24]
Stuff the head.
RND 19 > (1 sc, 1 dec) × 8 [16]
Finish stuffing. Leave a long yarn tail for sewing and make an invisible fasten-off.
HORNS (MAKE 2 IN SUNNY DAY YARN)
RND 1 > mr of 5 sc [5]
RND 2 > 1 inc, 4 sc [6]
RND 3 > 1 inc, 5 sc [7]
RND 4 > 1 inc, 6 sc [8]
Do not stuff. Leave a long yarn tail for sewing and fasten off.
MAKE THE DRAGON BODY IN ALL SKYLIGHT YARN
This body is unique because of its inward- facing feet. Best of all, there’s no sewing required with this body shape!
ARMS (MAKE 2)
RND 1 > mr of 6 sc [6]
RND 2 > 6 inc [12]
RNDS 3–4 (2 RNDS) > sc in all 12 sts [12]
RND 5 > 1 sc, 5 dec, 1 sc [7]
Stuff until this rnd only. Do not stuff the rest of the arm.
RNDS 6–11 (6 RNDS) > sc in all 7 sts [7]
Work 3 sc through both sides to close the arms (see page xx). Fasten off, leaving a short yarn tail (you will not need to sew the arms).
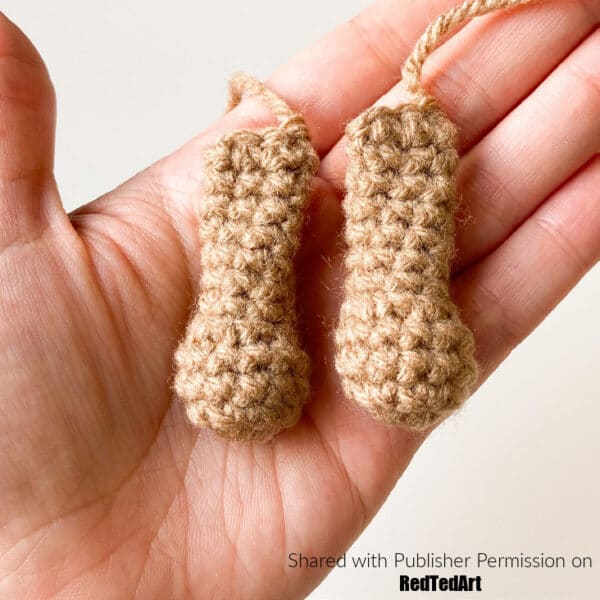
LEGS (MAKE 2)
You will start by working around the foundation chain.
RND 1 > ch 5, starting in the 2nd ch from the hook: 1 inc, 2 sc, and work 4 sc in the last ch. Working on the other side of the ch: 2 sc and 1 inc in the last ch. [12]
RND 2 > (1 inc, 4 sc, 1 inc) × 2 [16]
RND 3 > Work this rnd in BLO: sc in all 16 sts. [16]
RND 4 > 14 sc, 1 dec [15]
RND 5 > 5 sc, 3 dec, 4 sc [12]
RND 6 > 4 sc, 2 dec, 4 sc [10]
RND 7 > (1 inc, 1 sc) × 5 [15]
Stuff the legs.
For Leg 1 only: Place a stitch marker in the 11th st of Rnd 7. Leave a short yarn tail
and make an invisible fasten-off
For Leg 2: Do not cut the yarn; continue to the body section.
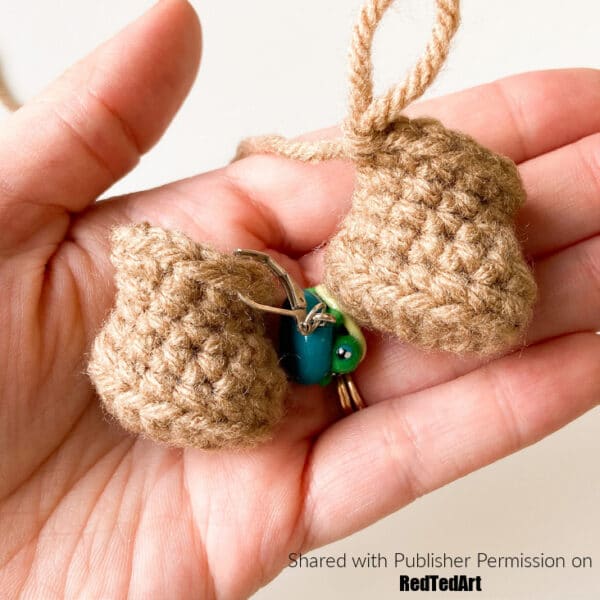
BODY

Remain with the crochet hook on Leg 2.
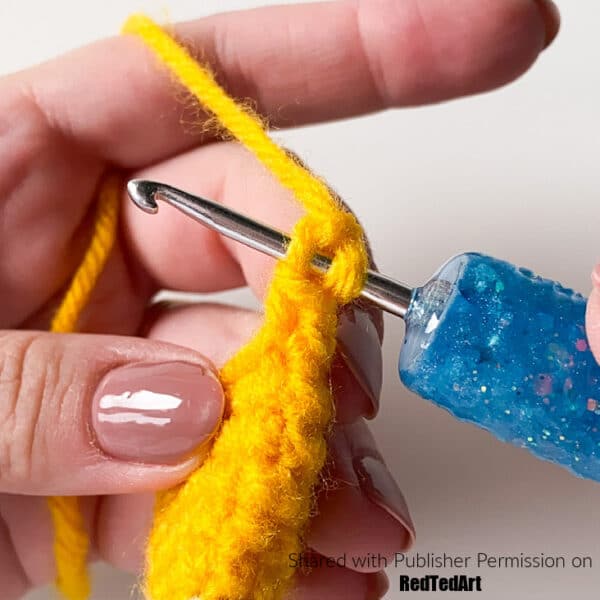
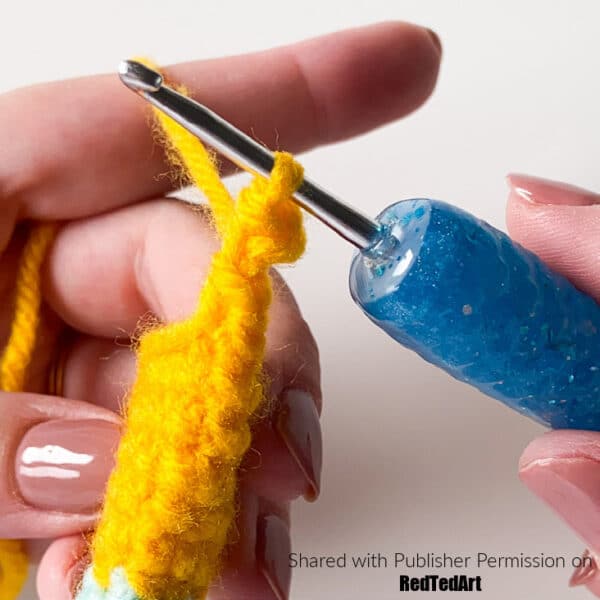
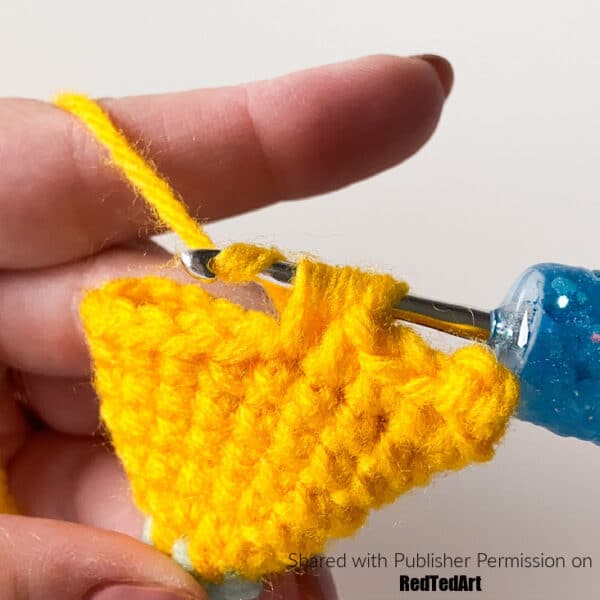
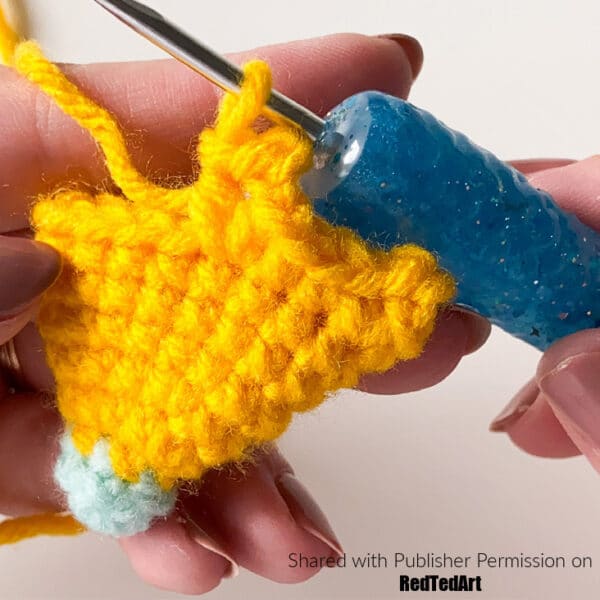
RND 8 > 8 sc in Leg 2 and ch 2. You will now join Leg 1: Sc where you placed a st
marker and make 14 more sc in Leg 1, 1 sc in each ch, 7 sc in Leg 2 (Figs. 3–7). [34]
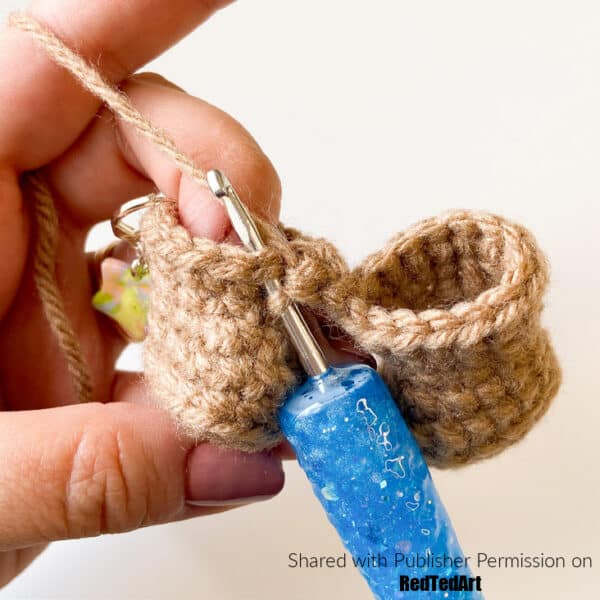
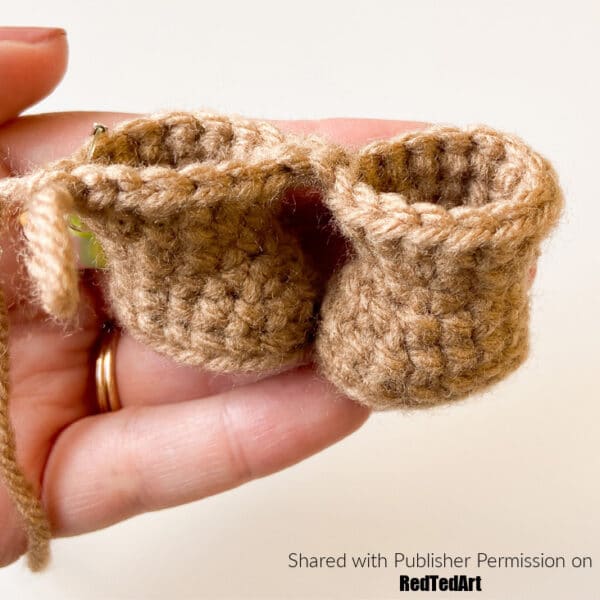
Remove the st marker from Leg 1 (middle image)
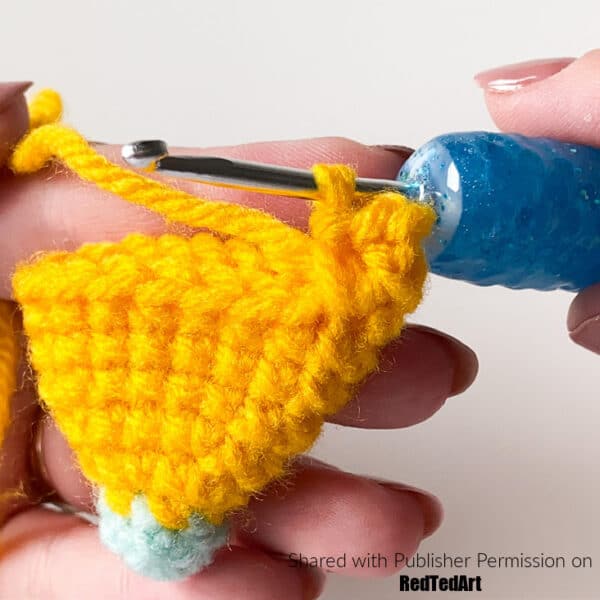
RND 9 > 8 sc, 1 sc in each ch, 7 sc, 1 inc, 3 sc, (1 inc, 1 sc) × 5, 2 sc, 1 inc. The increases
made in Rnd 9 will be the belly (front of the body). [41]
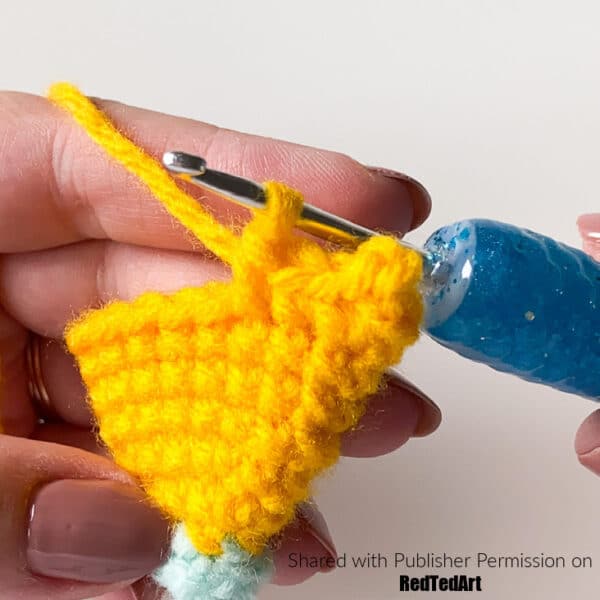
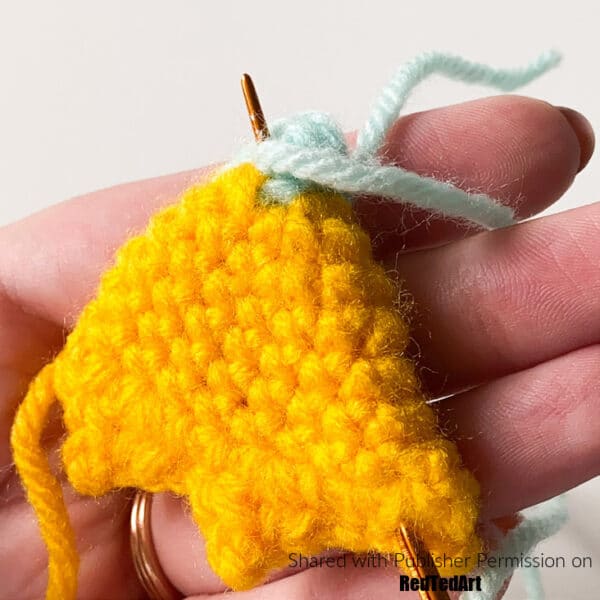
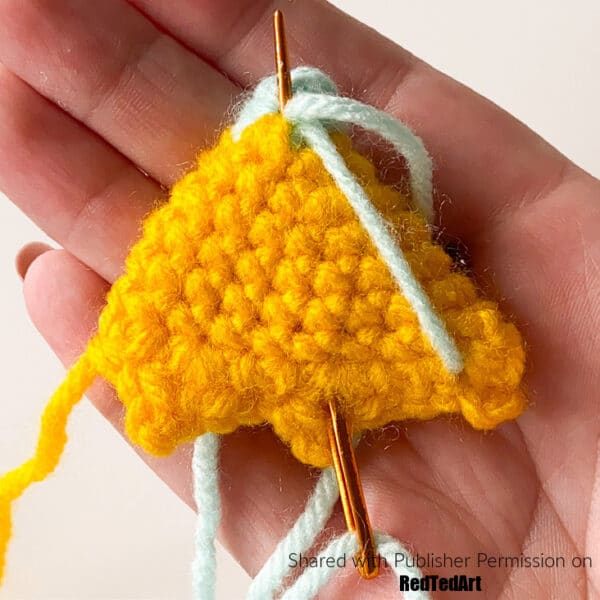
RNDS 10–15 (6 RNDS) > sc in all 41 sts [41]
RND 16 > (4 sc, 1 dec) × 6, 3 sc, 1 dec [34]
RND 17 > sc in all 34 sts [34]
RND 18 > 1 dec, 13 sc, 2 dec, 13 sc, 1 dec [30]
RND 19 > sc in all 30 sts [30]
RND 20 > (3 sc, 1 dec) × 6 [24]
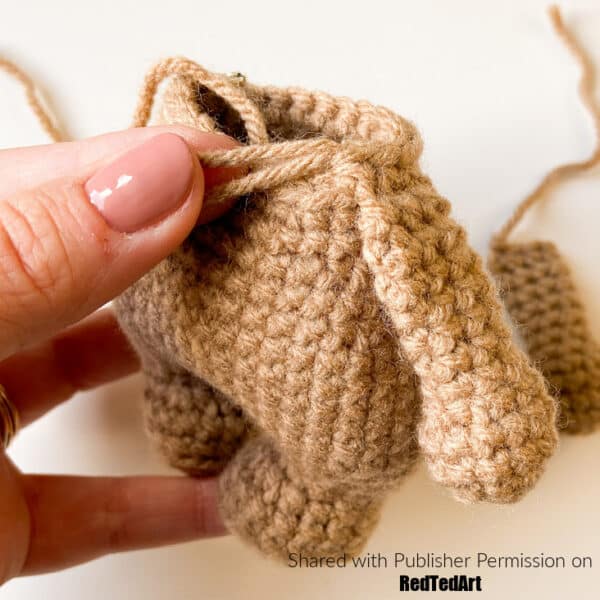
For the next rnd, you will be joining the arms. Make sure to attach them on both sides of the body. You may have a differ ence of 1 or 2 sts from my stitch count on Rnds 21 and 22, depending on your tension.
RND 21 > 12 sc, join one arm in the next 3 sts, 9 sc (Fig. 8) [24]
RND 22 > Join the other arm with 3 sc, sc in the next 21 sts. [24]
Stuff the body.
RND 23 > (1 sc, 1 dec) × 8 [16]
Finish stuffing. Cut the yarn, leaving a short tail, and make an invisible fasten-off.
WINGS (MAKE 2, STARTING IN SKYLIGHT YARN)
RND 1 > mr of 5 sc [5]
RND 2 > sc in all 5 sts [5]
Change to sunny day yarn.
RND 3 > 1 inc, 4 sc [6]
RND 4 > 6 inc [12]
RND 5 > (3 sc, 1 inc) × 3 [15]
RND 6 > 6 sc, 1 inc, 8 sc [16]
RND 7 > 6 sc, 1 inc, 9 sc [17]
RND 8 > 7 sc, 1 inc, 9 sc [18]
RND 9 > 9 sc and leave last 9 sts unworked
Do not stuff.
Close the wing, crocheting Rnd 10 through both sides:
RND 10 > (1 sc, picot*, 1 sc) in same st, 2 sc, (1 hdc, picot, 1 hdc) in same st, 2 sc, (1 hdc, 1 picot, 1 hdc) in same st, 1 sc and 1 sl st.
*Picot = ch 2, sl st in 2nd ch from hook
Fasten off, leaving a long yarn tail for sewing (the side with the yarn tail is the side
that will be sewn to the body).
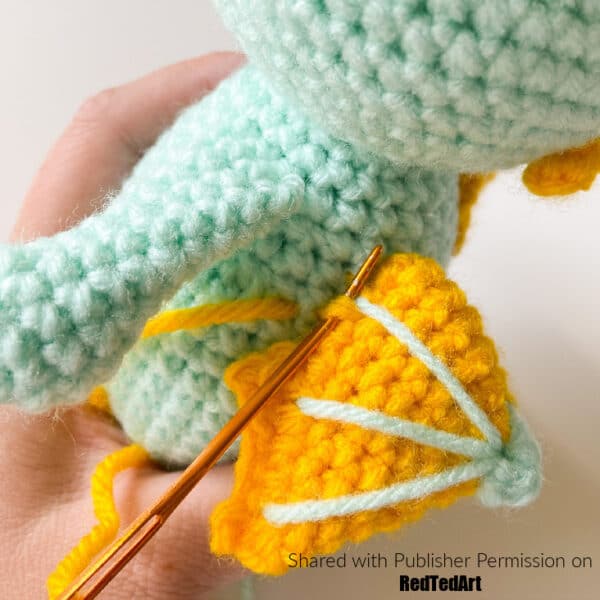
Embroider three skylight lines to the front of the wing.
TAIL (IN SKYLIGHT YARN)
RND 1 > mr of 5 sc [5]
RND 2 > 1 inc, 4 sc [6]
RND 3 > (1 inc, 2 sc) × 2 [8]
RND 4 > sc in all 8 sts [8]
RND 5 > (3 sc, 1 inc) × 2 [10]
RNDS 6–7 (2 RNDS) > sc in all 10 sts [10]
RND 8 > (4 sc, 1 inc) × 2 [12]
RNDS 9–10 (2 RNDS) > sc in all 12 sts [12]
RND 11 > (5 sc, 1 inc) × 2 [14]
RND 12 > sc in all 14 sts [14]
RND 13 > (6 sc, 1 inc) × 2 [16]
RND 14 > (7 sc, 1 inc) × 2 [18]
Leave a long yarn tail for sewing, make an invisible fasten-off, and stuff the tail.
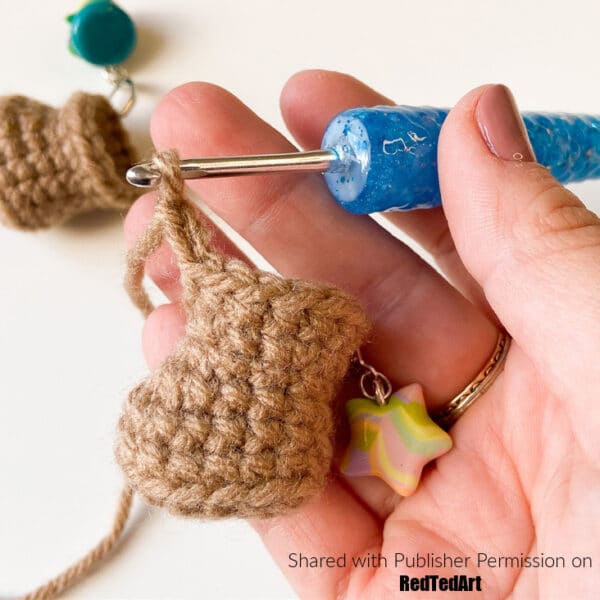
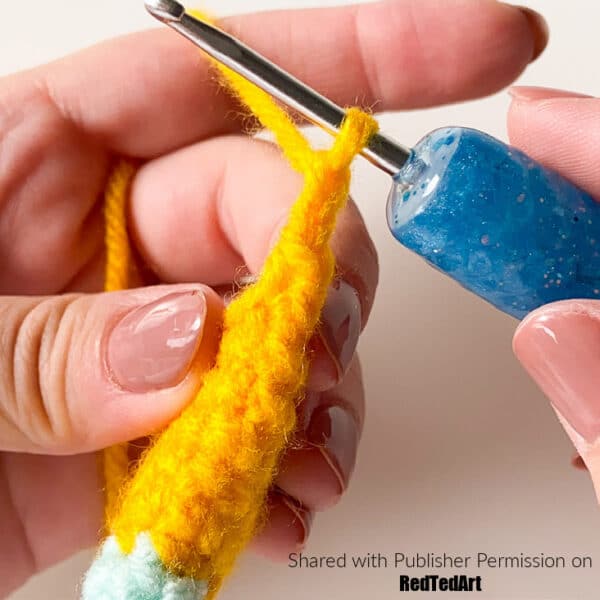
Crochet Dragon SPIKES
Follow this pattern for all the spikes in this project; refer to each body’s Put It Together section for where to attach the spikes.
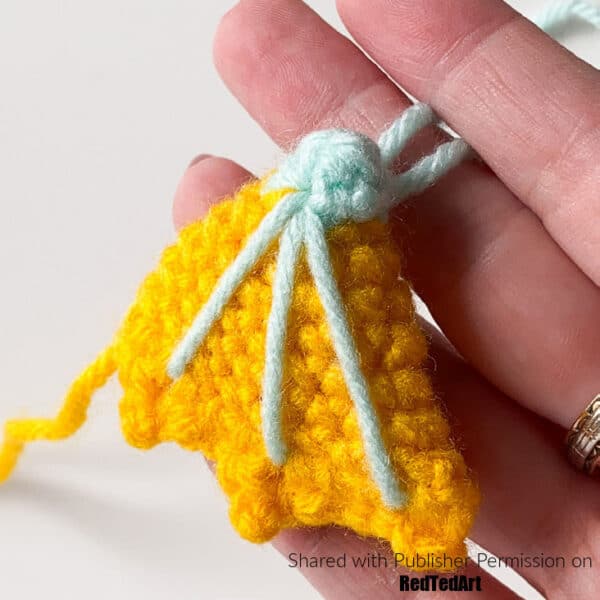
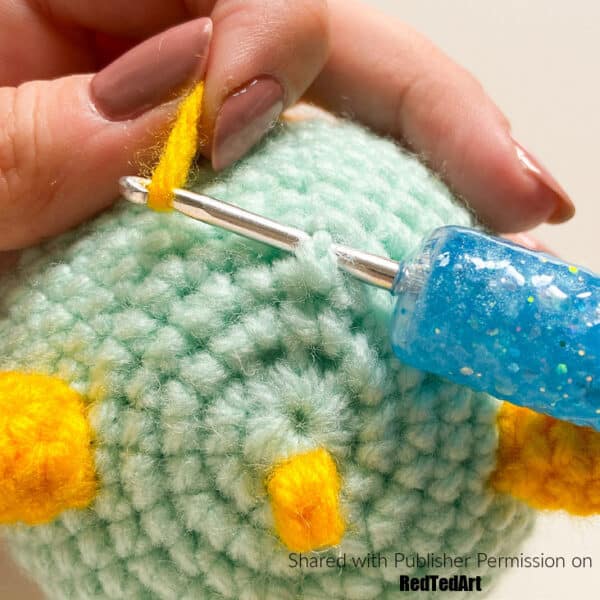
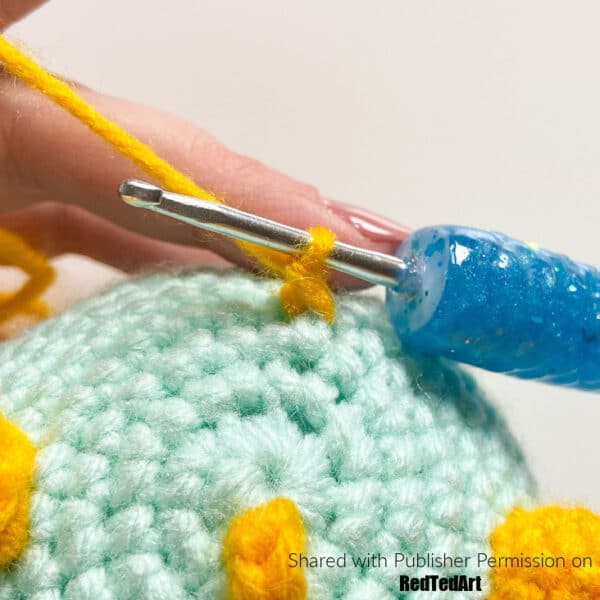
Insert the hook between 2 rnds, under a st. Place a new strand of sunny day yarn on the hook, pull up a loop, and ch 1.

Crochet 2 hdc in the same st, ch 1, and sl st in same st. Cut the yarn and hide
both tails in the piece.
Crochet Dragon Assembly
Dragon Head

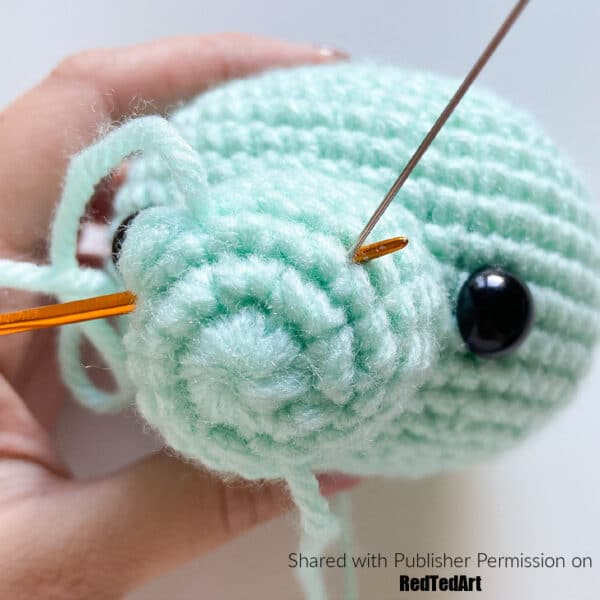
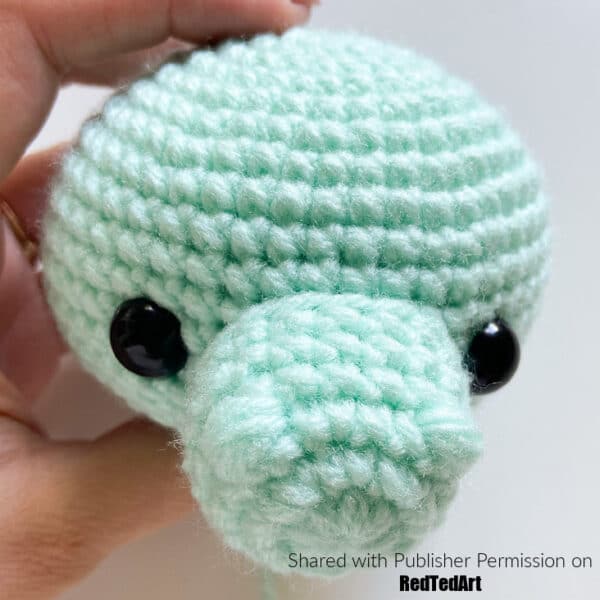
Optional: Indent the eyes. Add the eyes’ highlights and cheeks now (the crochet book, shows you how).
Sew the Muzzle to the Head: top between Rnds 10 and 11 and bottom between Rnds
16 and 17. Add stuffing before closing.
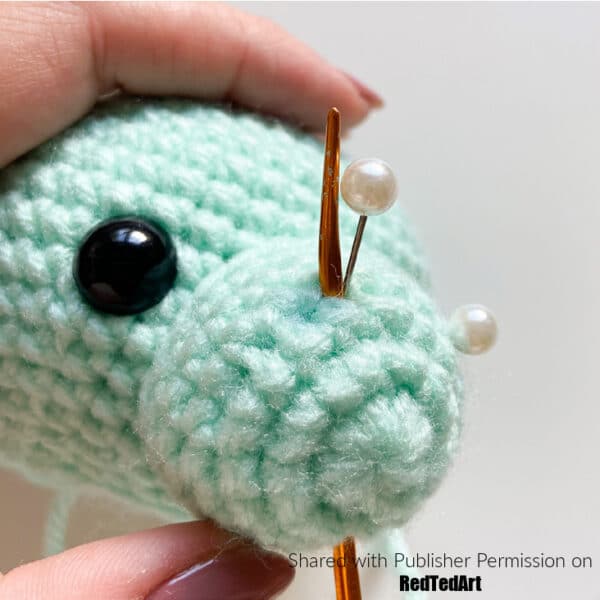
Optional: Embroider two nostrils with a new strand of skylight yarn between Rnds
3 and 4 of the Muzzle (the crochet book shows you how).
Note: The more passes you do, the larger the nostrils will be.
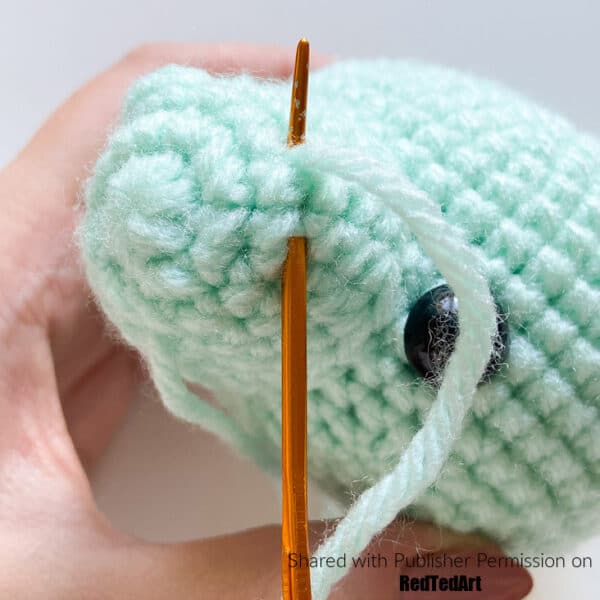
Sew the Horns on both sides of the Head: top between Rnds 5 and 6 and bottom between Rnds 7 and 8.
Crochet six spikes all down the center of the head: two to the front of the Head: 1 between Rnds 5 and 6 and #2 between Rnds 1 and 2. And four to the back of the Head: #3 between Rnds 3 and 4, #4 between Rnds 7 and 8, #5 between Rnds 11 and 12, and #6 between Rnds 15 and 16.
Assembly of the BODY #1
Sew the Head to the Body and add stuff ing before closing.
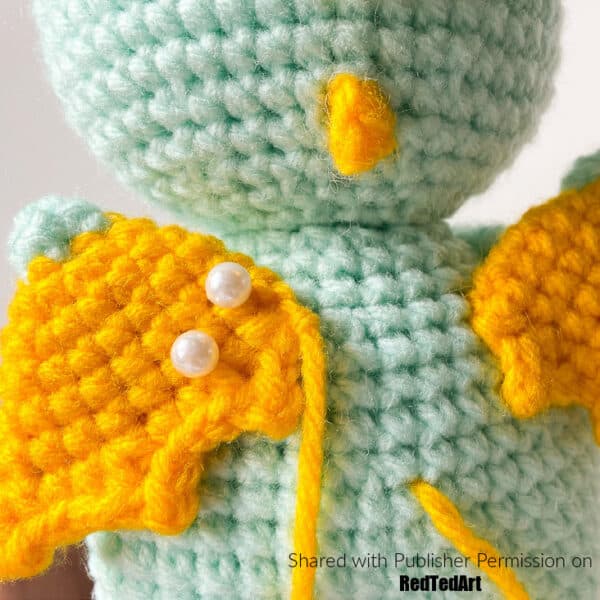
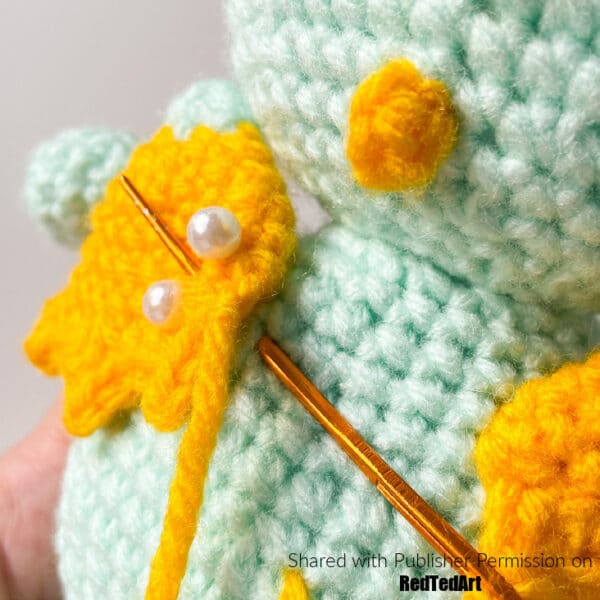
Sew the Wings to the back of the Body with about 5 sts in between (insert yarn
Tail between Rnds 19 and 20 of the Body).
Sew the Tail to the back of the Body: top between Rnds 14 and 15 and bottom between Rnds 10 and 11. Add stuffing before closing.
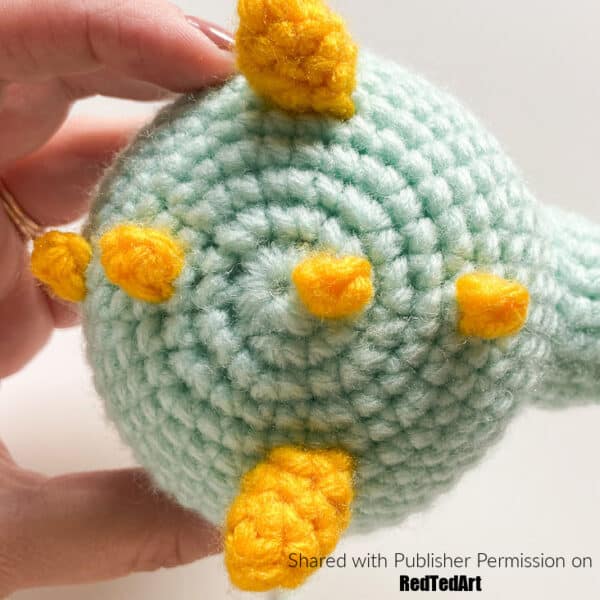
Crochet two Spikes to the back of the Body: #1 between Rnds 19 and 20 and 2 between Rnds 15 and 16.
Crochet three Spikes to the top of the Tail: #1 between Rnds 11 and 12, #2 between Rnds 7 and 8, and #3 between Rnds 3 and 4.
Optional: Embroider some yellow lines to the belly.
NOTE: In the actual Amigurumi Friends book, you also get instructions how to sew these body parts on to the different body types- so you can make the crochet dragon in different positions. This highlights how incredibly versatile the patterns shared with you are! But today’s pattern focusses on this try before you buy “standing” crochet body shape! 🙂
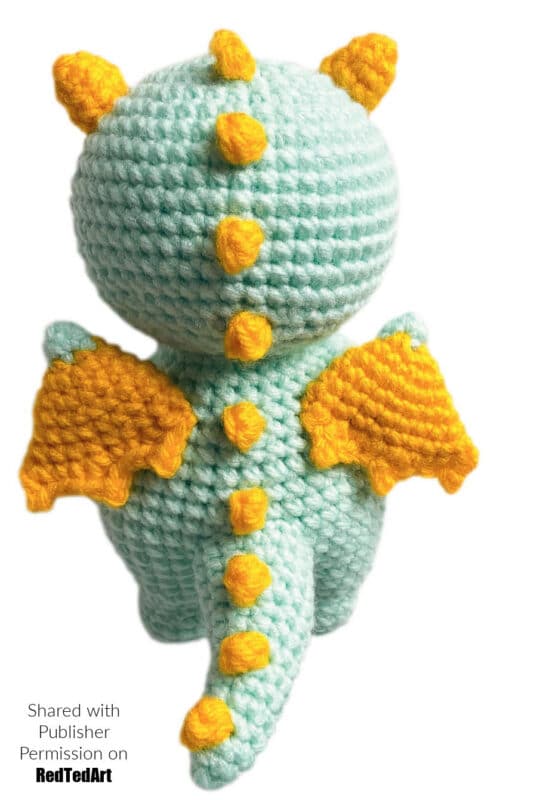
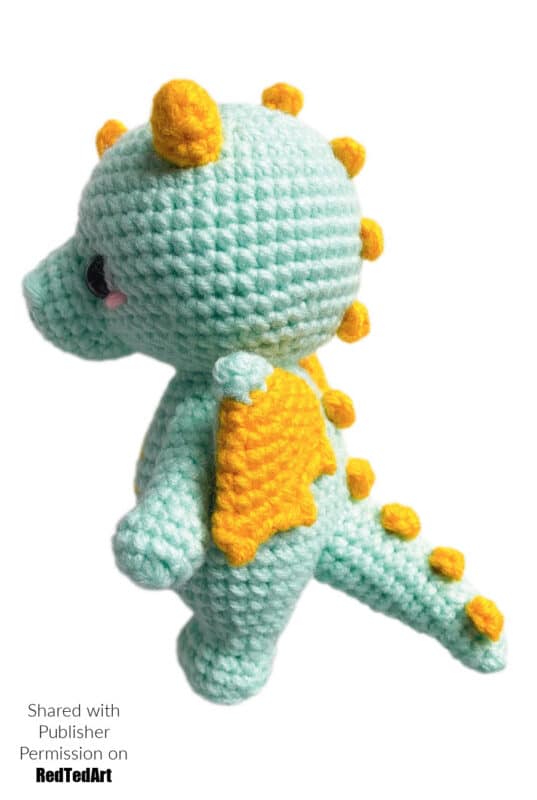
And here you have the finished closes up the amigurumi dragon pattern from the back andf rom the side. Isn’t this simply the cuest little dragon?
Love this pattern? Enjoyed all the detailed photos to guide you through the making process??? I told you would!! Now go on.. treat yourself to this wonderful book – Available on Amazon and on the Quarto website!