How to make a Bead Rakhi Bracelet with Kids
I love how in this modern age, I can be sitting in London, UK and have readers literally from all over the world!! Also, living London, we have a wonderfully diverse set of neighbours and school friends. In recent years my Indian audience has grown (hooray), so I wanted to create a mini series JUST FOR you! Today’s craft for my lovely (Indian) readers is a Rakhi Bracelet for Raksha Bandhan. For those of your not familiar with Raksha Bandhan, please do hop over and read all about this wonderful festival celebrated by brothers and sisters detail! But to sum it up, Raksha Bandhan is a Hindu celebration, celebrating the bond between a brother and a sister. As you know, I have a son and a daughter, I thought it would be a wonderful project for us to try. Needless to say, these Rakhi Braclets would also make nice Friendship Bracelets!
There are many different types of Rakhi bracelets and today we show you a simple but lovely beaded design. Beaded Rakhi bracelets can be quite ornate and complicated, however today’s beaded Rakhi Bracelets are a simpler version to introduce this beaded bracelet method to younger children!
This year Raksha Bandhan is celebrarted on the 26 August 2018. Today we share how to make a rakhi bracelet.
DIY Rakhi Bracelets – Materials
- Embroidery floss
- Scissors
- Wooden beads – 3 different sizes and colors of your choice
- Tapestry needle
How to make your rakhi bracelet
Preparing your thread
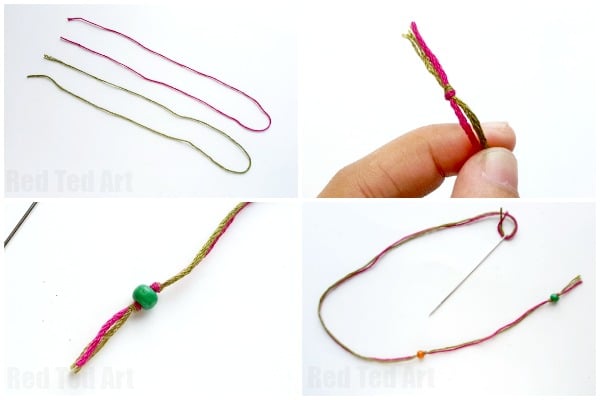
Select 1 or 2 different colored embroidery floss. Cut 2 strands of embroidery floss of the same size. Measure the size for your bracelet and cut out the strands 3 or 4 times the bracelet size. It’s better to keep extra length rather than cutting short strands.
Hold both strands together from any one end and tie a knot with both strands.
Adding the first bead
Draw both strands through the tapestry needle and insert a small wooden bead though the strands. Push the bead all the way near the tied knot at the other end of the strands. Tie another knot on the other side of the bead (adjacent to the bead). (In the images this bead is green and will make up the loose end of your DIY Rakhi bracelet).
Determine the length of the part required for tying the rakhi bracelet; and create a knot on that length; using both strands. Insert a small wooden bead and push it towards the knot. (In our images above this bead is orange and will be the middle pattern of your Beaded Rakhi Bracelet).
Beaded Rakhi Centre
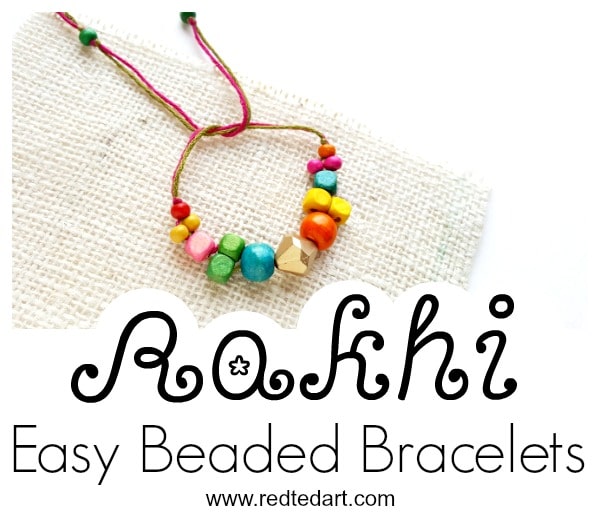
Separate the strands and insert 2 small (pink) beads into them; 1 bead into each strands of your diy Rakhi Bracelet.
Now join both strands together again and insert a relatively larger (turquoise) bead than the previous ones.
Separate the strands again and insert the same sized beads (yellow) into the separate strands; 1 bead into each strands of your beaded Rakhi.
Join the strands again; insert a large bead (this time orange – larger than the beads from the 2 previous steps) into both strands.
Note the beads get bigger from the end to the middle!!
Take a different kind of bead and insert it into the strands; this will be the center bead of the beading.
Symmetrical second half
Now repeat the beading from the first half. We chose a mix of bright colours, but if you want you can make both sides of your Rakhi Bead Bracelet symmetrical in colour and bead shape!
Finishing your DIY Rakhi Bracelet off
Tie a knot adjacent to the last bead once the beading is complete. Keep the same length of strands at this end of the beading like the other end. Insert a small bead and tie a knot at the end of the strands to secure the beading. Cut off extra floss from the open end if required.
Done!
We hope you enjoyed this Rakhi Craft for Kids and that you check out the rest of our special India celebration mini series!
If you love bracelets.. you may also enjoy these Friendship Bracelets – many of which would be suitable as Rakhi Bracelets!


