Bubble Printing Jellyfish
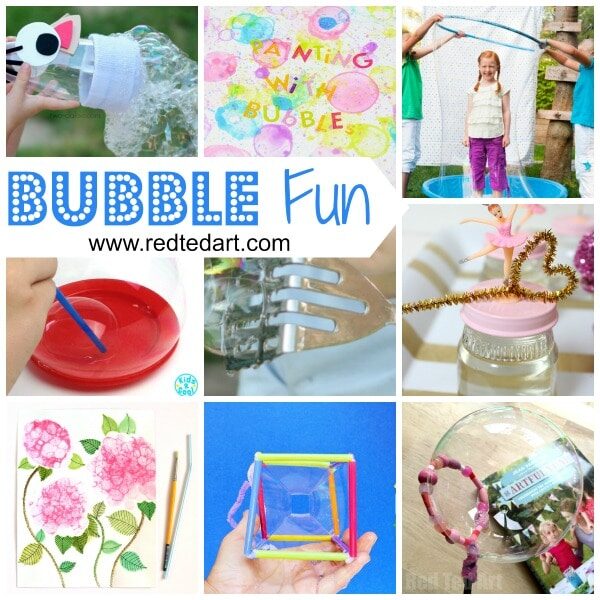
Learn how to do Bubble Printing with this fabulous Bubble Printing Tutorial. We love making our own Bubble Recipe and having lots of Bubble Activities fun in the Summer. I have since added some handy free jellyfish printables to this activity! Do check these out too. We welcome the gorgeous Making With Mommy who shares this fabulous Bubble Art Project with us today!

Bubble printing is a fabulous summer craft you can make using materials you likely already have at home! After you make your bubble prints you can use them in so many creative ways. I’ll explain how we turned ours into a jellyfish art piece in this post!
Bubble Printing Jellyfish – Materials needed
- Large, shallow dish (like a baking pan)
- Dish soap or bubble mixture
- Acrylic paint in the color of your choice (dark paint works best)
- Water
- A straw
- White paper for printing onto (thick paper, like cardstock, is ideal) – or you can use the printable jellyfish templates (enter $0 at check out)
The printable includes some jellyfish body shapes, jellyfish paper googly eyes and some circles for the background. Enter $0 at check out!

Bubble Printing Jellyfish Step by Step Guide

Step 1: In your baking dish, gently mix water, dish soap and acrylic paint. I don’t use an exact ratio here – you want the color of the paint to appear dark. You want to add enough soap to create a lot of bubbles, but you can always add more as you go if needed!

Step 2: Use your straw to blow bubbles across the surface of the solution you mixed! Move the straw around to cover the entire surface of the dish with bubbles.

Step 3: Hold your paper so that the surface is parallel to the surface of the bubble mixture. Gently dip your paper into the bubbles just until they pop! Be careful not to let you paper dip down into the water in the dish. When you pull your paper up, you will see that some bubble shapes have appeared where the bubbles popped! To get the best coverage, I like to dip each piece of paper repeatedly, one small area at a time. If an area appears too light, you can always dip it again until the bubbles are as dark as you would like!
Step 4: Place your paper flat to dry! Once it is dry, you can use it to create all sorts of summery, ocean-inspired art!

Use the PRINTABLES provided or cut your own shapes. For the free printables, simply add $0 at check out.
We used our bubble paper to create some jellyfish art! I cut our bubble paper into a variety of different sized circles.
I arranged the circles into a group and glued them together to create a bubble background.
Next, we cut semi-circles from pink painted paper to create the bodies of three jellyfish.
We cut lengths of a variety of different ribbons and string and glued them to the back of the bodies to create tentacles! You can also use some of the printed paper and cut strips to gently curl with a pair of scissors.
Finish your jellyfish off with a pair of googly eyes (paper googly eyes provided with printable) and glue them onto your bubble paper backdrop!

DO visit Making with Mommy over on Instagram where she has a range of the most amazing projects for kids! I adore these following:
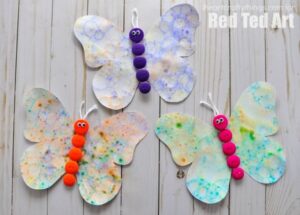
We also have some gorgeous Bubble Art Butterflies:
More fun with Bubbles in our complete Bubble Activities Guide: