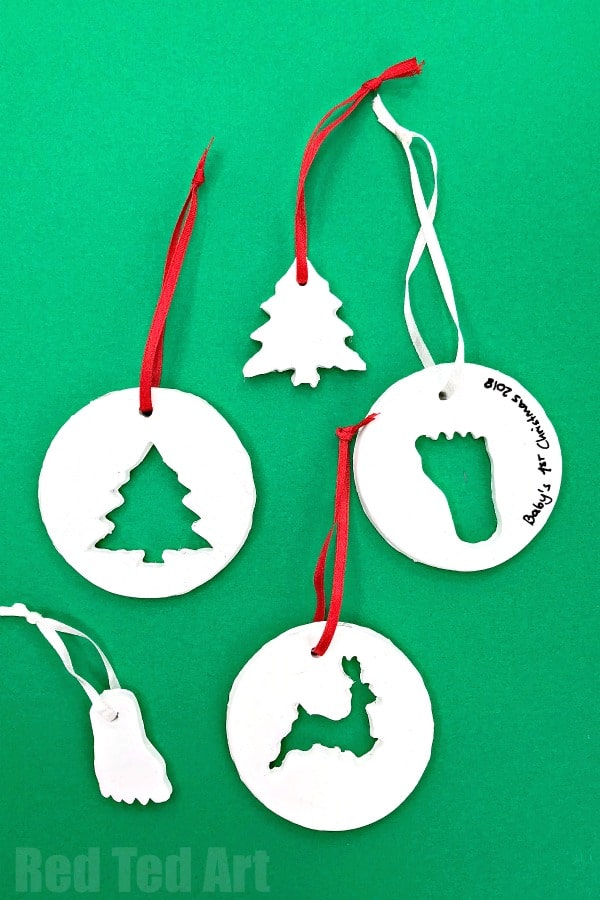
Cookie Cutter Clay Ornaments
There are so many fantastic DIYs and DIY Ornaments you can make with cookie cutters – we in fact have a whole collection of Cookie Cutter crafts for you – but one such DIY are these easy peasy Cookie Cutter Clay Ornaments. They are easy, simple and just stunning. The kids will love to make them and they make great Ornament Keepsakes and Ornament Keepsakes to make fro friends and family. We made these easy Christmas ornaments with natural Air Drying Clay, making this a super economical craft in large groups. However, you can buy beautiful White Clay to, which would work brilliantly with these too!
Note: This post contains affiliate links that have been added for your convenience! Should you choose to purchase via these links, I will earn a small commission towards the upkeep of this website! Many thanks!

Cookie Cutter Clay Ornaments – Materials:

- Natural Air Drying Clay – we used clay like this US/ UK but WHITE Clay like this would be fantasic too US/ UK
- Small Christmas Cookie Cutters – e.g. Tree US/ UK or Reindeer US/ UK – note if using fondant cutters out of plastic, make sure you clean this quickly and thoroughly before using on food. Metal cutters are easier to clean.
- Paint – spray paint would be the best finish – e.g. white spary paint US/ UK or gold spray paint US/ UK; thoguh acrylics work well too
- Red ribbon for hanging
How to make Clay Cookie Cutter Ornaments:
Roll your clay out to approximately 0.5 cm. Try and get a smooth even surface.
Take a glass or cound cookie cutter and cut out your basic shape. Carefully lift the circle off the surface to make sure it doesn’t stick.
With a little water smooth edges.
Take your cookie cutter and cut out a centre. Very carefully lift the cookie cutter out.
Again, lift the clay ornament off the surface, to make sure it doesn’t stick, but also to smooth down with a little water.
Place on a surface for drying (e.g. old cutting board or baking paper) and finally add a hole for hanging with a toothpick or similar.
Again smooth any edges that need smoothing.
Let dry fully for 2-3 days.

Then paint in your desired colours and hang!
Gift to friends and family and enjoy!!!
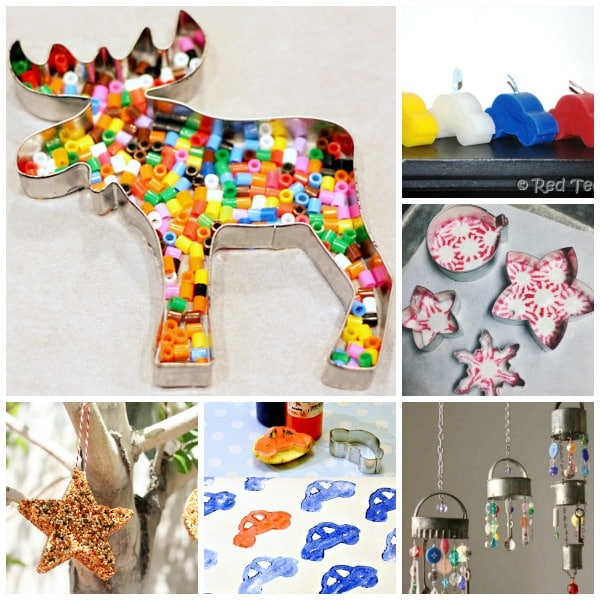
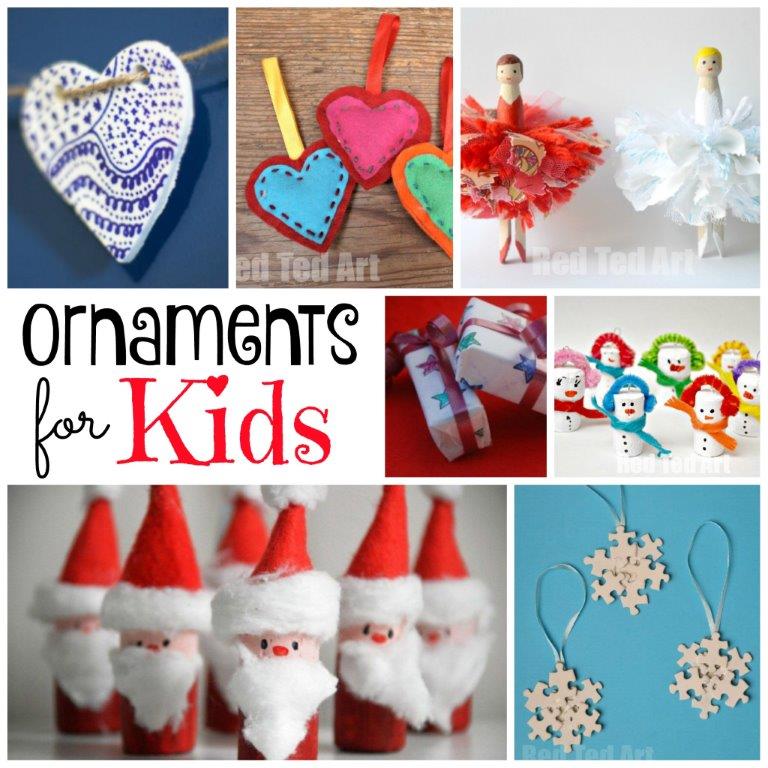
More great Kids’ Ornament DIY Ideas here:
More fun with Cookie Cutters here: