
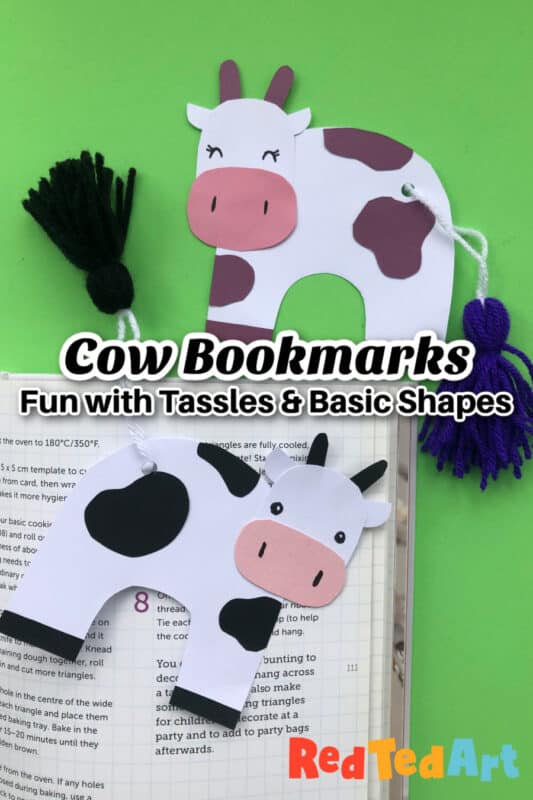
Cow Bookmark with Tassel for Kids
We love making bookmarks and have a bunch Creative Bookmark Ideas for you to browse. Of course there are MANY corner bookmark designs, but sometimes it is fun to make something a little different! Today, we have a cute Cow Bookmark with a Tassel Tail! In this post you will learn how to make a tassel, as well as how to draw and cut out basic shapes to make your cow bookmark.
This cow bookmark, compliments our Elephant Tassel Tail bookmark and uses similar basic shapes! It is a great way to explore shapes and colors with kids of all ages!
Supplies needed
- light card in desired colors
- yarn scraps in desired colors
- pencil for sketching
- pens for details
- scissors
- glue stick
How to make a tassle tail cow bookmark video tutorial
I have a simple video tutorial for this cow bookmark (including how to make a tassel), or you can follow the step by step instructions below!
How to make a Cow Bookmark – Step by step tutorial
I often think of this process as “drawing with paper shapes” – you are basically creating the “image” of cow with shapes you need to draw and cut. The great thing about this process:
- You learn how you “draw” almost anything with some basic shapes
- You can cut and recut the shapes until you are happy that they fit just right! I will guide you through the process to make your own shapes!
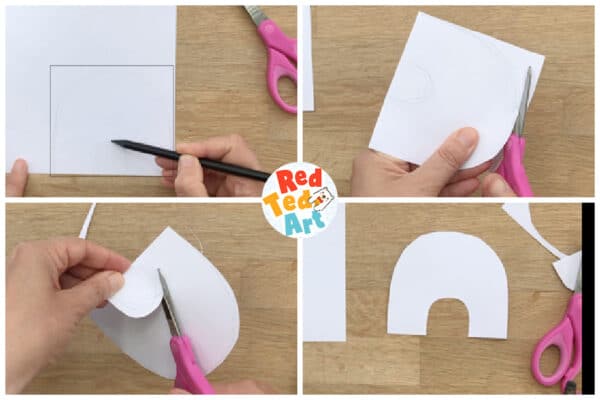
Cut out the cow body
First we make the cow’s body. As mentioned the focus on simple shapes. Start off with a rough square (I think the dimensions of mine are slightly more rectangular than square, but it is just a rough guide).
Then round off the edges to make the body’s hump.
Repeat the same with a “hump” in the middle of the body to form the legs. Don’t worry about pencil marks. You can either carefully rub them out later or simply turn the book mark around, so they are on the back!

Cut out the cow features
Again you will need simple shapes – for example – the ears are a cricle cut in half and the muzzle is an oval. The hooves are cut bigger, so we can easily trim them later!
Now cut the following shapes:
- Cow head – again, a rectangle with rounded edges at the top
- Cow ears – this is a circle cut in half
- Cow muzzle – this is an oval – I ended up cutting two of these before I was happy
- Cow horns – two longish shapes round at the top
- Cow hooves – two longish shapes that you will trim later
- Cow spots – random shapes
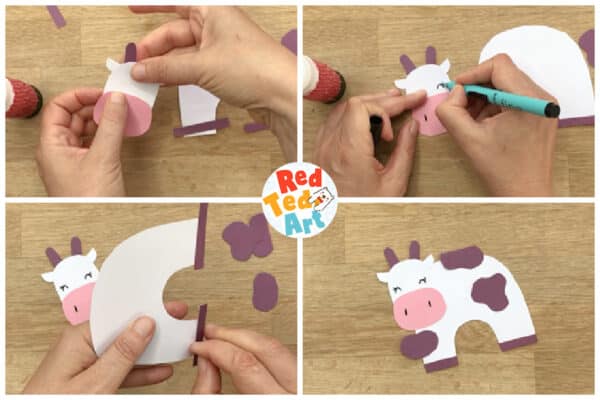
Assemble the cow bookmark
Now it is time to glue your pieces together – add the horns and ears to the back of the head. And the pink cow muzzle to the front. If any shapes don’t look quite right, re cut them.
Draw on nostrils and cow eyes. I gave my cow some eye lashes!
Now glue the hooves on and trim. You can see how easy it is to stick our shapes and trim them AFTERWARDS for that perfect fit.
Similarly, glue the spots on and trim and excess.
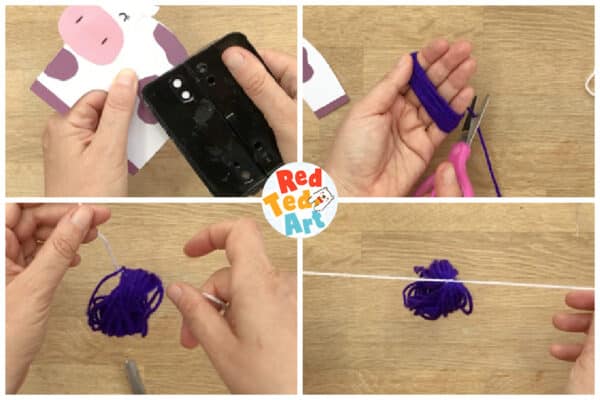
Make a simple tassle part one
With a hole punch, make a hole to attach a tassle. I like looking at the bottom of the punch, so I can see the exact positioning of my hole.
Now make your tassle:
Note how we used a different color for the part of the tassle connecting to the cow to make it more like a tail.
Wrap yarn around your fingers, and cut.
Thread a piece of white yarn through the loops.
Tie off.
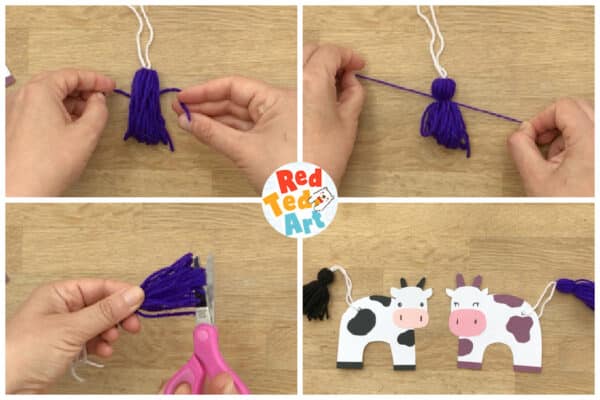
How to make a tassle part 2
Get a second piece of yarn in tassle color and tie towards the top of your loops (see pictures).
Now trim open the yarn at the other end. Trim to even out if necessary.
Tie to the hole in your cow!
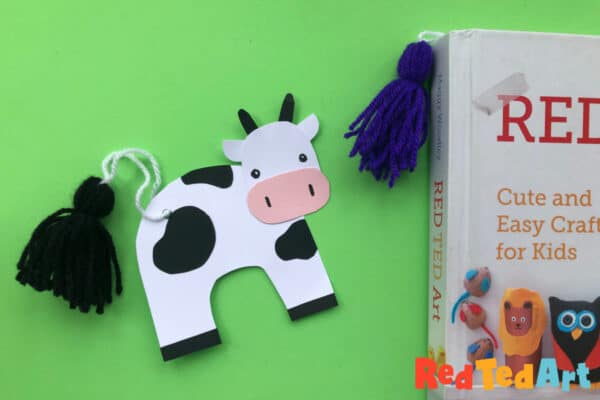
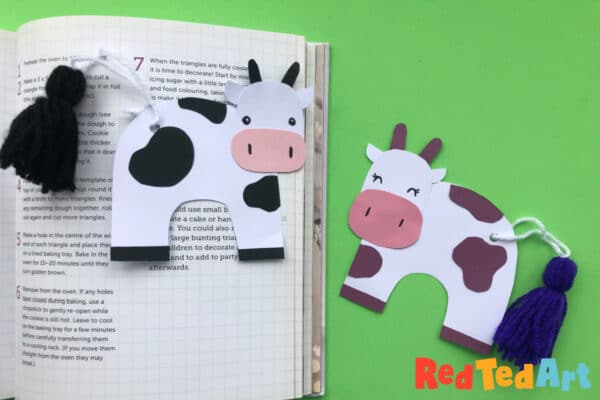
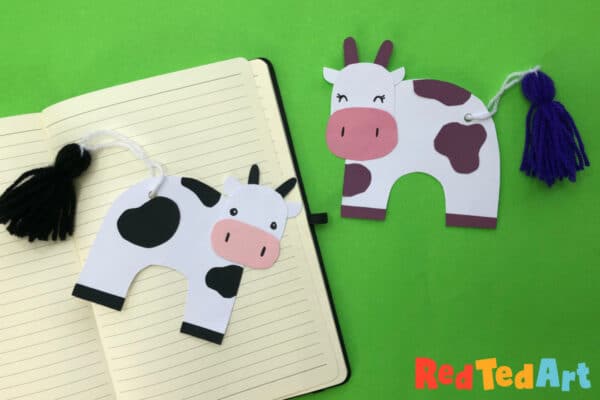
Finished! Isn’t your Tassel Tail Cow Bookmark Adorable?! I do love a cute Cow Craft for Kids!
As mentioned, we have made a similar tassel tail bookmark before – check out the Tassel Tail Elephant Bookmark – I will guide you how to draw your own template again too! So cute. Love the multi colors of the elephant tassel. So fun!

We have MANY more wonderful Creative Bookmarks for you to explore here:
