
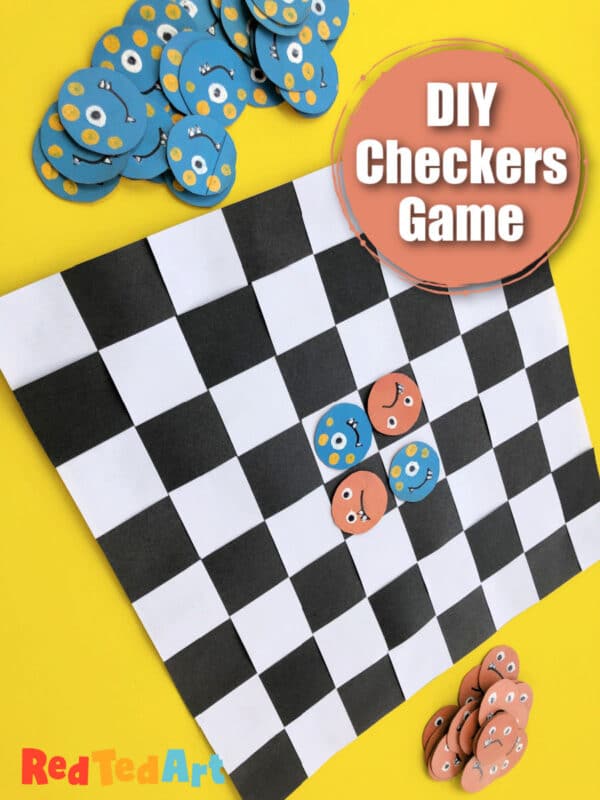
DIY Checkers Game – Easy Paper Toys for Kids
Our summer fun continues with some more great paper toys for kids to make! Last week we had the fantastic Shark Paper Toy, today, we make our own paper Checker Game (or if you are really determined, you can turn this into a DIY Chess Boardgame too!). These posts are part of our Best Makes Ever series that Arty Crafty Kids and created back in 2020 for Sky Kids and that we now get to (slowly) share with you on our own websites. The concept is simple: easy crafts using every day materials! Eco friendly, in expensive and above all: fun!
As mentioned this DIY Checkers Game is part of our series of Paper Toys to make and play with, as well as our Paper Weaving Crafts! Enjoy!
Supplies needed to make your DIY Checkers Game:
- 2 sheets each of black and white paper – printter paper is great for the white, you could use magazine paper for the black
- Cereal box (painted) for the monster tokens
- Paint
- A ruler (to trace)
- Scissors
- Glue stick
- Pen for decorating your checkers tokens
You can see how to make this Checkers Boardgame in the video on auto play of follow the step by step instructions below!
Make your own checkers board – paper weaving board games
Let’s begin by making your own checkers board – or chess board. This is a super easy paper weaving activity!
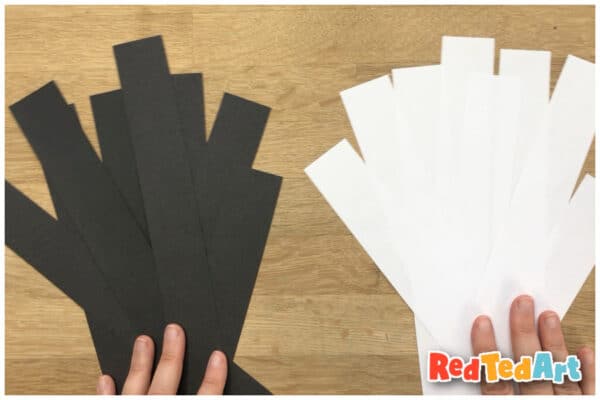
You will need a set of 8 black and 8 white paper strips. The easiesy way to get 8 matching strips of paper, is to take a LONG RULER and simply trace it! Be as neat as possible as this will make your paper weaving easier later!

Start of by gluing a white strip of paper onto a black strip of paper – at right angles. (Top left images).
Take a second piece of white paper. Add a little glue, and stick it UNDER the black strip to the right of the first white piece of paper (Image top right).
Now take a third strip… and continue. Until all 8 strips of white paper glue in place – on top and under the black strip (Bottom right).

Now it is time to start weaving in the black strip of paper.
Add a little glue to one end of the black paper and secure it on the left hand side.
Now weave the rest of the black paper in.
Repeat with the remaining black pieces of paper.
Once everything is neat and in place, glue down the ends and secure your checker board.
Finally: trim off the edges.
Your basic checker board is done!
Make your own recycled checkers tokens
Now it is time to make your tokens. For checkers you need two sets of tokens in different colours. If you are using this as checkers, you can “simply” colour one side of your cardboard. I decided to make the pieces reversible, making this game suitable as a game of DIY go too!

Take your cereal boxes apart.

Paint both sides of the cardboard and let dry fully!
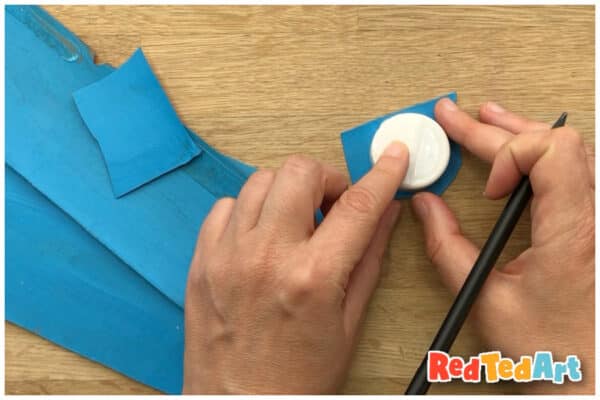
Once dried, take a coin or the lid of your glue stick and trace some circles – make sure whatever you pick to trace is the right size for your checkers board and fits neatly into each of your checkers board squares.
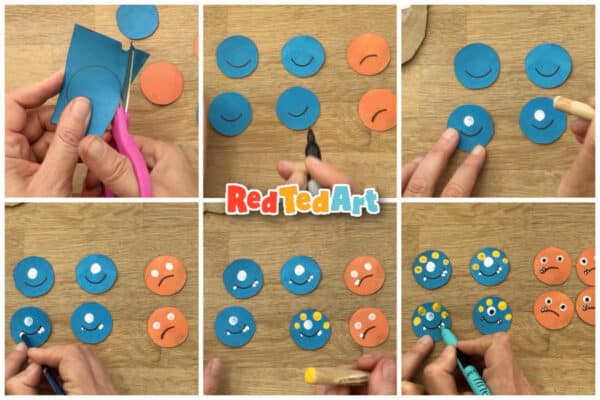
Cut our your circles and start decorated. Here we added:
- A mouth
- Dots for eyes
- More dots for monster features
- Small teeth

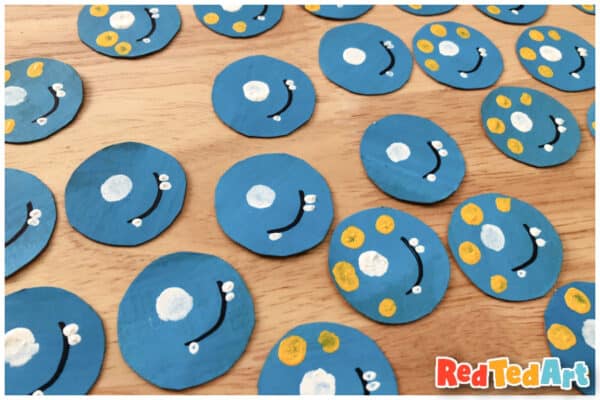
Once everything has dried, use your black pen to add finishing touches (outlines to the teeth, es and pupils).
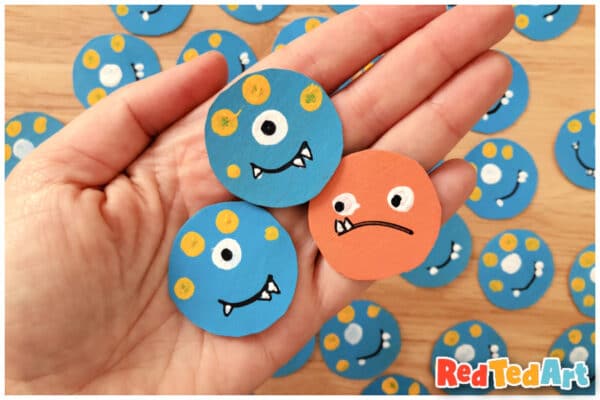
Your reversible tokens are finished!

Now it is time to play!

You can use this as a game of DIY Go or as Checkers!

So fun!

Your DIY Paper Toys are finished!
You can see more from the Best Makes Ever series here (we will be adding projects over time) in the meantime, do check out the Paper Shark Toy, and the fun Pirate Finger Puppets:

With more paper toy crafts here:
