DIY Clay Leaf Magnets
Today, I like to welcome Kim from The Best Ideas for Kids who is sharing a gorgoeus DIY Clay Leaf Magnet craft with us today. Not only do we LOVE to work with clay (we have many great easy clay projects for kids here), but these make stunning Autumn decorations, great little gifts for kids to make or would also be brilliant for decorating the Thanksgiving table (then let your guests each take one home at the end of their visit..). Over to Kim!
Greetings everyone! It’s Kim from The Best Ideas for Kids and I’m excited to be sharing with you today these beautiful fall clay magnets. Fall is my favorite season – especially when the leaves start changing colour. But not only that, fall brings on the start of a new school year, fun activities like going to the pumpkin patch and then looking forward to Halloween, Thanksgiving and Christmas! So today I’m sharing with you how to make these pretty air-dry clay fridge magnets. You won’t believe how easy they are to make. Kids will love helping or creating these on their own! And the best part about them is they look great on the fridge and will bring some fall décor to your kitchen.
This was our second time working with air dry clay and we were so impressed with how easy it was to work with and the quality crafts you can create. If you’re looking to do another craft while you create these magnets, see our easy leaf bowls. We had enough clay to make both the magnets and the dishes and even some clay left over to spare.
DIY Clay Leaf Magnets – MATERIALS NEEDED
- Package of air-dry clay*
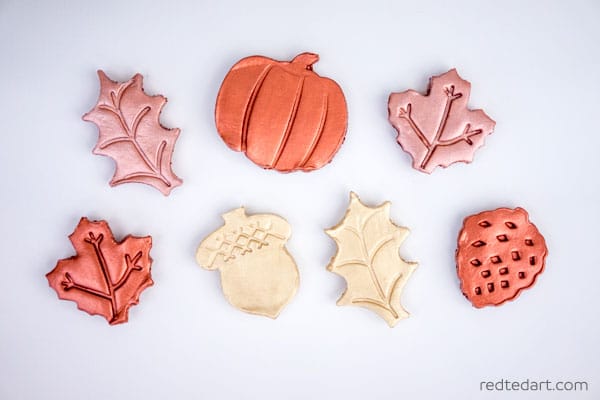
- Acrylic paint – we used gold, bronze and rose gold
- Leaf cookie cutters (Get great ones here US/ UK (aff links))
- Rolling Pin
- Mod Podge Gloss
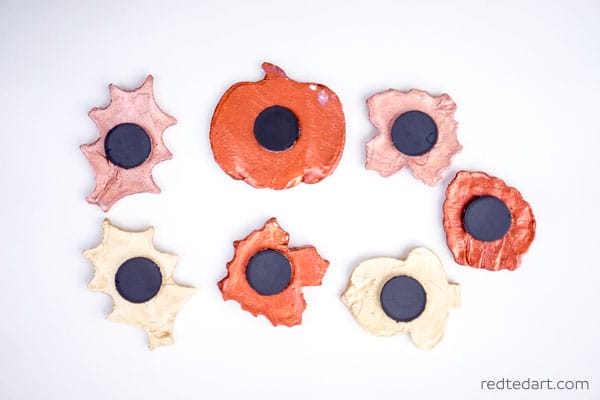
- Adhesive Magnetic Buttons
* we like to buy air – dry clay in bulk (great for Apple Pinch Pots and stunning Leaf Bowls too!) e.g. –
- grey clay (US/ UK) (the best for buying in bulk)
- terracotta clay (US / UK) (great for earthy projects)
- or get this premium white air drying clay (US/ UK)
How to make Fall Fridge Magnets step by step instructions
- First remove some clay from your package and roll it out with your rolling pin.
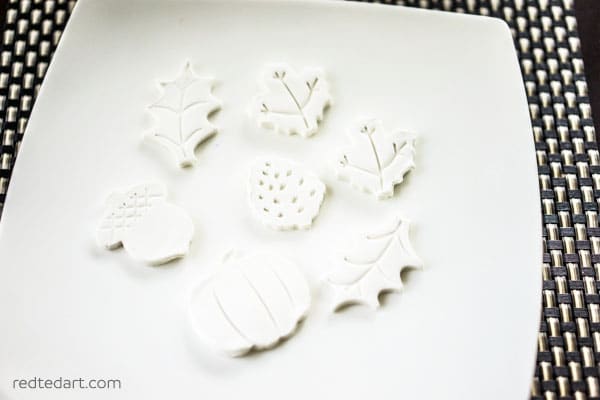
- Using your leaf cookie cutters press into the clay. Be sure to use cookie cutters that have a design in the center of them so they create an impression when pressed into the clay. Then remove the cookie cutter and the excess clay around the cookie cutters.
- Create as many different designs as you’d like! Once you’re happy with the number of magnets, let them air dry for 24 hours. After 24 hours test that the fronts are dry and flip them over to air dry the backside for another 24 hours.
- Once your magnets are dry, you can now paint them! We did two coats on the front and one on the back. We then sealed with mod podge gloss for a finish.
- Now you can add your adhesive magnetic buttons to the backside of your clay. Simply peel and stick. It’s that easy!
That’s it! Kids will love helping you press the cookie cutters in and painting these will be fun too! We hope you enjoy the finished pieces. Feel free to choose any colors or cookie cutters too – the options are endless! And if you’re looking for another fun project to do with these cookie cutters – see our fall potato stamps we made with similar cookie cutters.
Here is a nother lovely project from Kim, that you may like to check out – adorable Glitter Handprint Keepsakes!!

 Kim McLeod is the writer behind the fun kid’s craft and activity blog, The Best Ideas for Kids. You can follow The Best Ideas for Kids on Facebook, Instagram, Pinterest or Youtube.


