
Easy Apple Pinch Pots for Kids – Step Instructions
Looking to have a go at a simple pottery project with kids? Look no further. Here are some great pinch pot step by step instructions that you and the kids will love. Learn how to make easy Apple Pinch Pots today!

Oh yes, it is APPLE CRAFT season again. How I love apples as a craft theme for kids. They are beautiful… and I love the bright reds and greens. Today, we are revisiting Air Drying Clay Projects for Kids and turning them into some wonderfully easy and adorable Apple Pinch Pots. Be sure to add them to your lesson plan introducing pottery in the classroom.
Pinch Pots are super easy for kids to manage and look great. I can imagine that these easy pinch pots would make a great class room activity or activity at home.
It is great for fine motor skills, feels wonderful and makes for a lovely end product… and you know what? They make great little gifts for kids to make too. This is the time of year, we love to craft both because of the season, but also because we can start “stock piling” some little homemade Christmas gifts the kids can give later in the year. So… let’s learn how to make pinch pots for kids!
You may also like our fun Monster Pinch Pots that we made last Halloween!
Apple Pinch Pots for Kids – Supplies needed
- Air dry clay – you can use the natural grey or brown air drying clay, or you can buy the “prettier” white air drying clay too. We love using the natural earthy colours, making this a wonderful “back to basic craft” for kids.
- Paints in desired colours – we used red, white, brown and green and we used both Enamel and Acrylic paints – simply because those are the paints and colours I have “in”. If you don’t have acrylic paints, you can use ordinary poster paints and add some glue, to give them the extra shine and strength. You **MAY** need two layers though. I LOVE using enamel paints for air drying clay, as they give a lovely smooth finish and dry super quickly!
- We used these enamel paints (Red and Green) US/ UK and this acrylic paint (White and Brown) US / UK (affiliate links)
- We find it useful to have a damp sponge to hand, as well as tray to work on (then you can move the whole tray to the side to let your projects dry)
We like to buy clay in bulk – and usually get clay like this:
Any good craft store should have natural air dry clay. Don’t be tempted by fancy packaging, the big lumps of clay in plastic bags, is what you are after. It is super cost effective too!
- grey clay (US/ UK) (the best for buying in bulk)
- terracotta clay (US / UK) (great for earthy projects)
But this white clay is also popular
- white air drying clay (US/ UK) (a lovely clay for when you want that clean white finish without painting, however it is MUCH more expensive and therefor best for small projects such as ornaments)
(affiliate links added for convenience)
If you have old hardened clay.. you can soften it again quickly and easily using this How to Soften Air Drying Clay method – remember you will need 2-3 days for this method, so check on your clay before you plan to use it! Make sure you always store your clay in a plastic bag!
How do you make a Pinch Pot?
Pinch pots are the simplest of Pottery Projects for beginners. They are a great air drying clay project, as well as kiln project. There are usually only 3 simple stemps need to make a pinch pot:
- From a ball of clay
- Make a dip with the thumbs of your hands in the centre of the clay
- Smooth down any cracking on the surface of your pot
Basic shape done. From here you can turn your pinch pot into all sorts of wonderful pinch pot creations – making designs for different seasons or adding a pinch pot handle or lid! A potters delight!
How do you make a pinch pot for a plant?
Air dry clay is not waterproof. You would need to either kiln fire your clay (different clay used) OR you can also buy a glaze for your pinch pot for that “professional finish”.
Some glazes, even all you to waterproof your pinch pot to make a water resistant vessel.
Though, I wouldn’t use an air dry clay pot for flowers, you may get away with putting succulent plant in it – as they are quite a dry plant and don’t need too much water.
Why are pinch pots so good for beginners starting out with pottery?
There are two main problems beginners encount when working with clay and learning pottery –
- Trapping air (which can lead to a small explosion in a kiln, or weakness in air dry clay pot)
- Not connecting pottery “pieces” together properly (other clay pots are made by layering a coil of clay on top of each other, tehse coils need to properly connected and smoothed down)
The method used for pinch pots, means, that you rarely encounter either of these problems.
How to Make Apple Pinch Pots – Video tutorial – easy pinch pots for Fall
Watch the video on auto play or follow the step by step instructions!
As mentioned Pinch Pots really ARE super easy to make and the kids had great fun doing them. What I love about these pinch pots, is that they are a relatively quick project to make too – perfect for my now 9yrs old Red Ted, who still loves to craft, but not for very long periods…. These apple pinch pots are perfect for keeping him interested.
Step by step photo instructions for how to make a pinch pot apple

Step 1 of How to make Pinch Pots – form a ball of clay
If you have previously softened your clay.. be sure to let it dry out a little first too. You don’t want it to be too “wet”.
Once your clay is ready to be used, begin by forming a nice smooth ball about the size of your hands. We like ours to fit nicely into the palm of our hands. But it is totally a matter of preference – and you can of course go bigger or smaller!
Step 2 of Apple Pinch Pot DIY – use thumbs to shape bowl
Hold the ball of clay in the centre of your two hands and now gently move your thumbs into the centre of the clay ball – making an itentation – about the size of a plum to begin with.
Step 3 of your Pinch Pot How To – Shape the pot into an apple
Keep manipulating the “walls” of your pinch pot and move them “up a little”. Make sure the sideas a uniform all the way round. Once you have a basic pinch pot that you are happy with, make some slight intentations opposite each others – these will form the top and bottom of your apple and give you that final shape of an apple.
Be sure to now smooth down any cracking on the surface of the pot. Dip your finger in water and run along the lip of your clay pot. A damp sponge will work too!
Step 4 of your Apple Pinch Pot – stem and leaf
Now take a small amount of clay to make a small clay stem and leaf – you can add leaf patterns with a knife if you wish. Cross hatch/ scratch the wall of your apple where you want to add your stem and leaf and gently press your stem and leaf onto this year.
The scratch/ cross hatch helps connect your attachments to the clay pot. With a little water smooth your stem and leaf down to make sure it is securely attached!
Finally, do scratch your initials at the bottom of your pot with a wooden tool (especially if working in the classrom!)
Step 5 – let pinch pot dry fully
Time to wait!! Let your apple pinch pots dry! This can take anything between 1 day and 7 days – depending on how hot and dry your environment is. In a humid country this will take longer.

Step 6 of your apple pinch pot – paint!
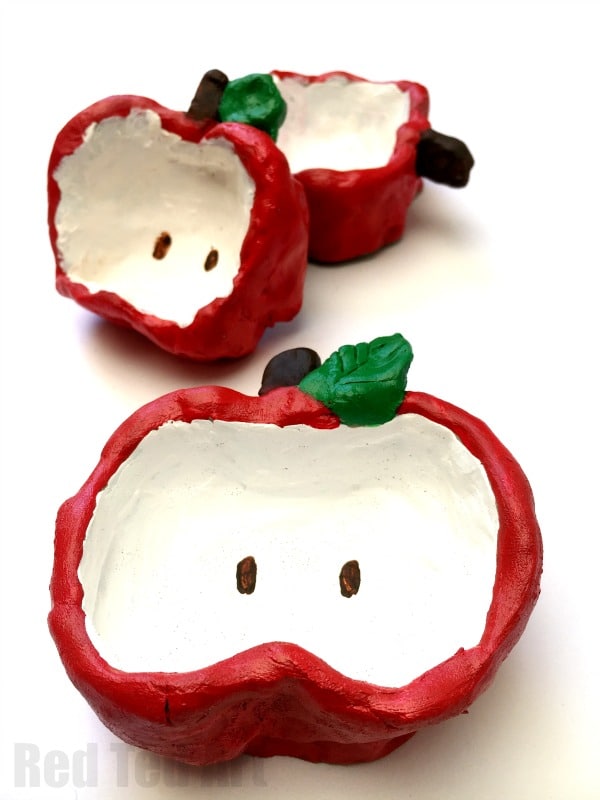
Your easy Pinch Pots are FINALLY ready to be painted. We decided to go for a Snow White Red outside, lovely bright green leaf and white inside, plus some brown pips! We painted the outside first. Then added a red rim. Next the kids painted the centre of their apple white. Add brown to the apple stem and of course green for the leaf. Finally, once dry, add two little brown pips to your apple pinch pot!!
Super easy for both my kids (now aged 7yrs and 9yrs) to manage. They LOVED making these!!!

The only problem we have now, is that they may not want to part with them as Christmas Gifts later in the year. Ha.

But aren’t they pretty? Love!
I love how the lovely Imagination Tree has made this wonderful Christmas Tree Pinch Pot for kids too! Just adorable!
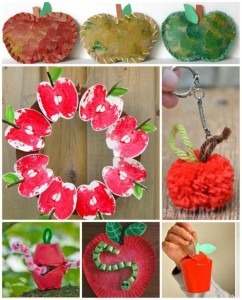
As mentioned we have lots more Apple Crafts Here –
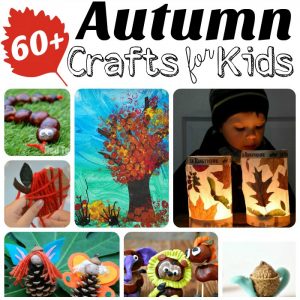
Some wonderful Autumn Crafts for Kids (and Autumn Crafts for Preschoolers) here –
And of course PLENTY more Air Drying Clay Crafts for you here –
