DIY Desk Organiser for Father’s Day Gifts
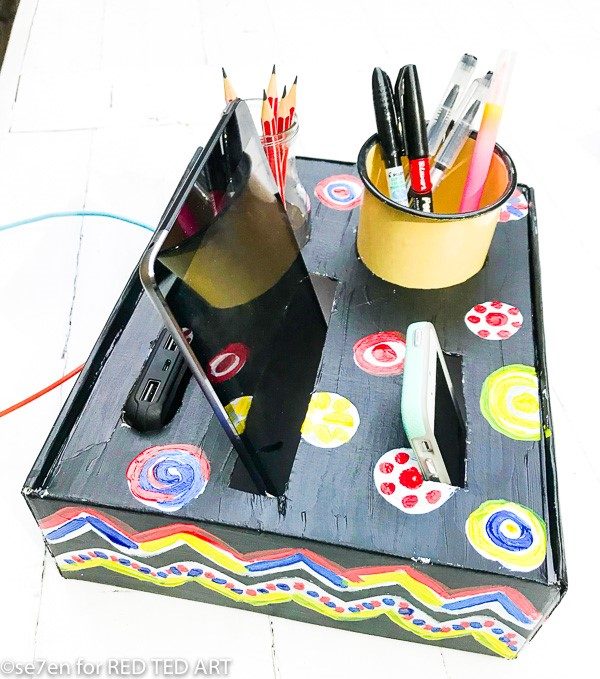
As we near the end of the 31 Days of Dad guest series, we have the fantastic se7en and a fabulous Father’s Day Gifts for Kids to Make! Dad will LOVE this DIY Desk Organiser for Father’s Day!!
Not only does this make a great Father’s Day Craftsidea for kids, but would also be a fabulous Back to School project to get a tween’s desk origanised!
We are so excited to be part of REDTEDART’s Father’s Day Crafts and Activities. We are the se7en gang, a homeschooling family waving hello from sunny Cape Town. You can follow our homeschooling journey and outdoor adventures at se7en_hoods on instagram and on our blog over here.
Creating a Father’s Day Gift is not as easy as you might think, Dad’s have the terrible habit of not really needing anything. So we put our heads together and thought and thought and came up with the idea of creating a charging station for him. We wanted to create something useful with what we have lying around at home, and something that could be personalised and unique for every dad out there. In the era of online shopping, there is no shortage of delivery boxes lying around our house and boxes have so many uses… we can’t help saving them up for just this sort of crafty project.
To make a DIY Desk Origaniser you will need:
- A sturdy box… we used a delivery box.
- A pencil for planning and creating a template
- A craft knife (and an adult helper) or scissors
- Paints, coloured papers, or stickers… to decorate your box. Not glitter, mind you… because no father ever wants glitter near his electronics.
How to make a DIY Desk Origaniser for Dad
First we gathered together a couple of goodies that would make the charge station a charge station. On the inside of the lid we drew circles around a mug for collecting gadgets that lie around and maybe for popping treats into from time to time, and a jar for pencils.
Then we “borrowed” his electronic gadgets that he needs to charge in the evenings and we drew around them carefully, to create templates to cut out… and we got an adult to start cutting out with a craft knife and then the children were able to use scissors to neaten them up.
Finally, to create the “charging” part of the project… we made a number of crosses in the back of the box and then we could just poke a pencil through the centre of the cross to make a hole for the charging cable to fit through.
It looks a little messy, but we paused here to check that everything fitted in place.
And your job is done, except for the best part… all you have left to do is decorate… go wild with paints, stickers, pretty papers, markers and gluing, go wild and have fun and make it your own. We used acrylic paints, and started by painting the box black… to hide all the labels and stamps on the delivery box… from there we used acrylic paints to brighten the box up a bit.
Once all the artwork has dried, you can pop all your goodies into your charging station… and as we get closer to the day I am sure that some little surprises will be popped into the mug as a treat.
And here is a picture from the back, to show where all the cables plug in.
More great ideas from Se7en:
Check out the rest of our Father’s Day Gift Ideas for dad!


