
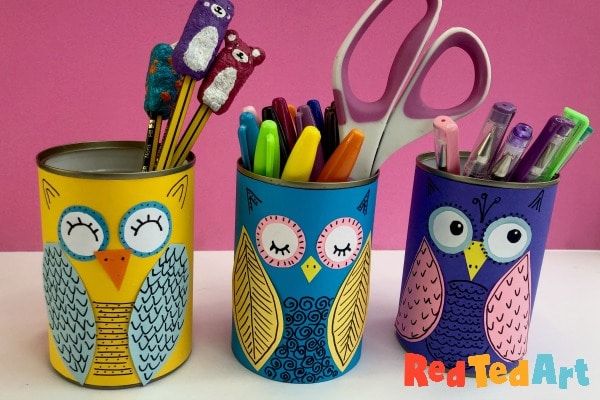
DIY Tin Can Owls – Desk Tidy
Ah yes, it time for a refresh of our DIY Room Decor… we have desk tidies for all seasons.. and today, we share these super duper cute DIY Tin Can Owls Desk Tidy craft. It is a super quick and easy project, that I am sure you will love. Customise the colours to suit your colour schemes/ or materials to hand. These can also be made with white printer paper and pens! If you love Owl Crafts, we have plenty more for you here!
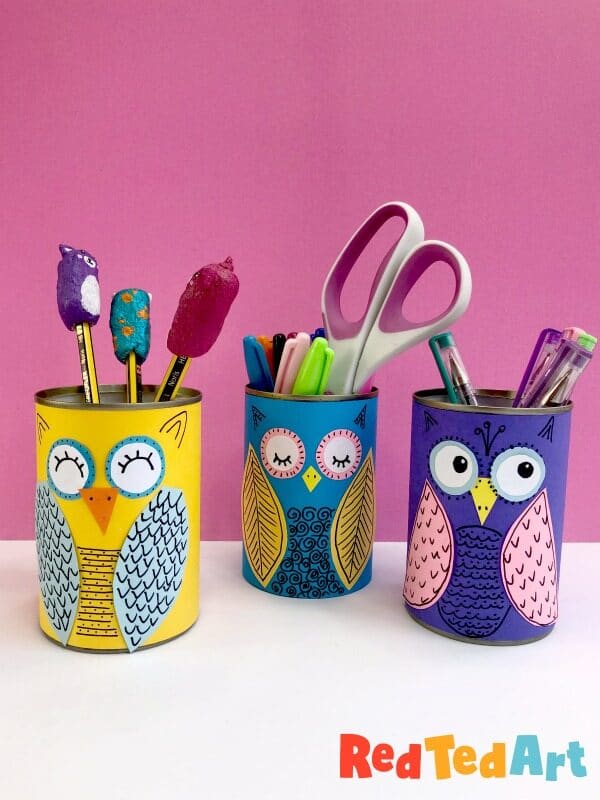
If you love Owl Crafts for Fall, I think these little Owl Tin Cans are a must. They are super simple to make and look great. A perfect to update your homework station for Fall! It is also a great recycling project, using old tin cans to create something new. Just lovely.
Owl Pencil Holders – Materials needed:
- Tin can (cleaned and dried)
- Paper in desired colours
- Black pen for features (or colouring)
- Scissors
- Tape
- Glue Stick
How to make a DIY Tin Can Owl Craft!
We have a video tutorial for you, or you can follow the step by step instructions! Choose whichever you perfer.
Step by Step Photo Instructions

Cutting your paper to fit the Tin Can
The first thing you will need to do, to make your Tin Can Owls, is measure your paper to fit your tin. Most tin cans, come in fairly standard sizes.. however, I find they do vary a little.
So I line up the edge of the paper with the rim of the top of the tin can.
Carefully wrap the paper around the tin can.
Squeeze the paper along the bottom of the tin can, to make a crease for cutting, as well as marking how far round you need to wrap the paper.
Cut out your rectangle.
Check for size. If you are happy with it, continue!
Note: you can make this background paper in any colour you wish! If you only have printer paper, you can use to pens to decorate the paper as an owl!
Decorating your paper as a paper owl

Now you have the basic paper ready, it is time to cut out all your owl shapes! You will need:
- 2 centre eyes (circles)
- 2 outer eyes (circles)
- a triangle beak
- Wings (like leaves)
Check all your owl cut outs on teh paper, and see if you like the shapes and sizes. Trim anything, or re cut features if you feel it is need.
Glue the eye parts together and draw on some eyes – these can be closed, opened, sleepy.. anything you wish.
Add little breathing holes to the beak.
Finally decorate the wings!
Now you can glue all your owl features to the CENTRE of the paper. You can add final features like “decor” to the tummy and ears. It is a fun opportunity to get doodling.
Attaching your paper owl to the tin can

I love this bit, as it is so quick an deasy! Add tape to one of your paper.
Tape it to the back of the tin can.
Wrap the paper all around, make sure it is neat and aligned.
Secure with some more tape.. and your DIY Tin Can Owl is finished. The perfect little pen pot for your desk! Enjoy you Autumn Decoration!

Aren’t they the cutest. I love this technique of “drawing” with paper – all you need is simple shapes, to create wonderfully little paper owls, to then transfrom a tin can into a Desk Tidy. So pretty!
What colours would you pick?
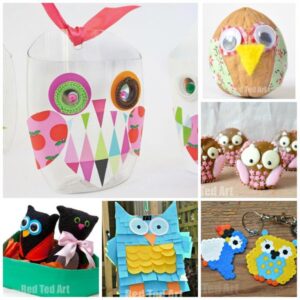
Would you like to see more of our Pencil Holder Ideas? Check these out:

Or how about some more fabulous DIY Owl Crafts:
Don’t forget that you can also find Red Ted Art on Instagram and Pinterest!